

Transplanted from my intro thread here a couple of months ago below:
Hi,
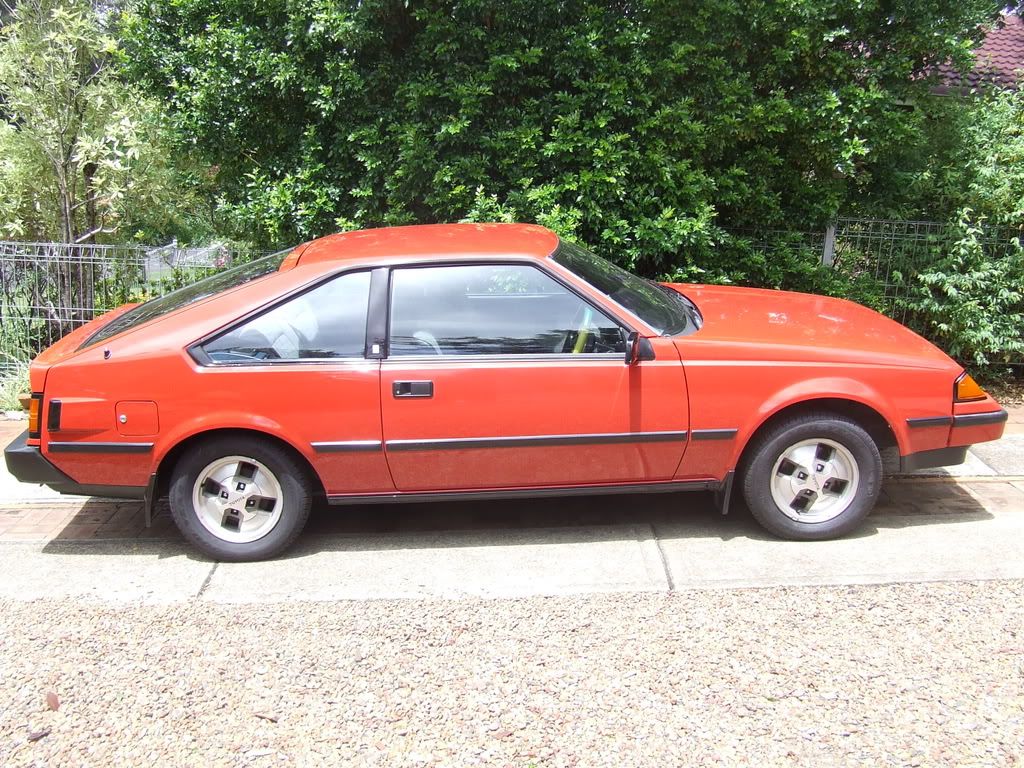
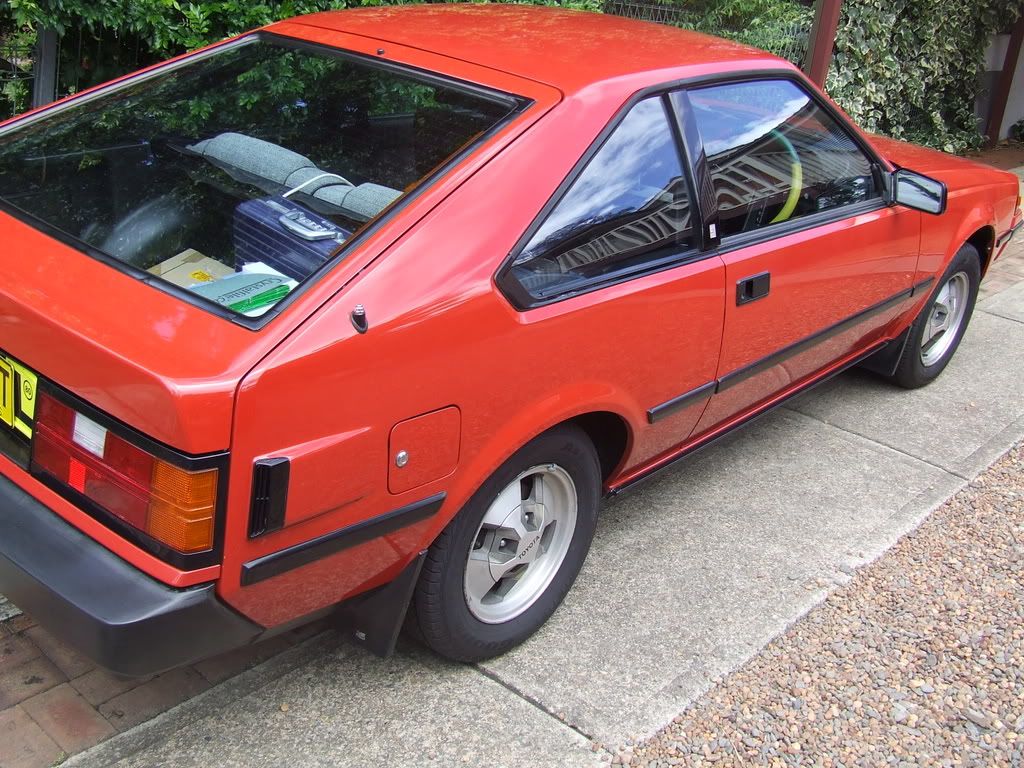
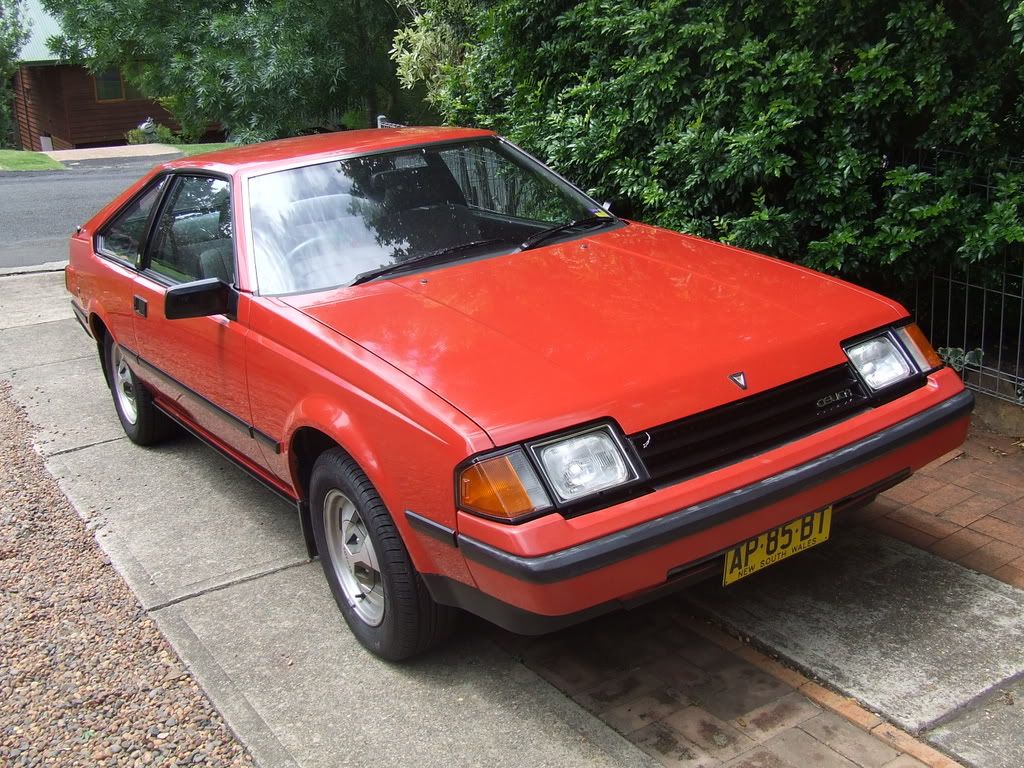
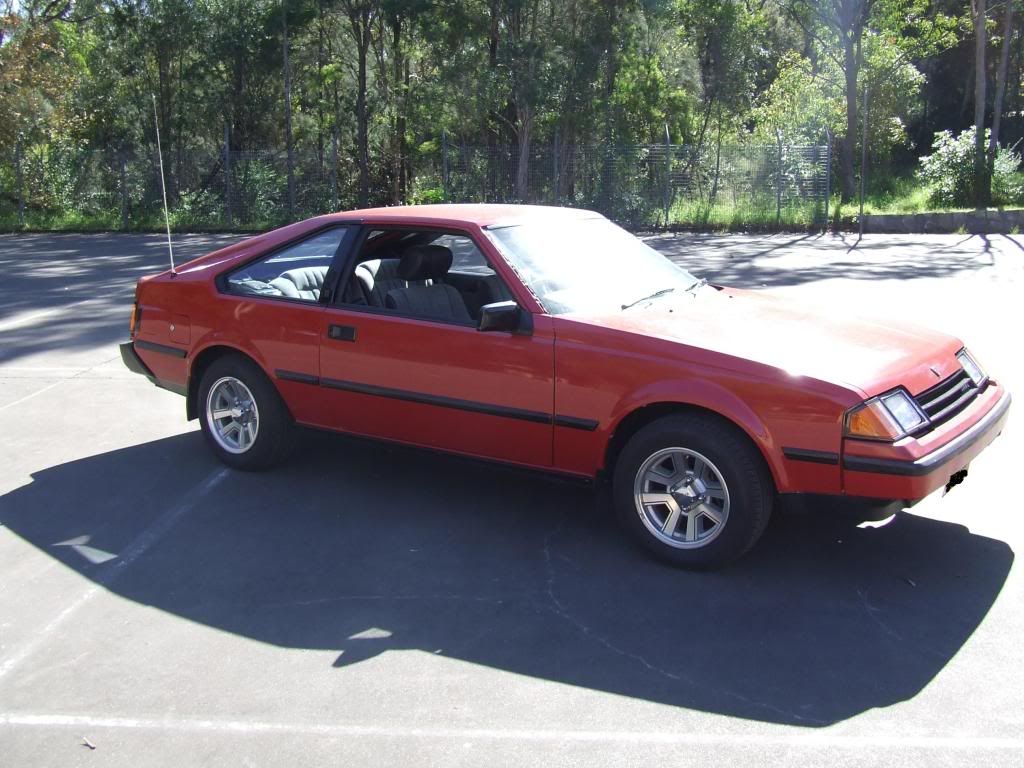
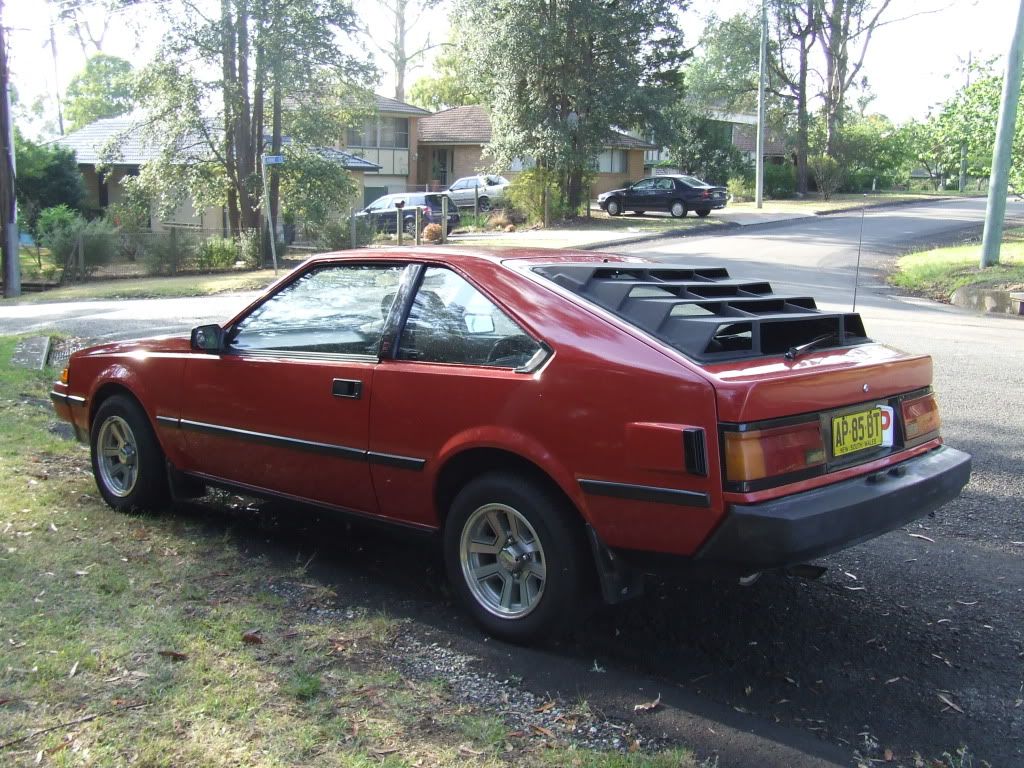
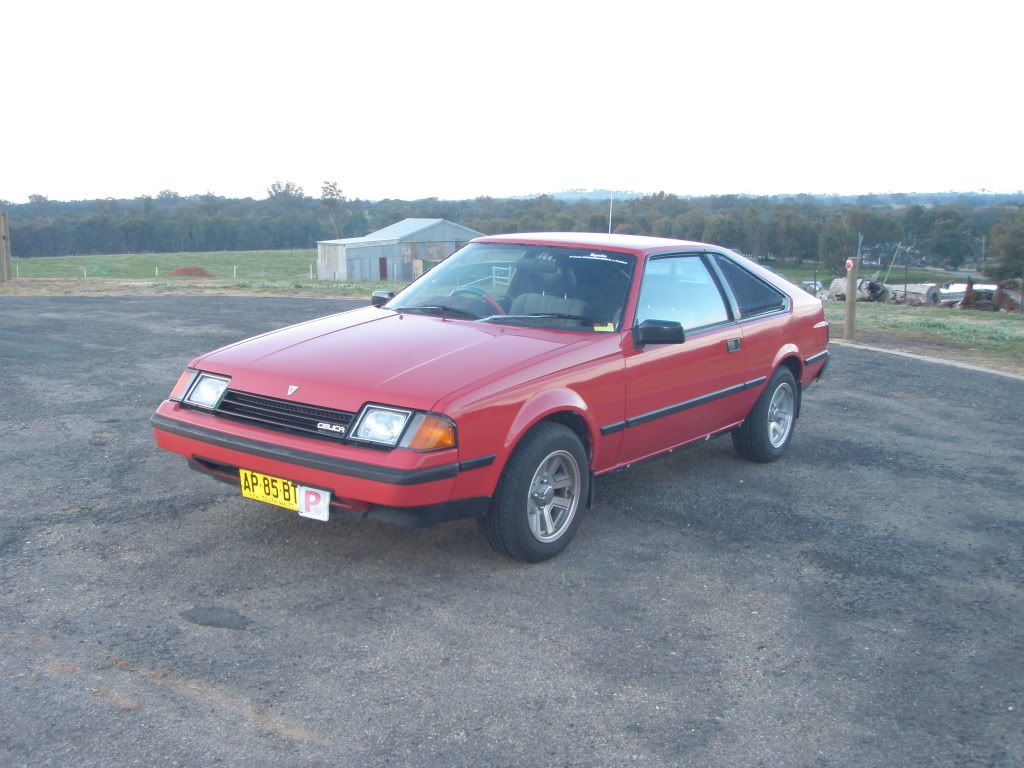
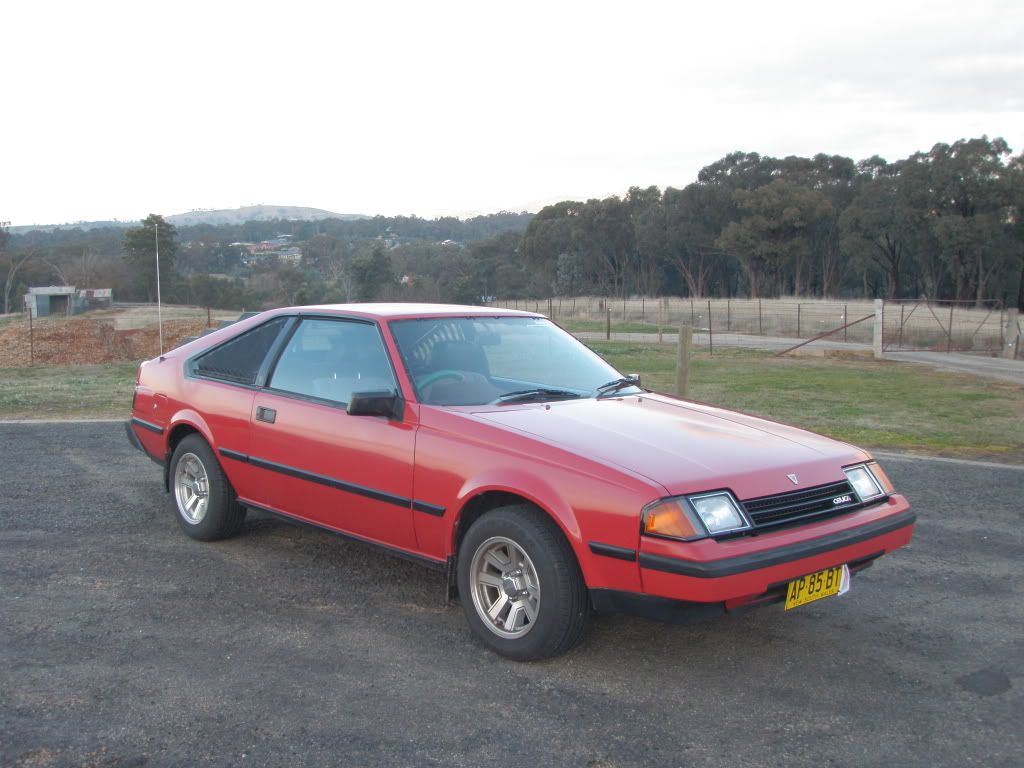
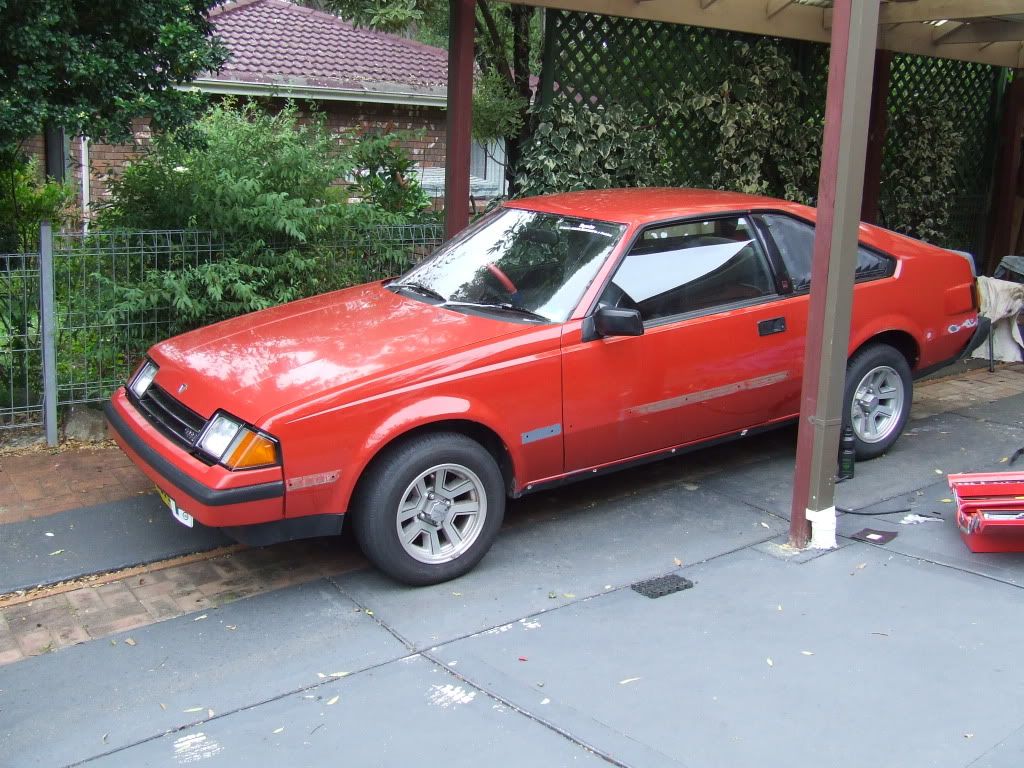
I'm actually a big frequenter of Celica-GTS forums, Toymods and Celica-Supra. I own a 1982 RA60 with the 21R-C engine. I have not posted here because I made the conscious decision to get my RA60 over a MA61 because I like the RA60 much better in terms of looks but yeah that's my small minority view.
![Image]()
Cars done 130,000km's
Here a picture sideshow of what I've done to it since I got it ages ago.
![Image]()
![Image]()
![Image]()
![Image]()
![Image]()
![Image]()
![Image]()
![Image]()
![Image]()
![Image]()
![Image]()
![Image]()
![Image]()
![Image]()
![Image]()
![Image]()
![Image]()
![Image]()
![Image]()
![Image]()
![Image]()
![Image]()
![Image]()
![Image]()
![Image]()
![Image]()
![Image]()
![Image]()
![Image]()
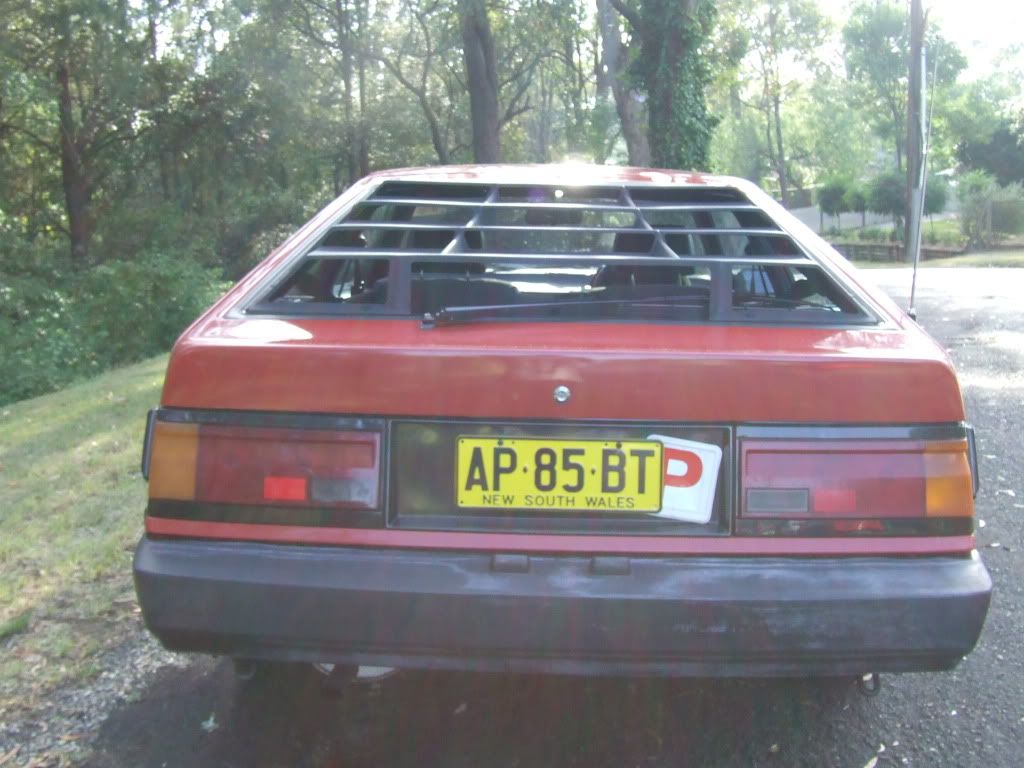
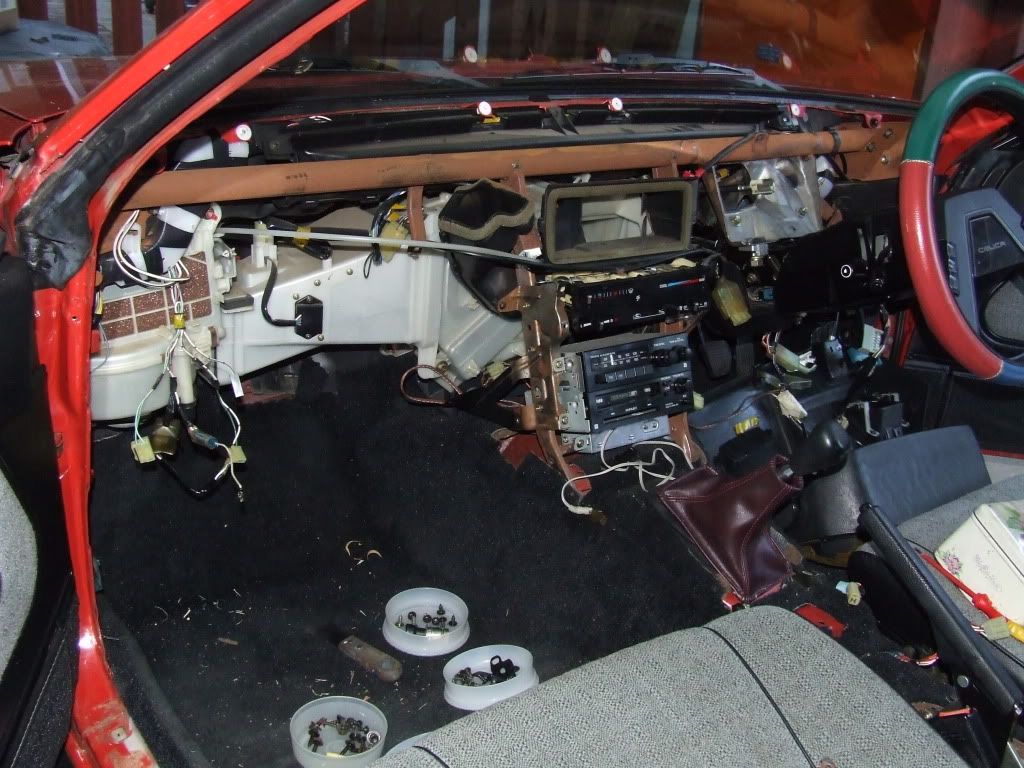
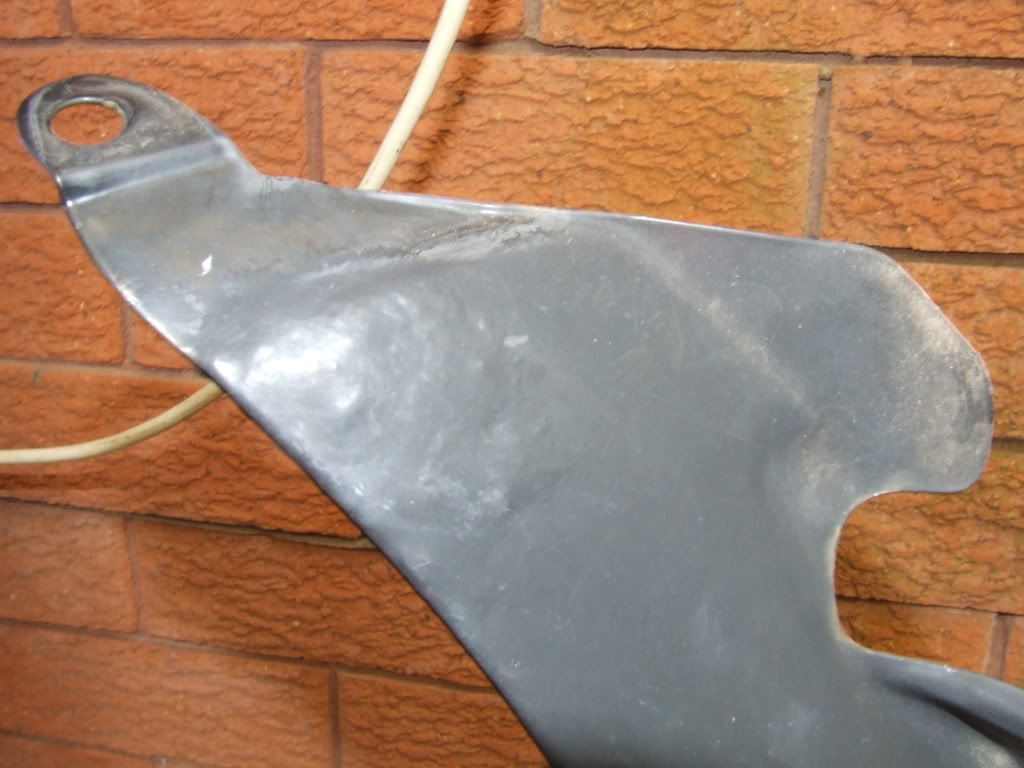
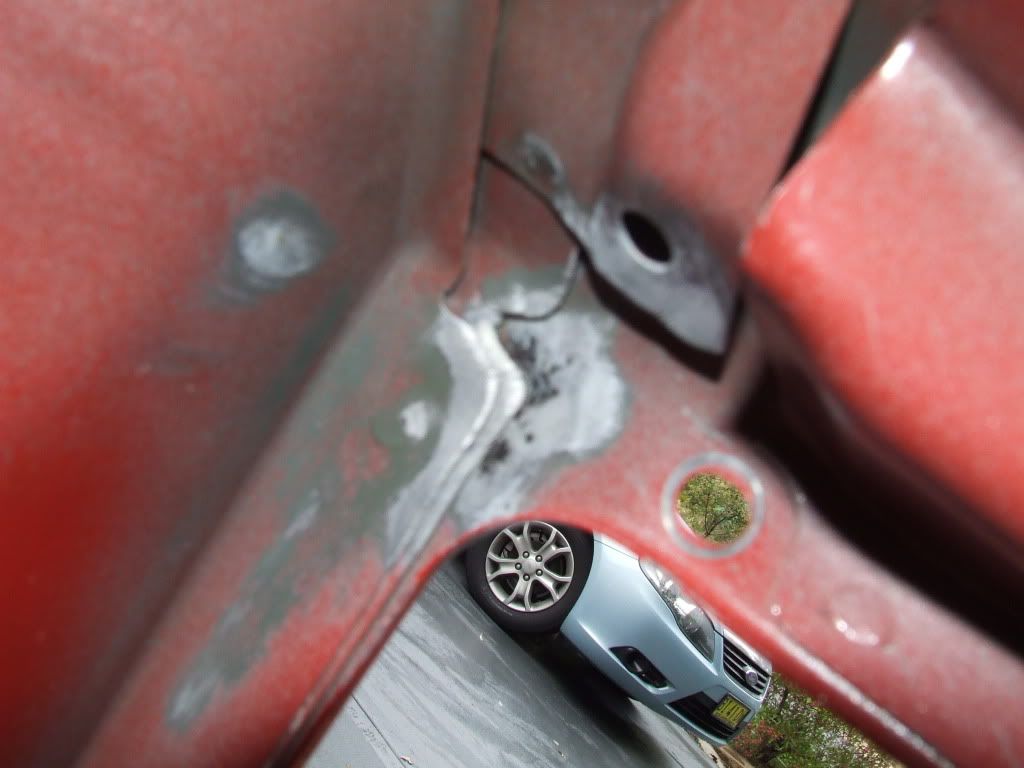
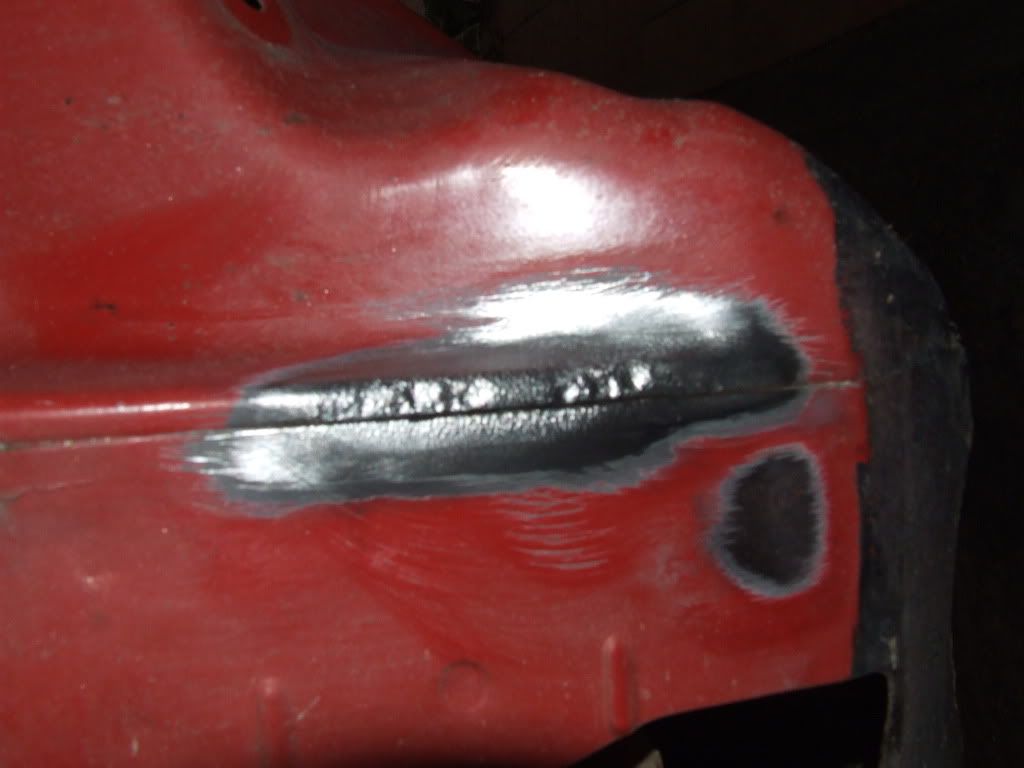
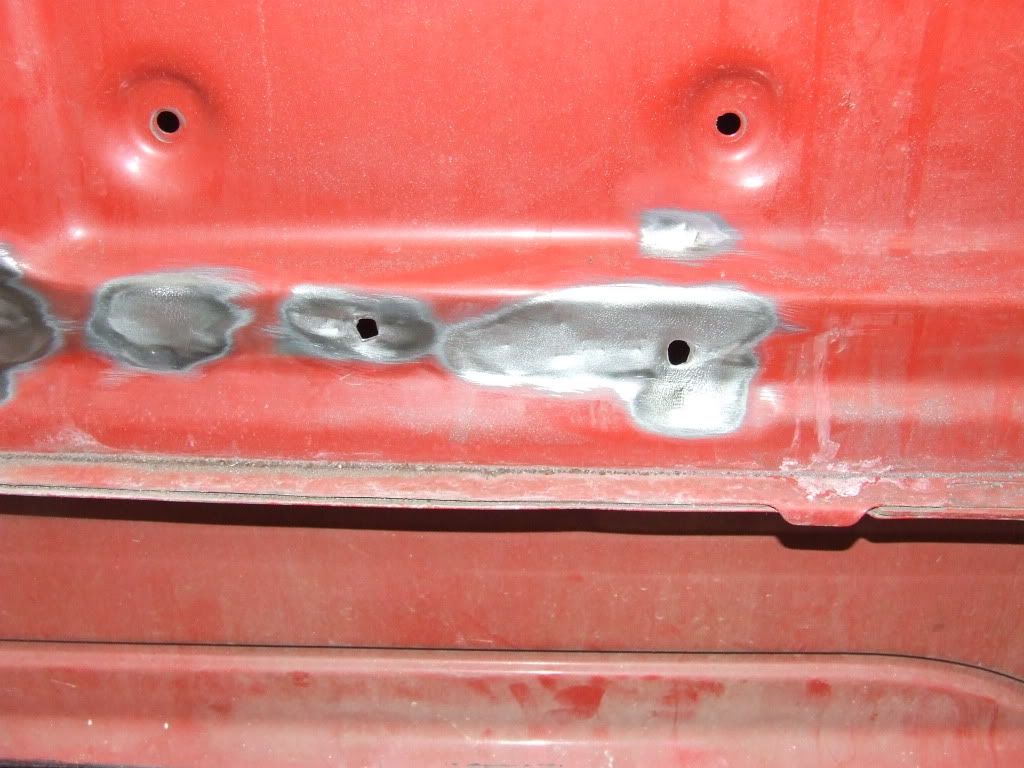
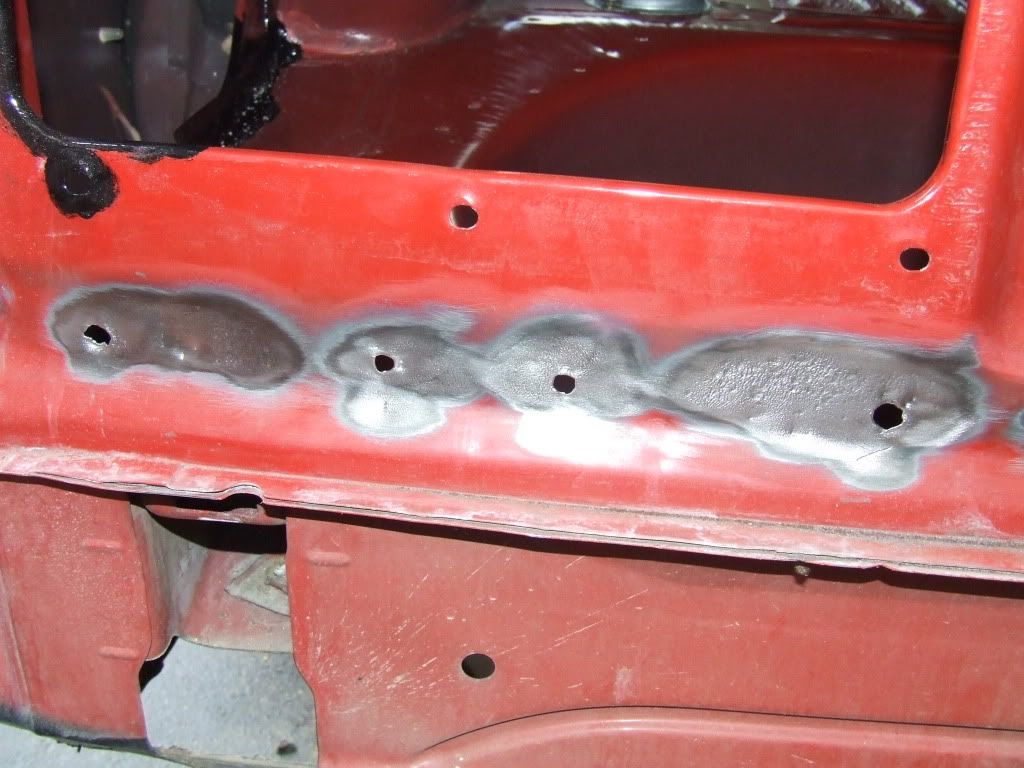
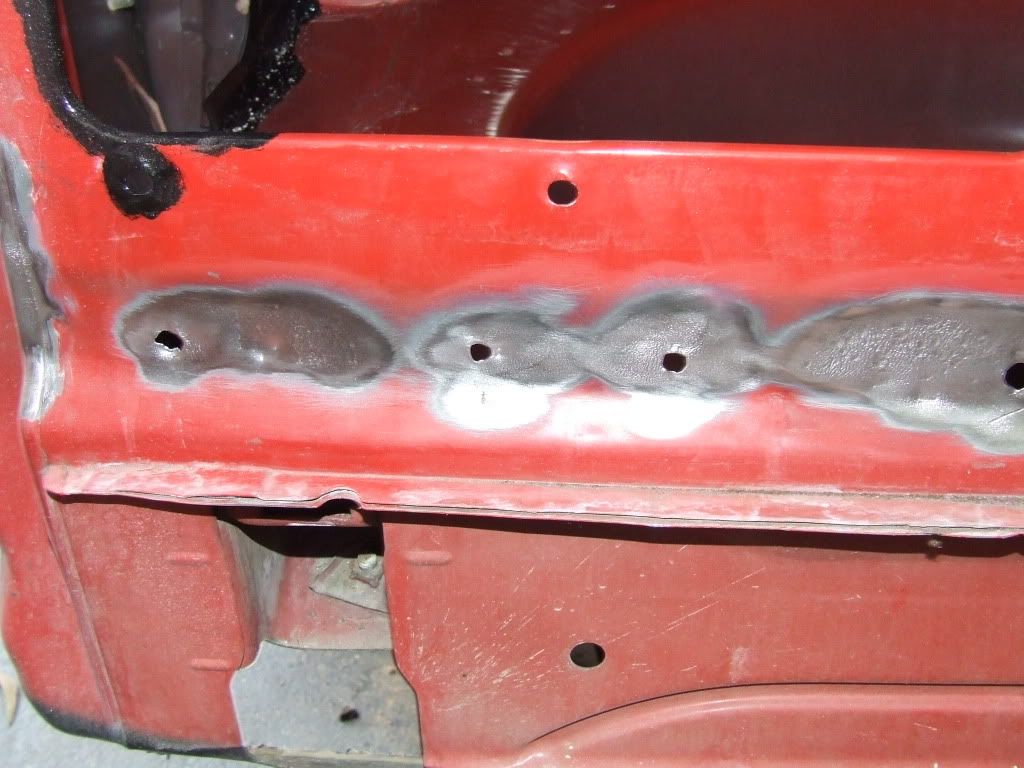
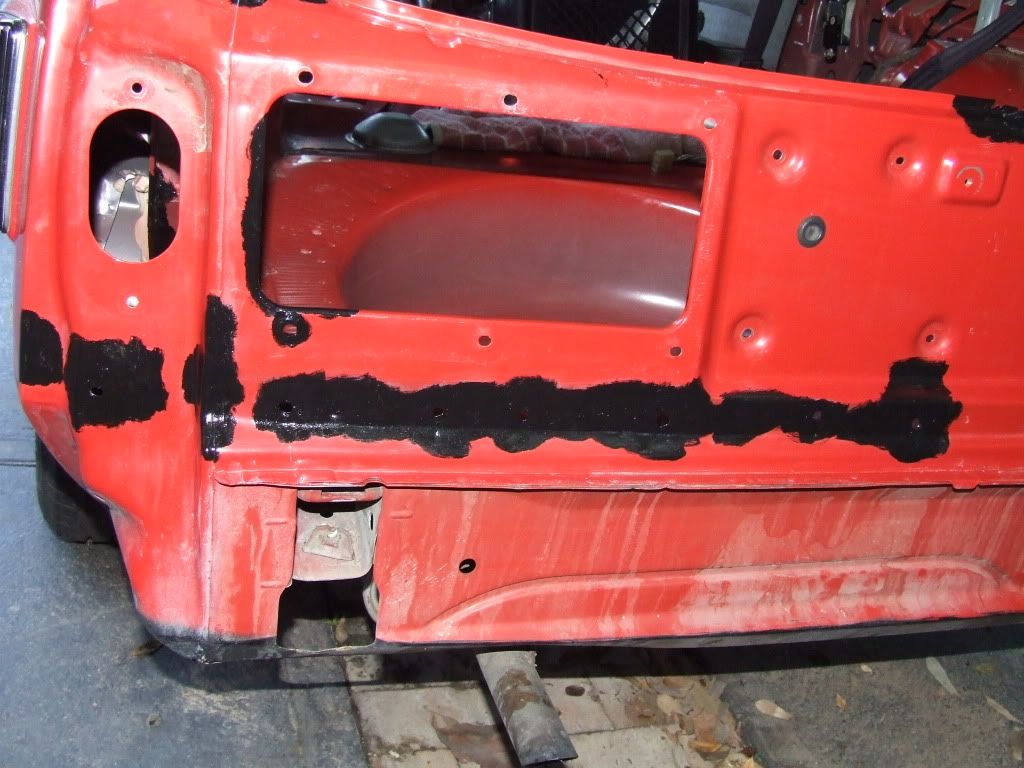
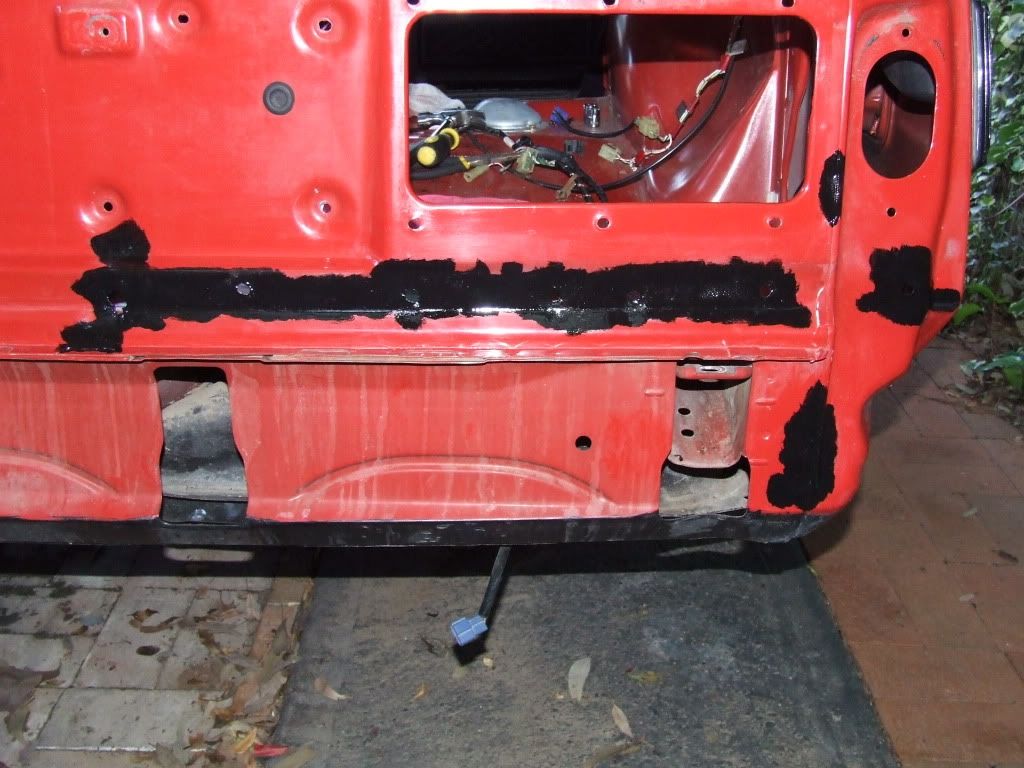
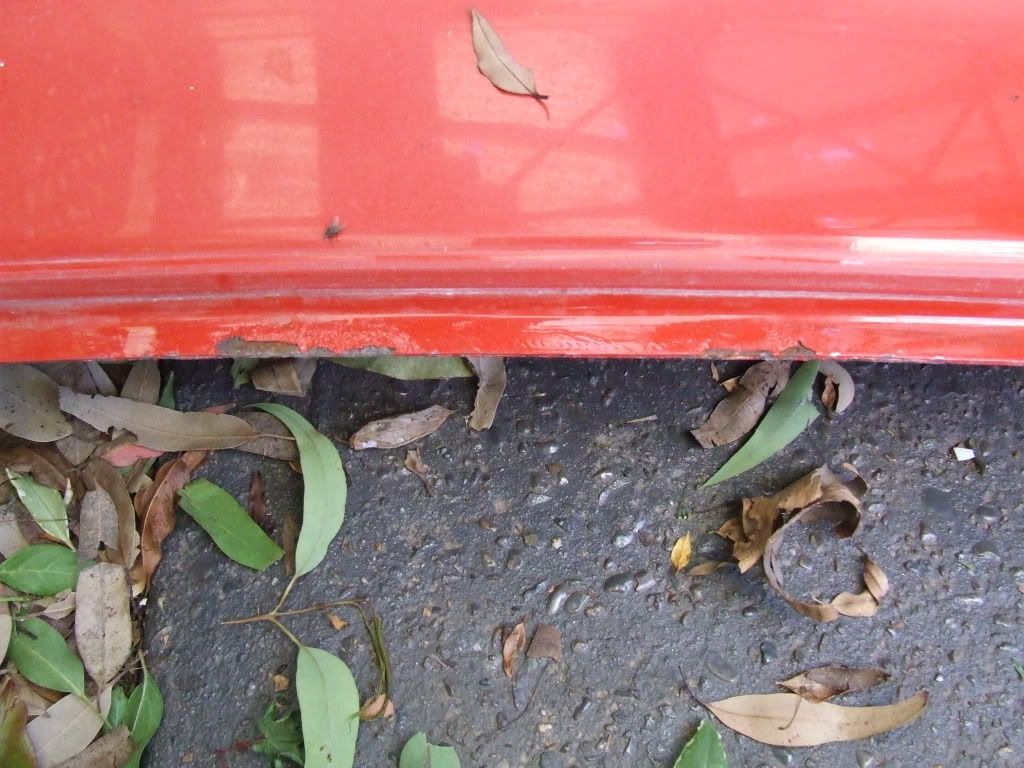
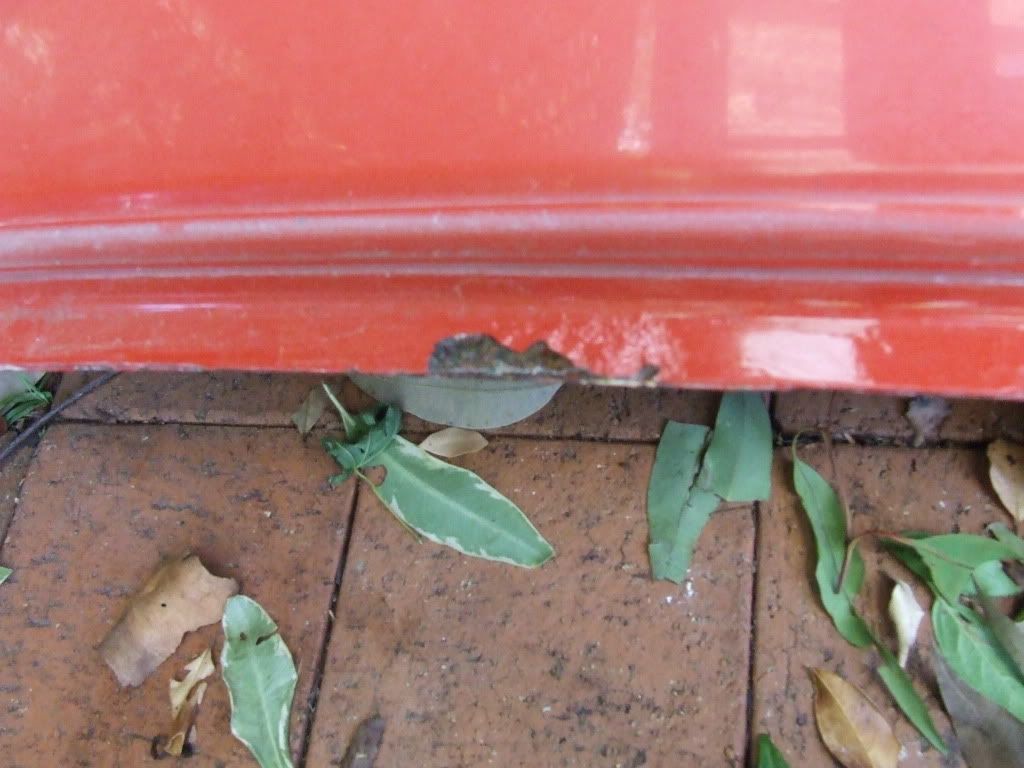
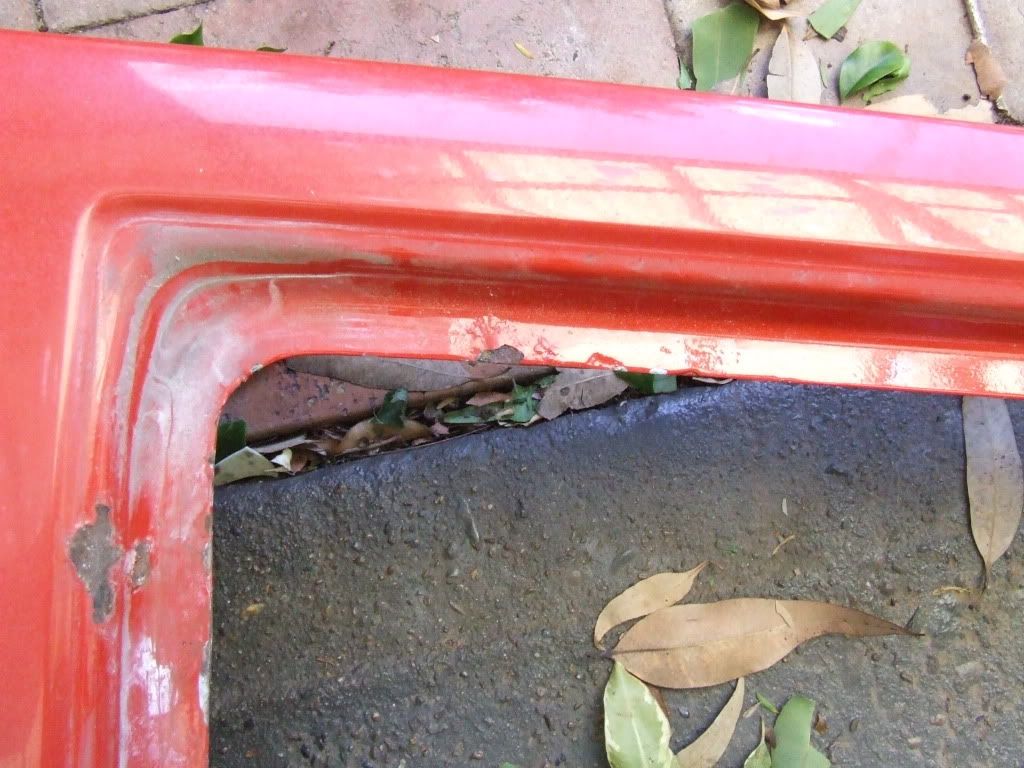
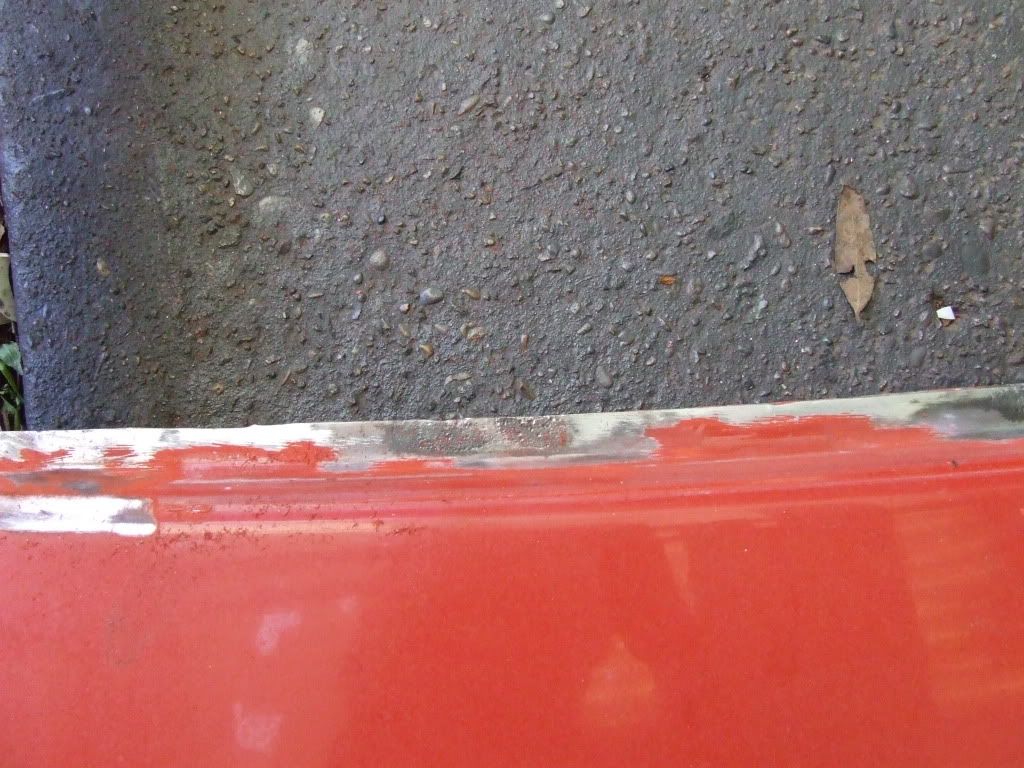
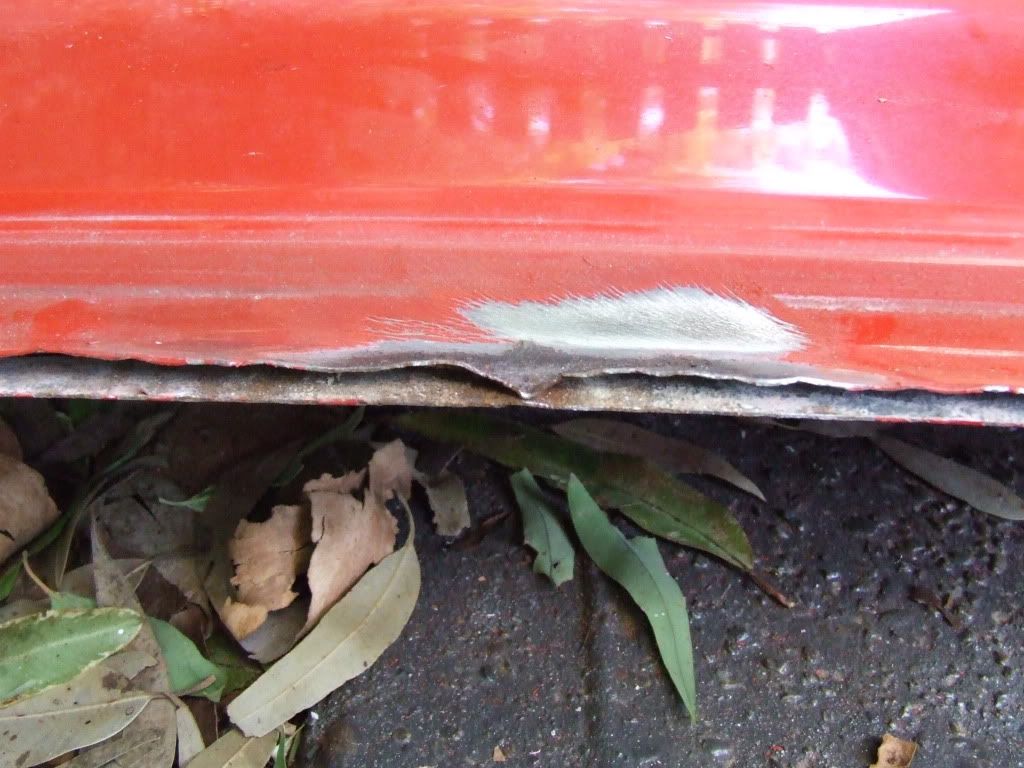
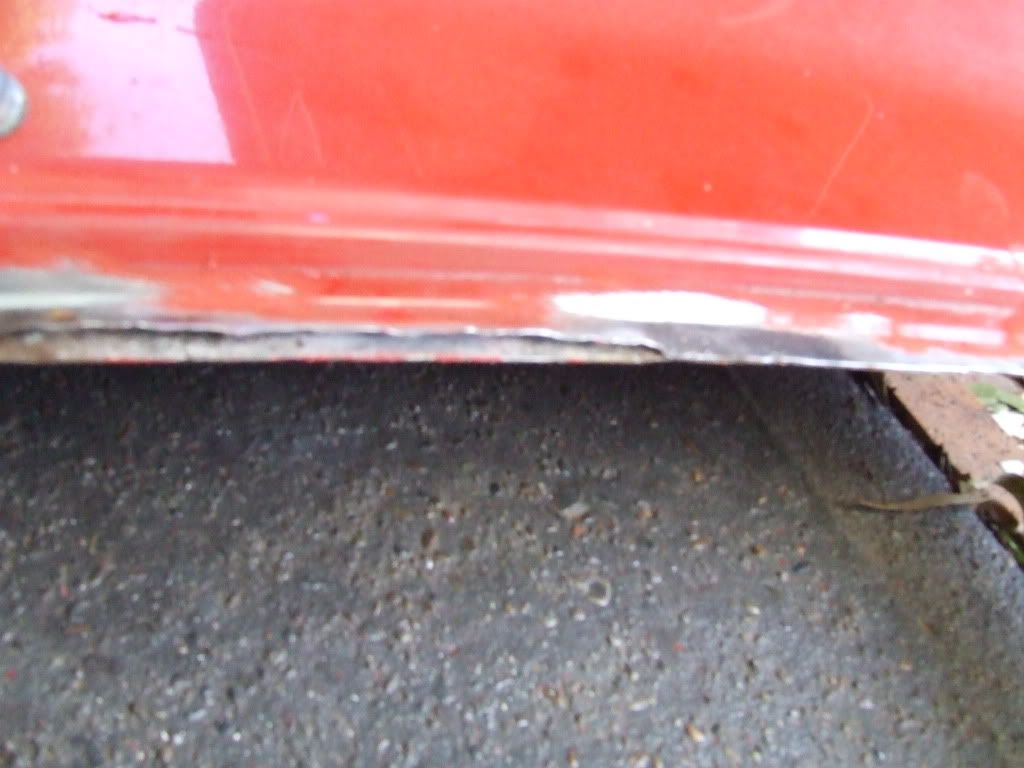
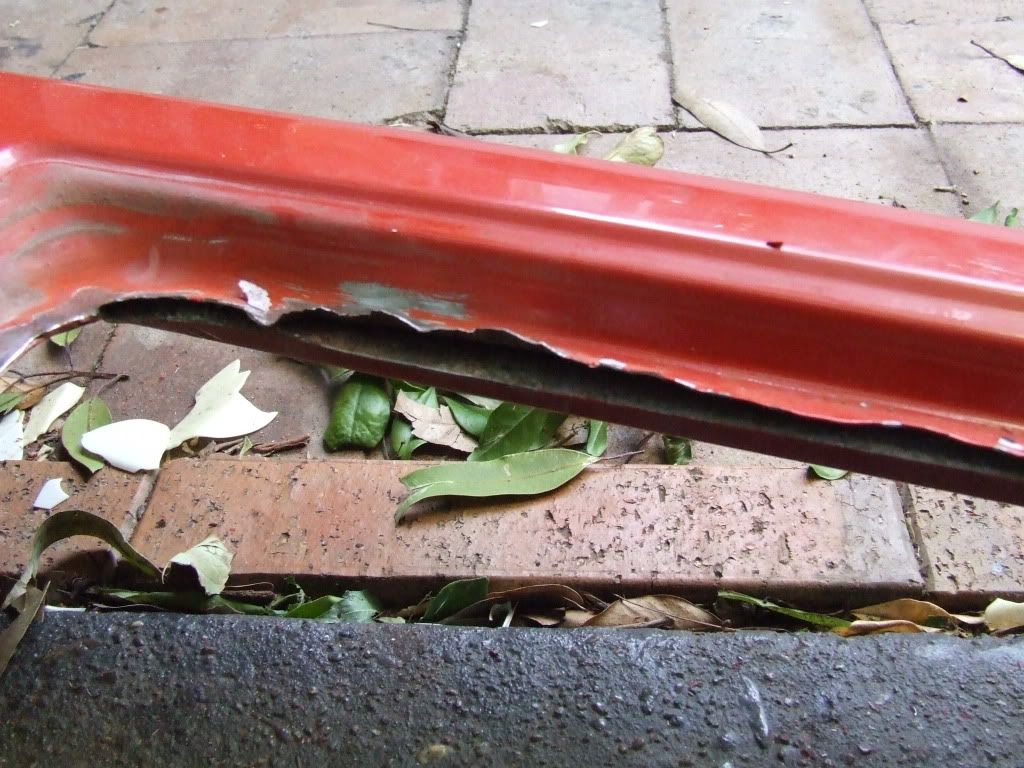
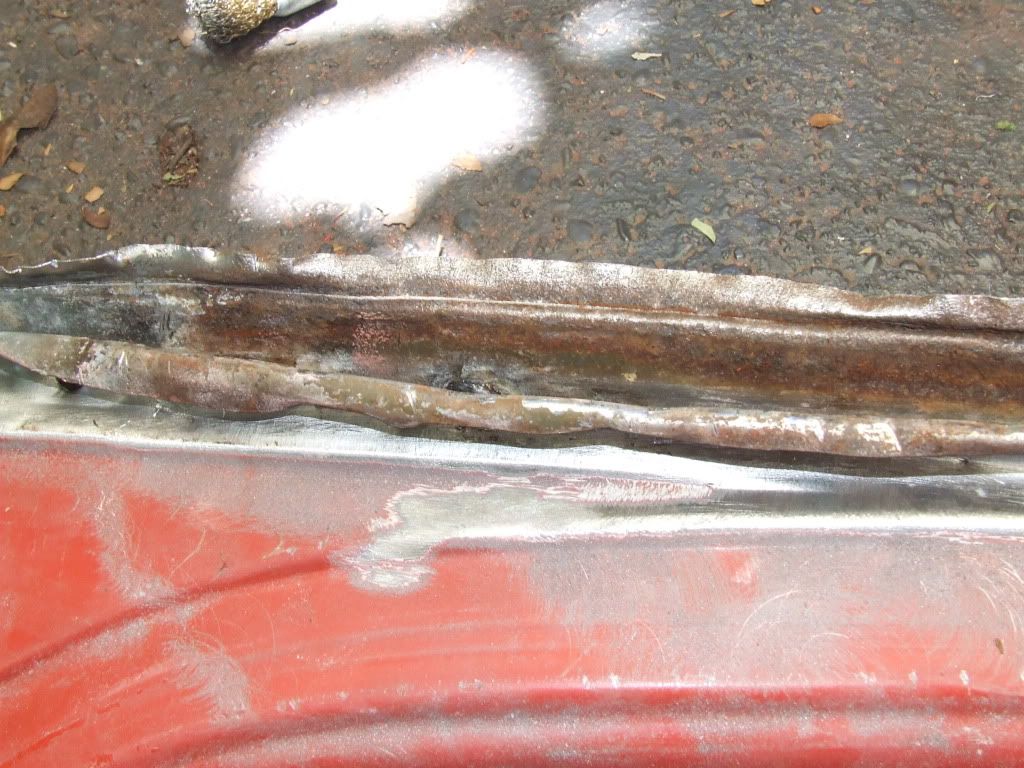
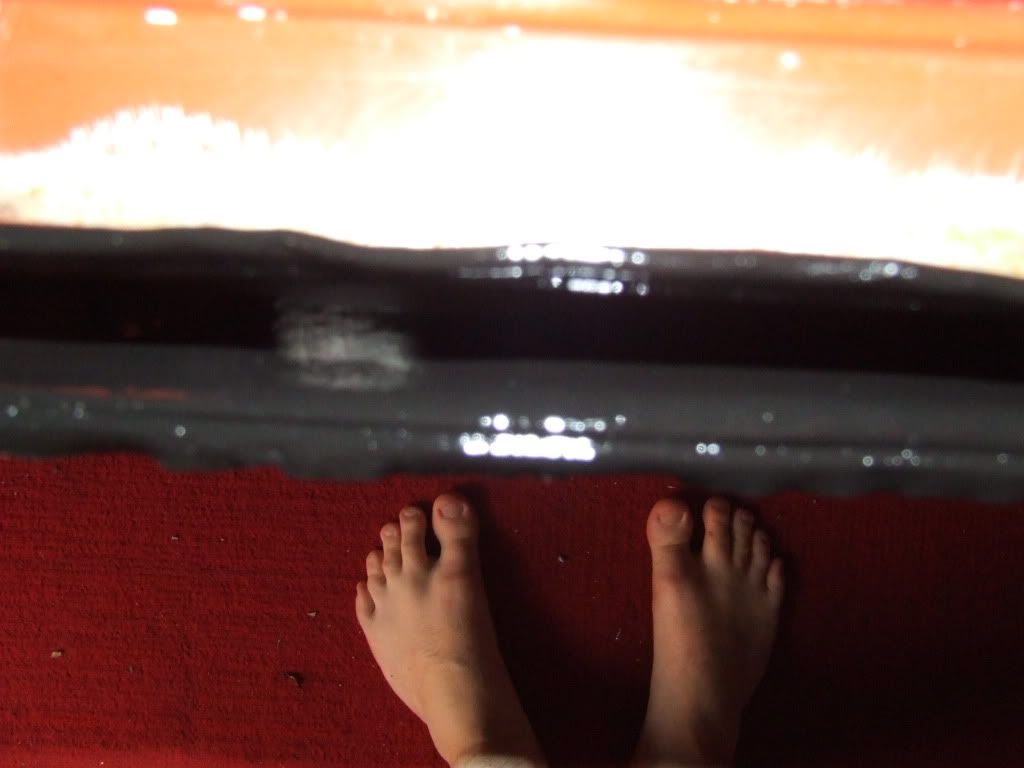
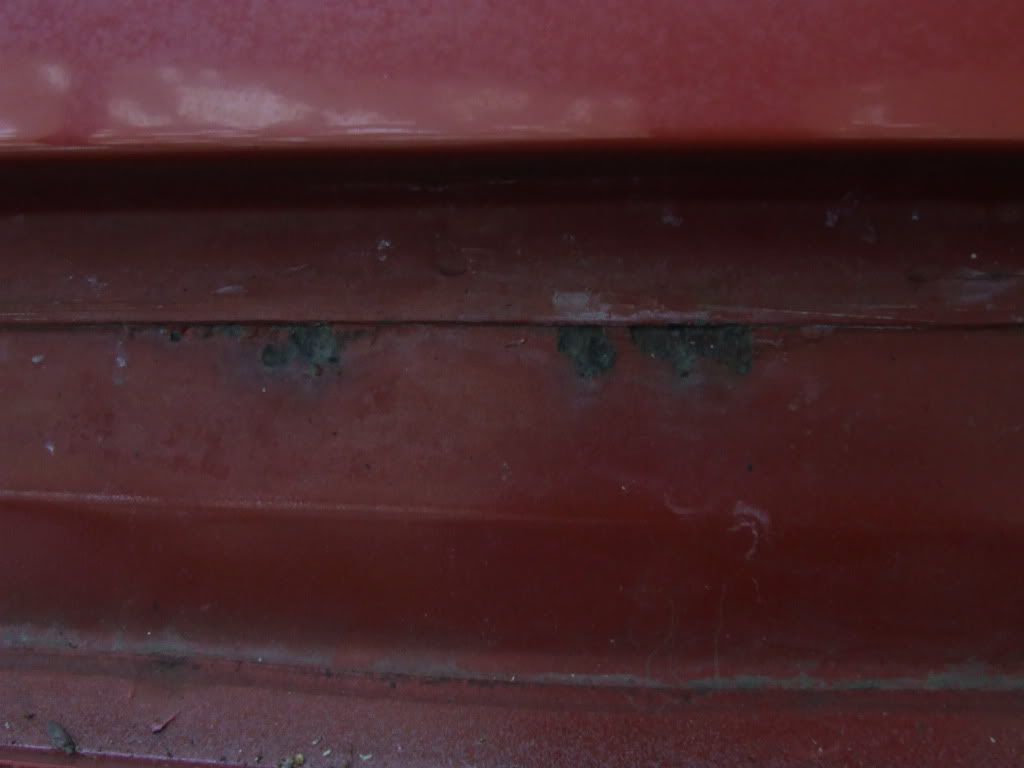
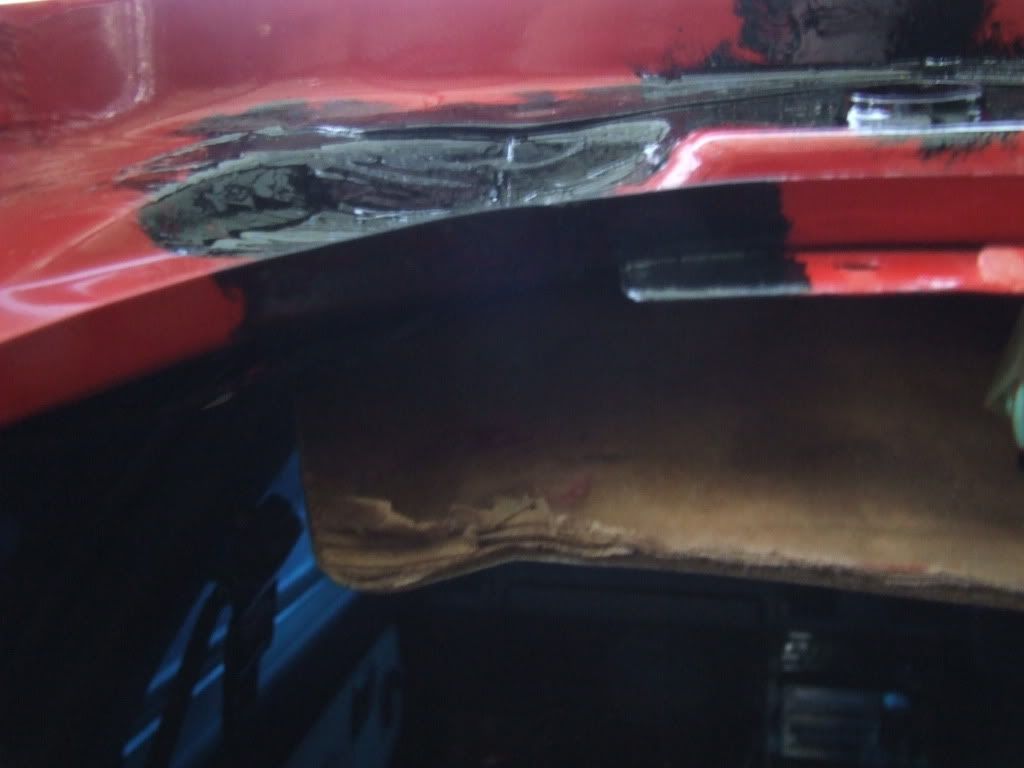
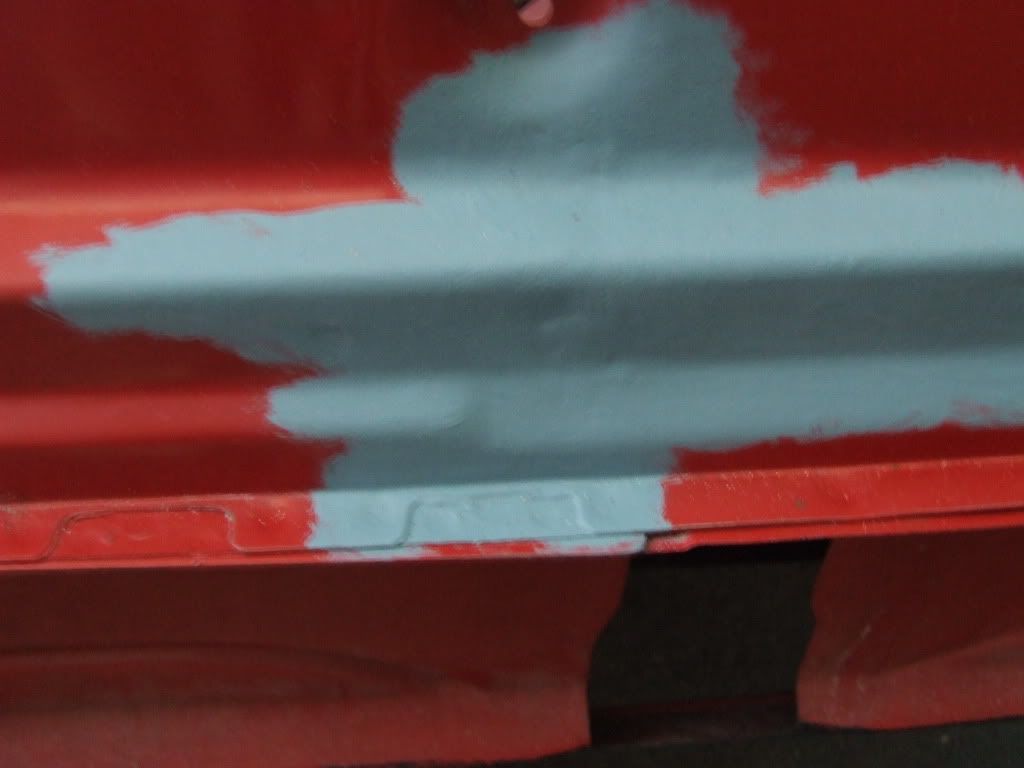
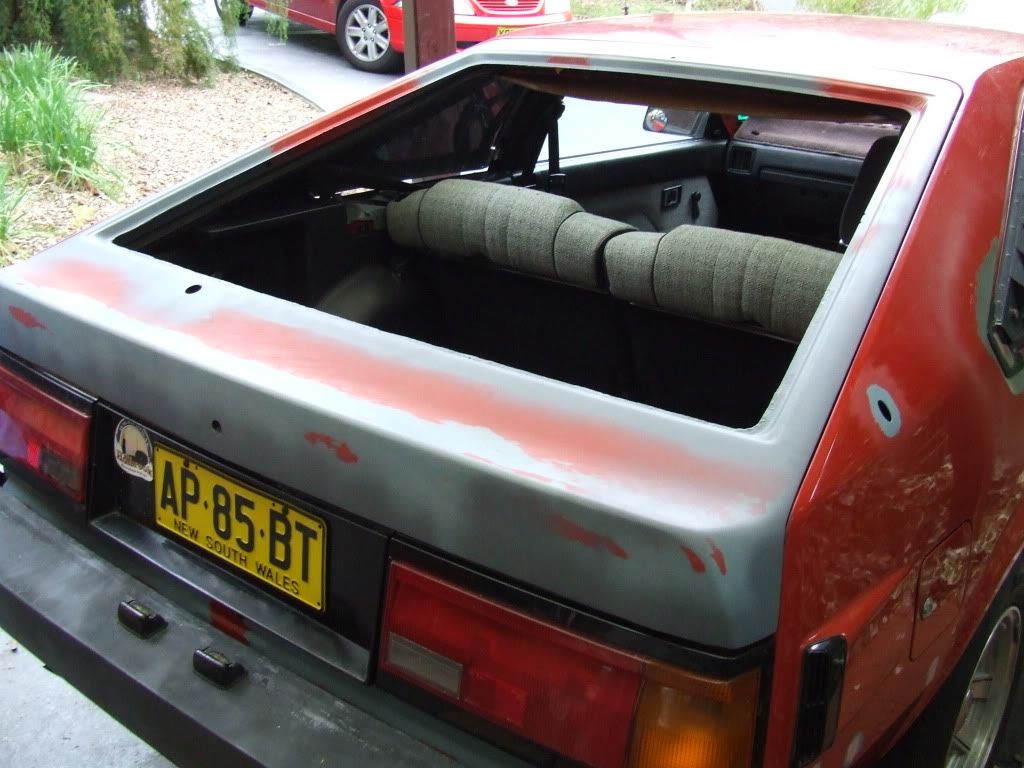
As you can see I've done alot: Uncracked MK2 dash swap, wired up a rare TA63 cluster (was tricky and not fun but it's awesome now), Rust work is a bitch the car was rust free but yeah it's happening again been wire wheeling and primering and clear coating the bare metal, I will be dropping the hatch glass out and attacking the rust under there at the end of the year and will respray the entire car when I'm doing that", USDM metal side louvres (rare as anything and no I'm not selling they were hard enough to get and I will be spraying them when the entire car gets done btw thanks Supradad) also in the picture it looks that they don't fit right well I've solved that there is no gap between the b pillar and the side louvre, Aussie Aunger brand rear louvre, Celica-Supra b pillar badges (yea I know sorry but those stock ones I hated and well I know it's not a MA61 be happy), I felt kind of bad cutting into the paint to remove the rust and leaving ugly primer and metal but I reckon it's better then leaving it.
Ok I am transplanting my Toymods forum thread below now:
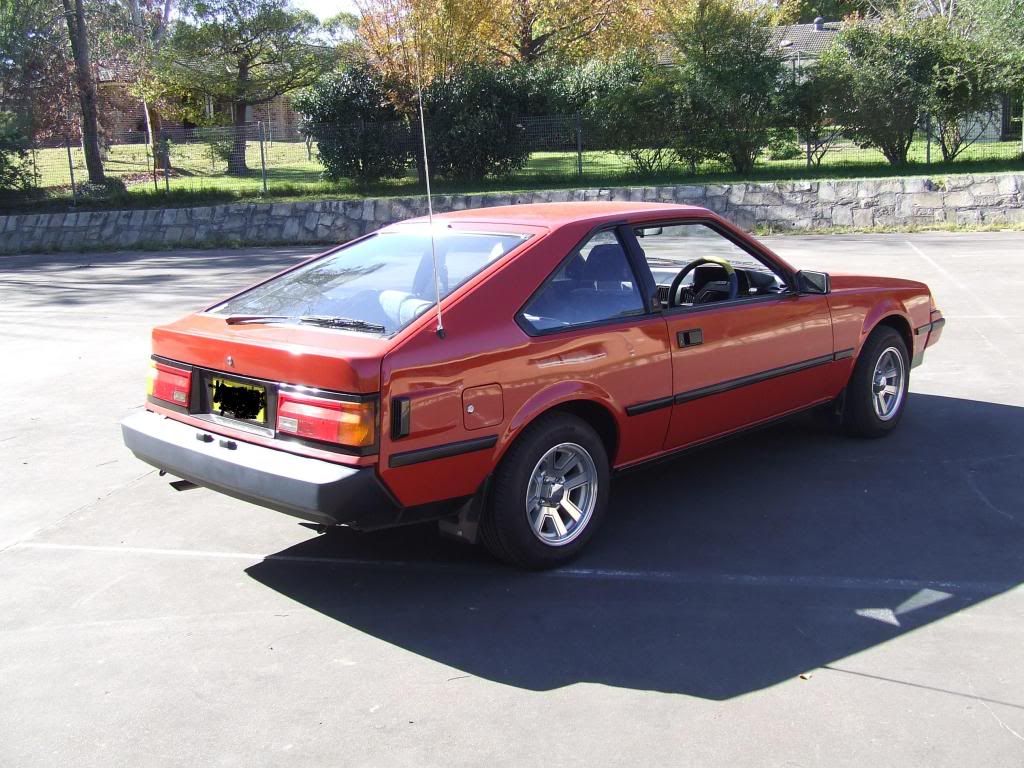
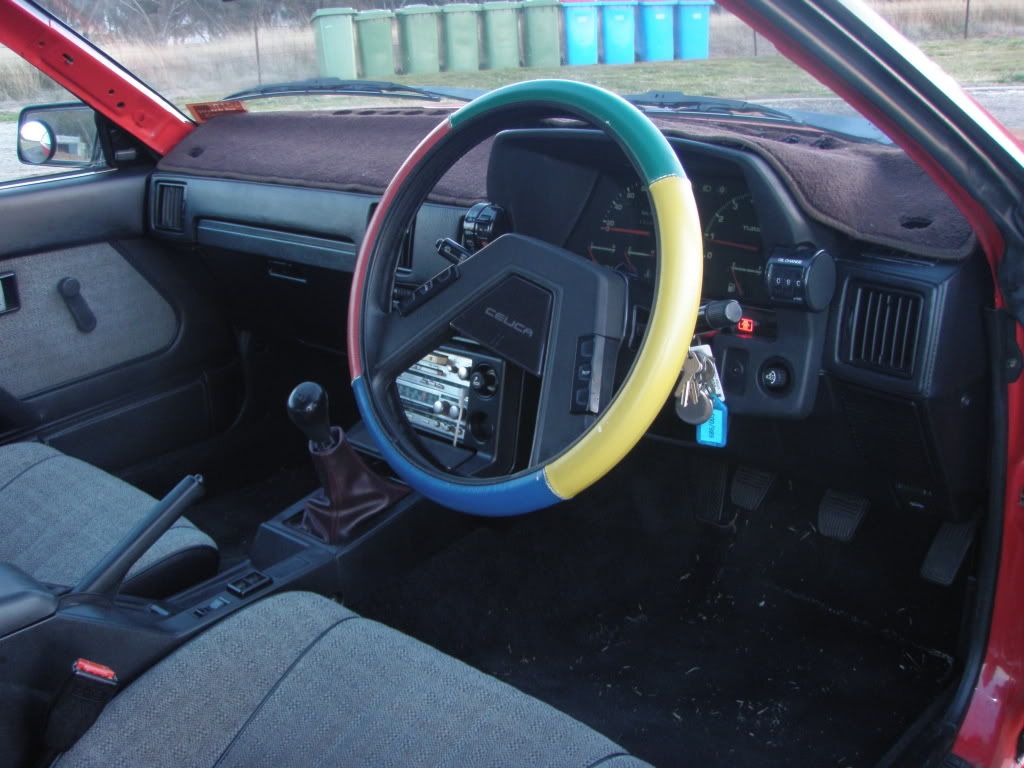
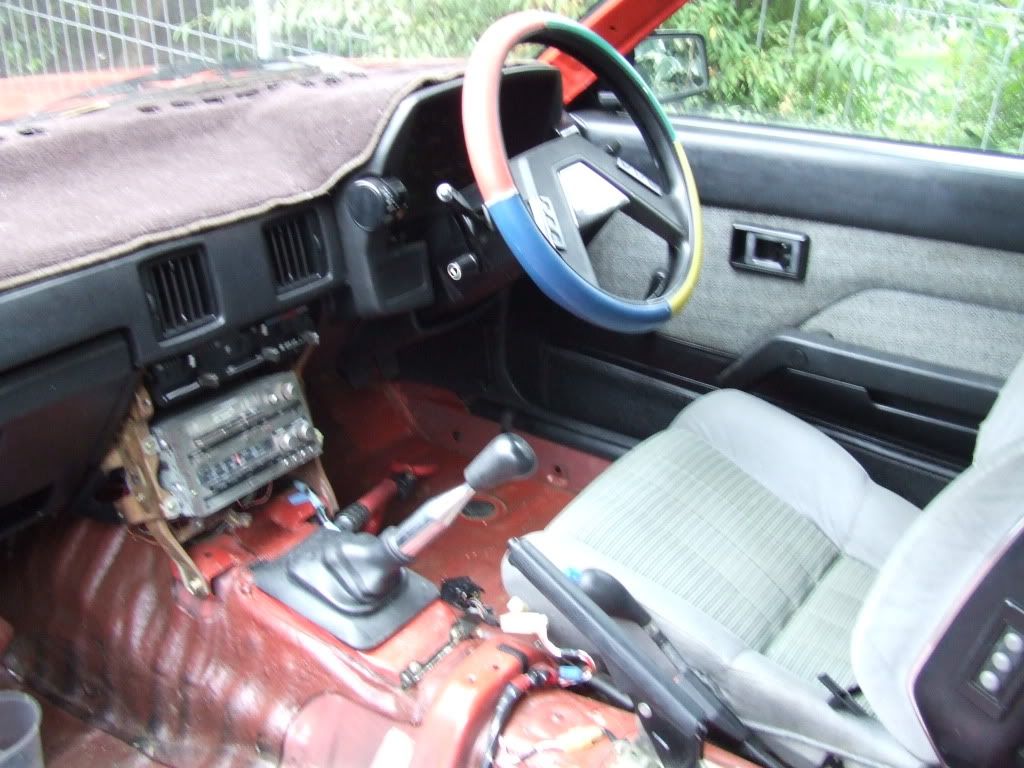
I get so many people telling me it looks like "That back to the future car" or as us car guys know the mighty DMC Delorian.
I did'nt get around to the rear tail-light seals yet. I'm looking into it next Friday.
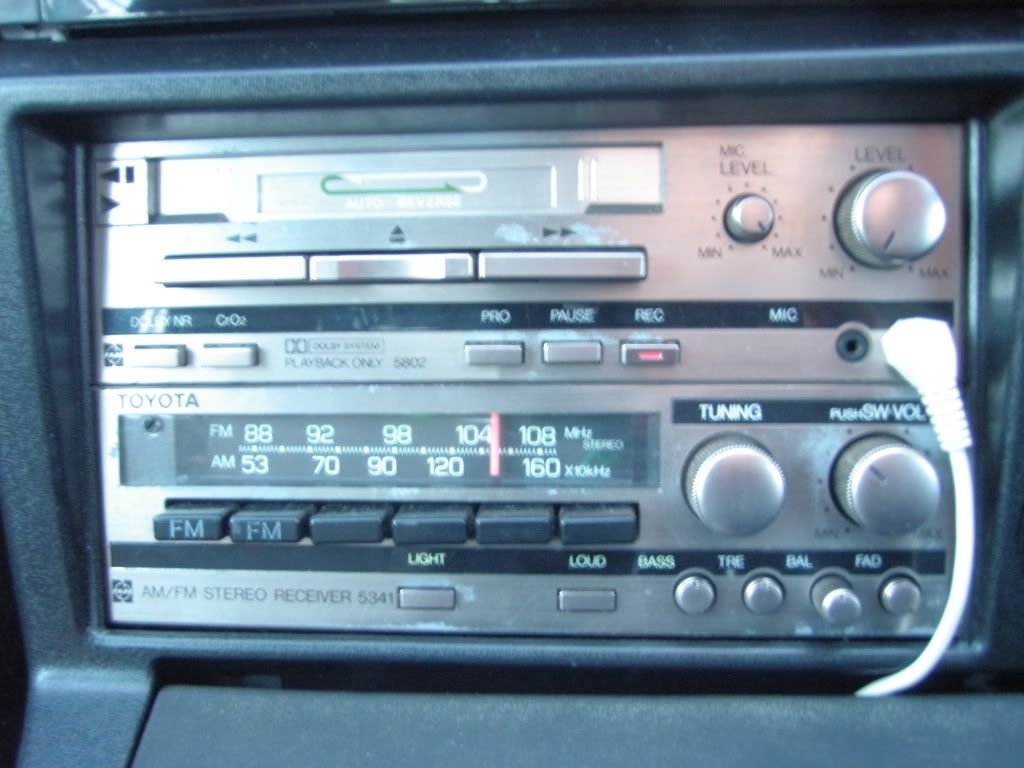
I really like this crown radio because even though it has a microphone input they configured it for stereo.
![Image]()
![Image]()
![Image]()
![Image]()
![Image]()
![Image]()
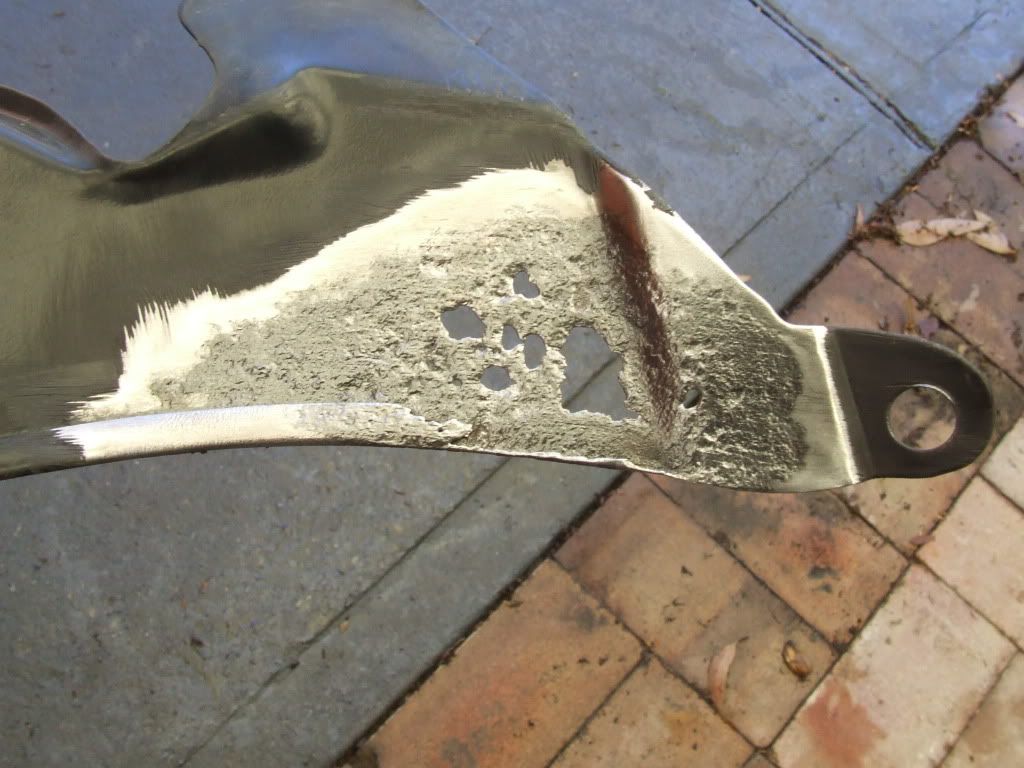
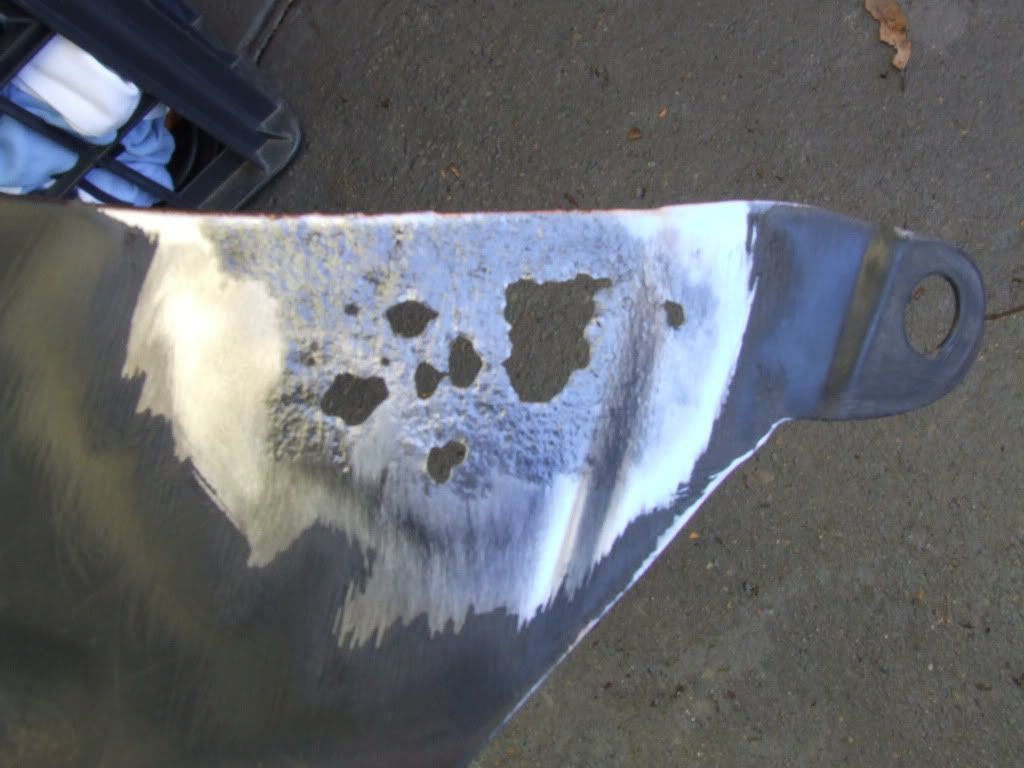
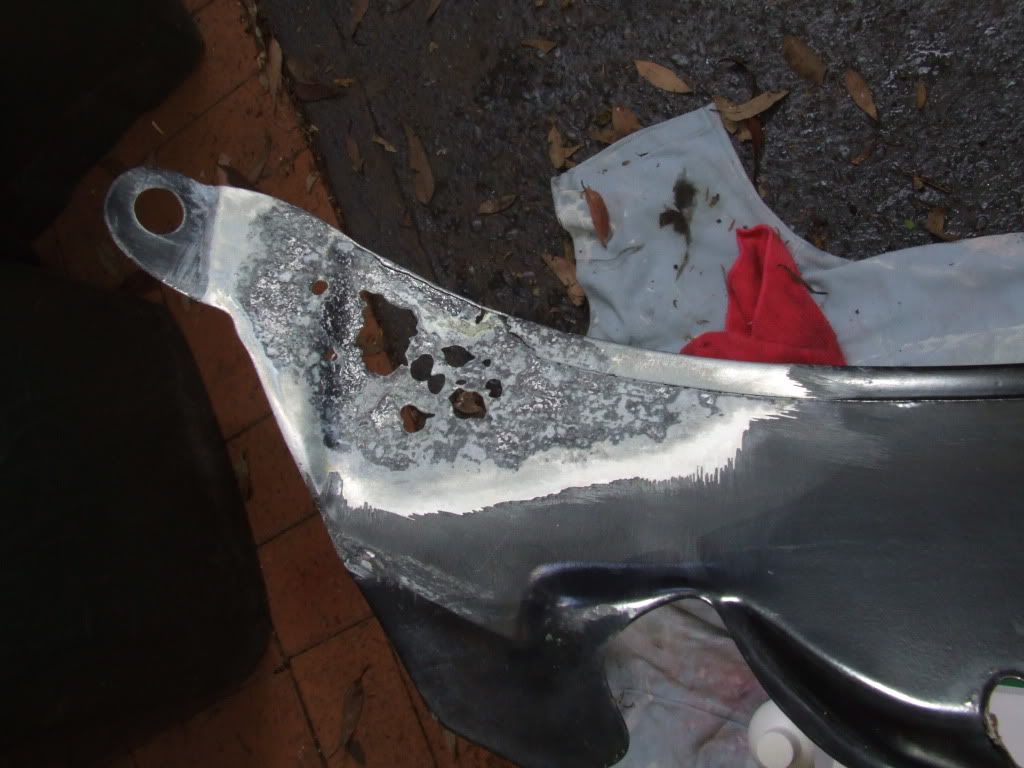
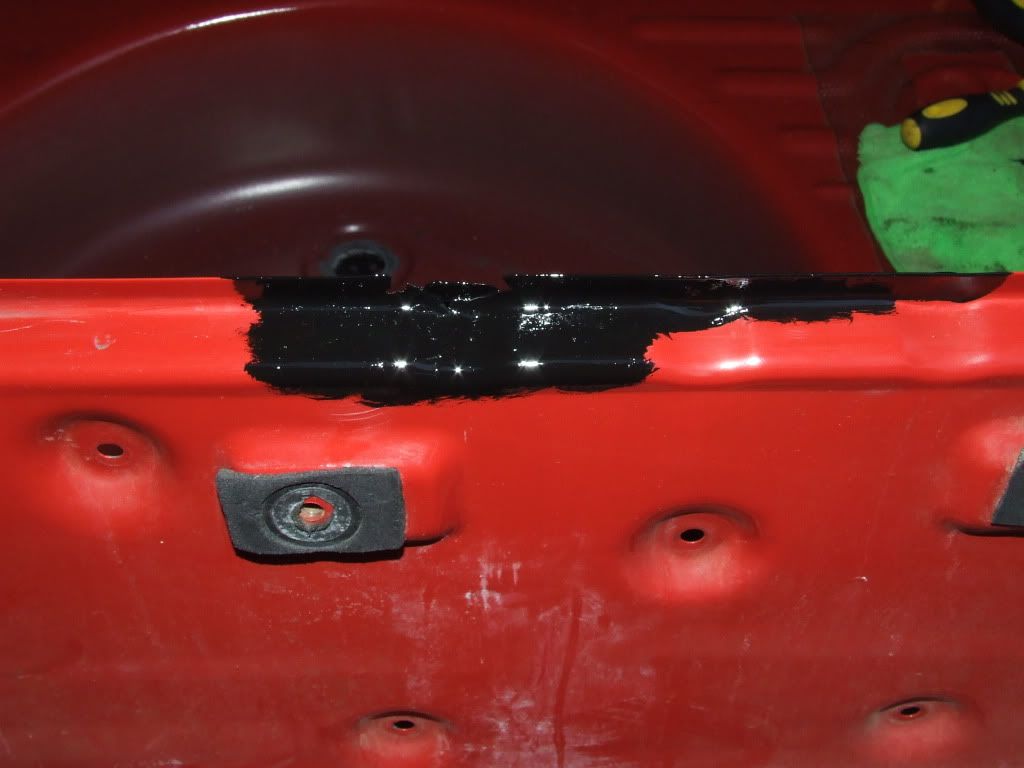
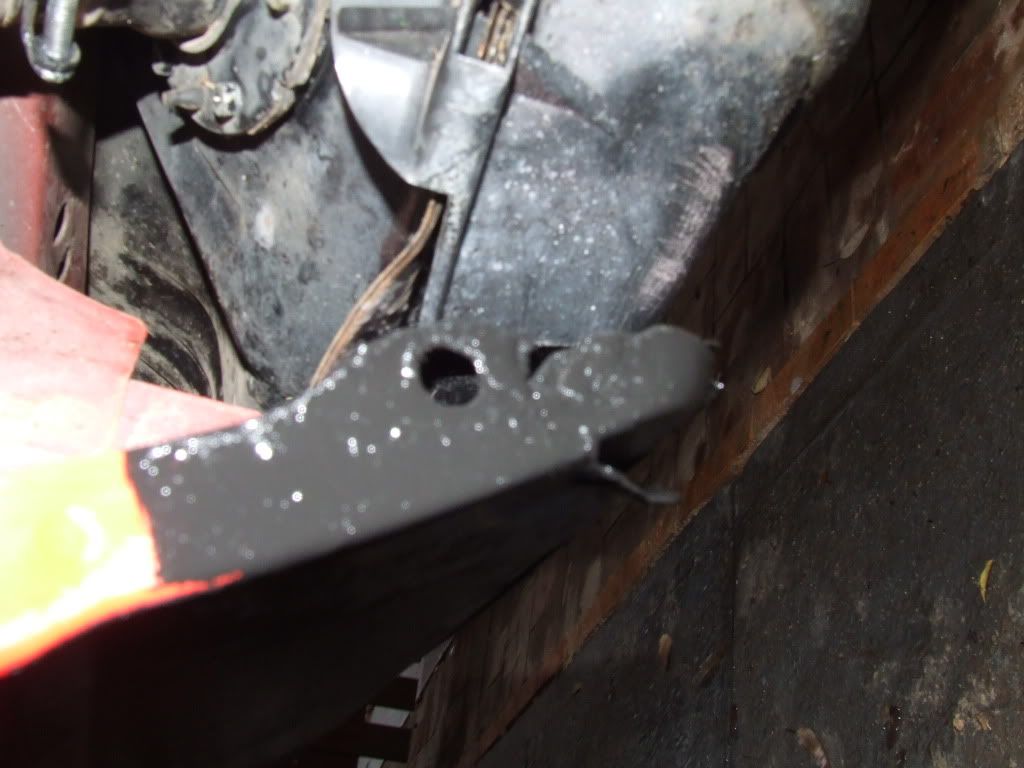
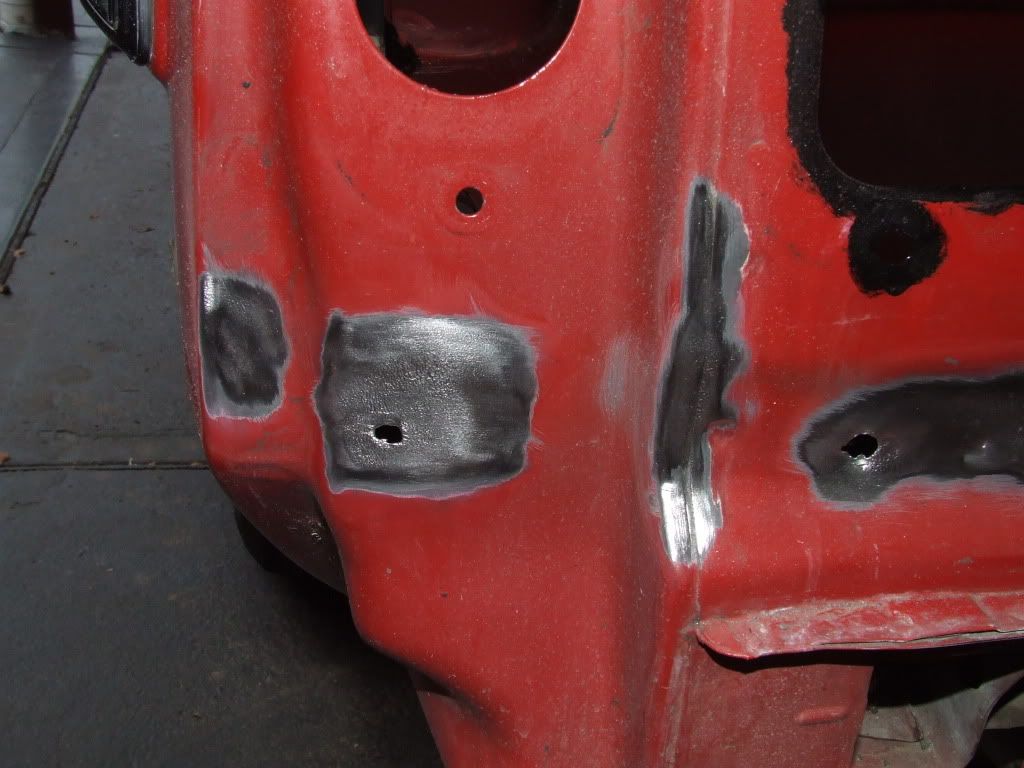
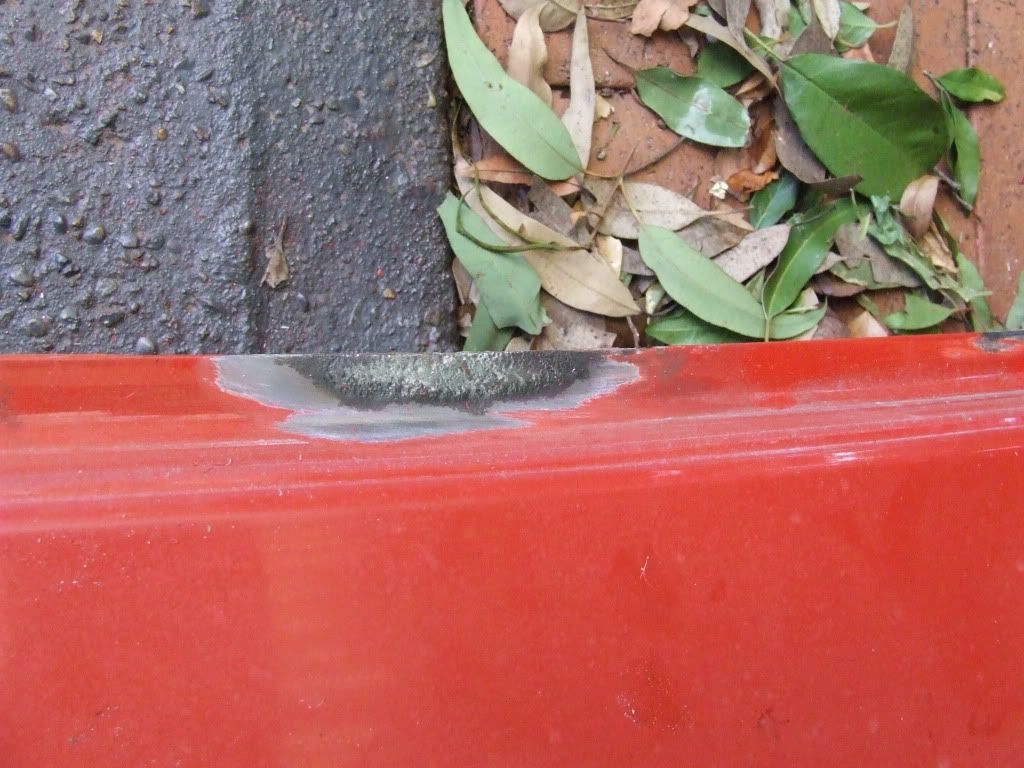
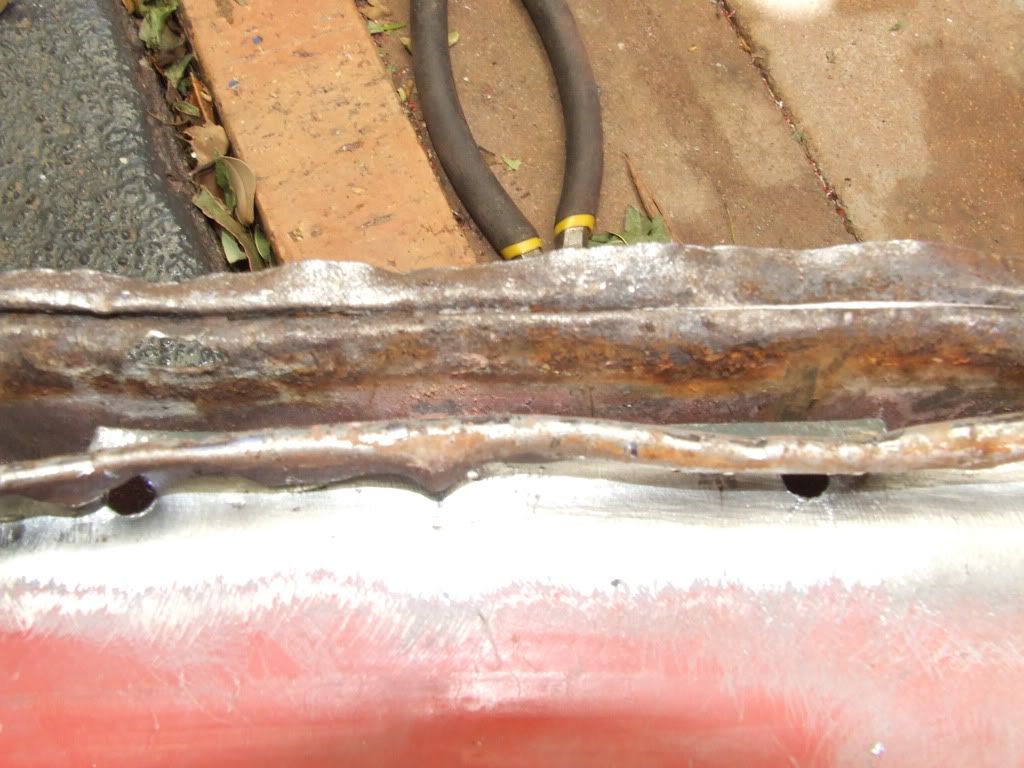
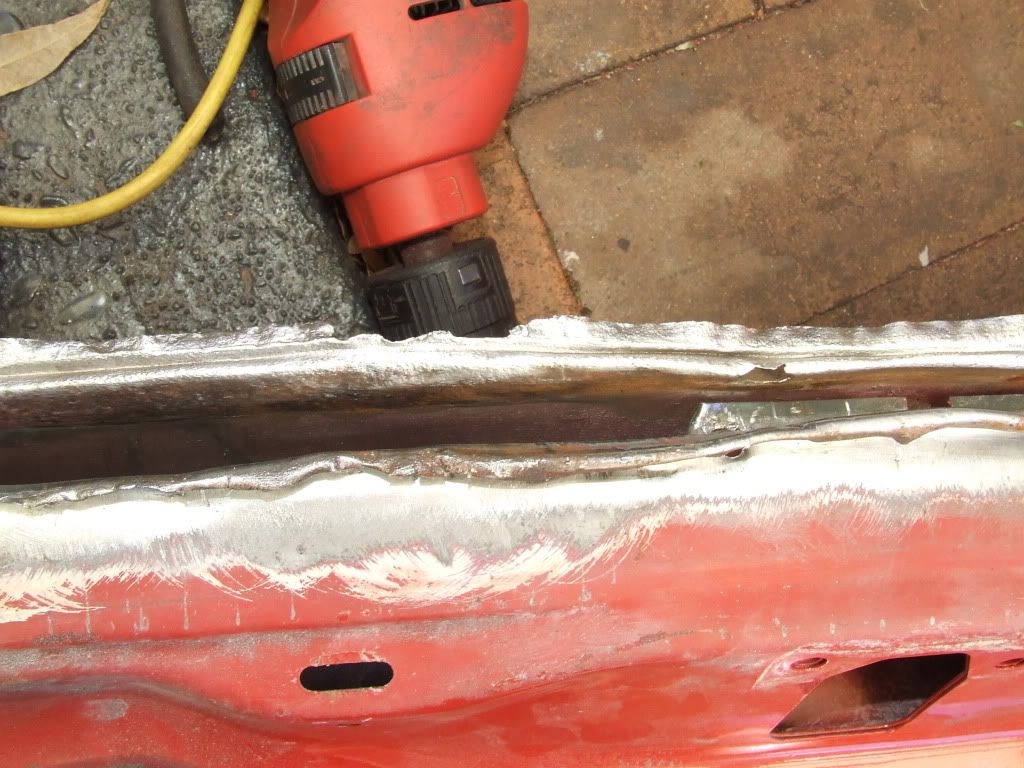
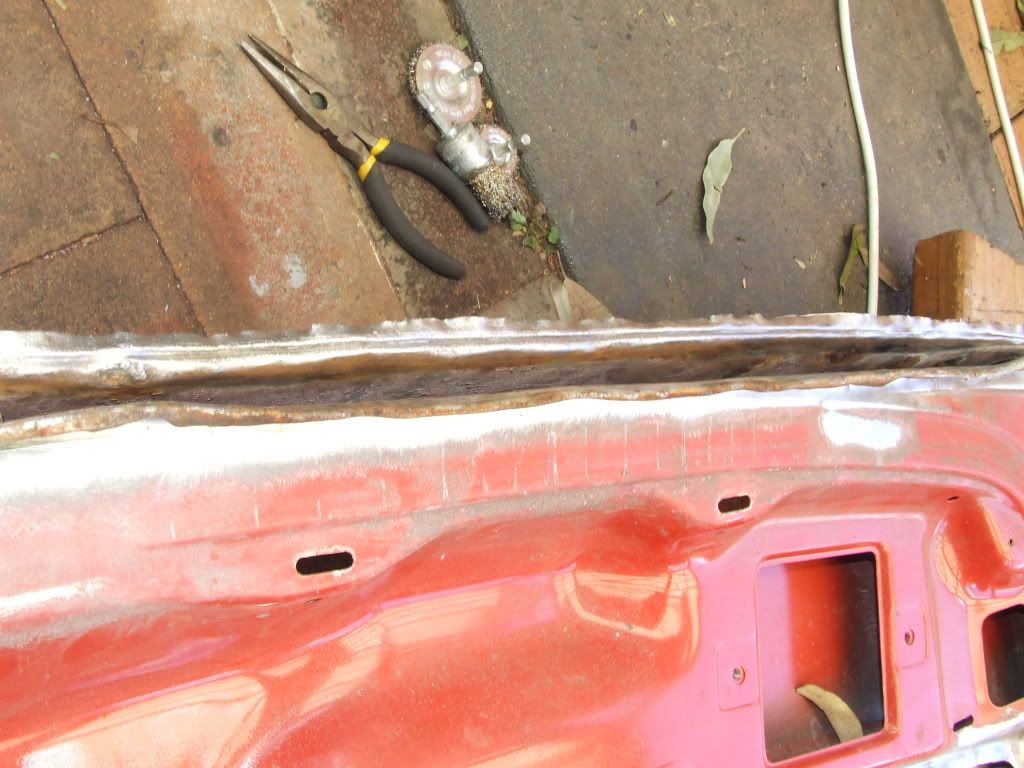
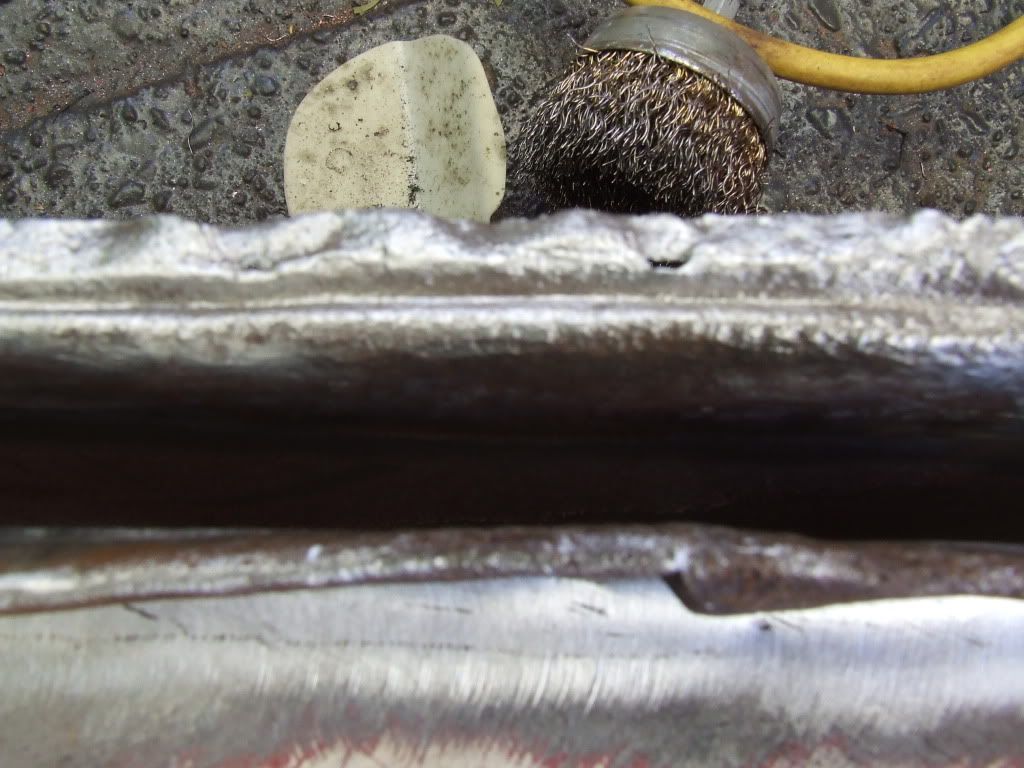
Alright Update: Operation Rust WAR!
Ok so 1st up after alot of reading I decided to use the POR-15 anti-rust system for my car look it up its the best product on the market period. They do say its best applied by brush and well that's totally right but its not neat but then again its a under seal so you do put high fill primer and then top coat over it. U should buy alot of 68c brushes from bunnings because this totally ruins a brush in 3 hours and putting it in water trying to clean it just makes it set harder and quicker lol POR-15 is awesome.
This is what I've done the last 2 days.
In January I posted areas that I had wire wheeled rust out of well now I'm getting around to getting ready to paint them.
1. Passenger side rear wheel arch left bottom coated with POR-15 dries super hard with a ceramic hard glassy finish. Just needs some high-build primer and then top-coat.
![Image]()
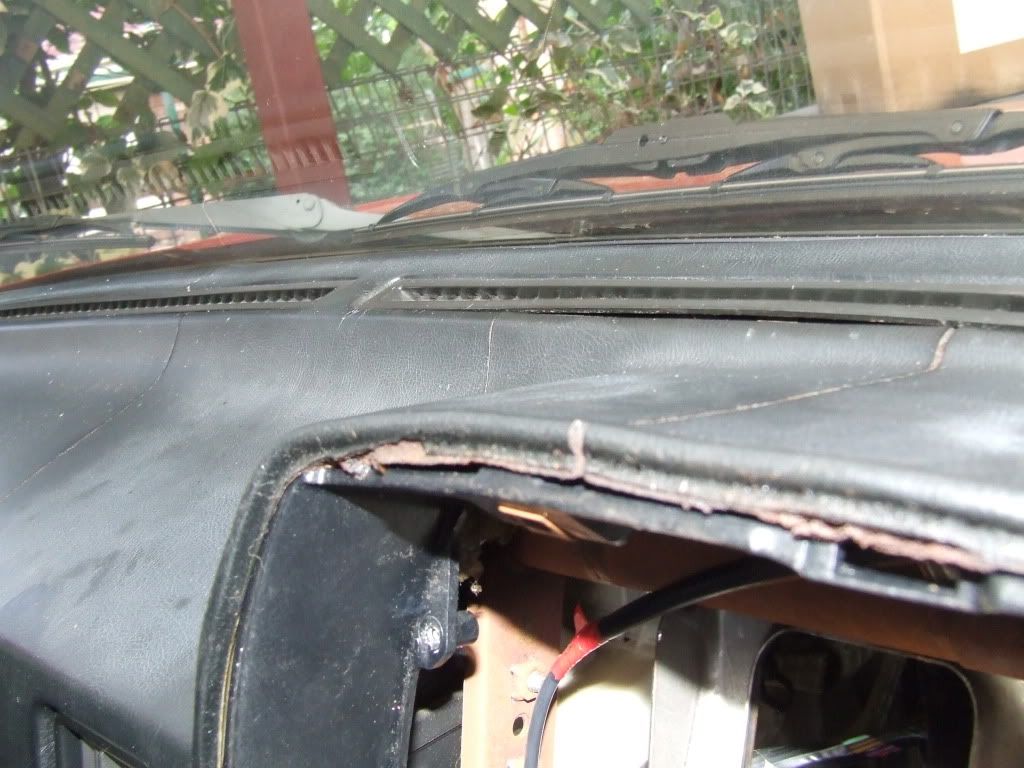
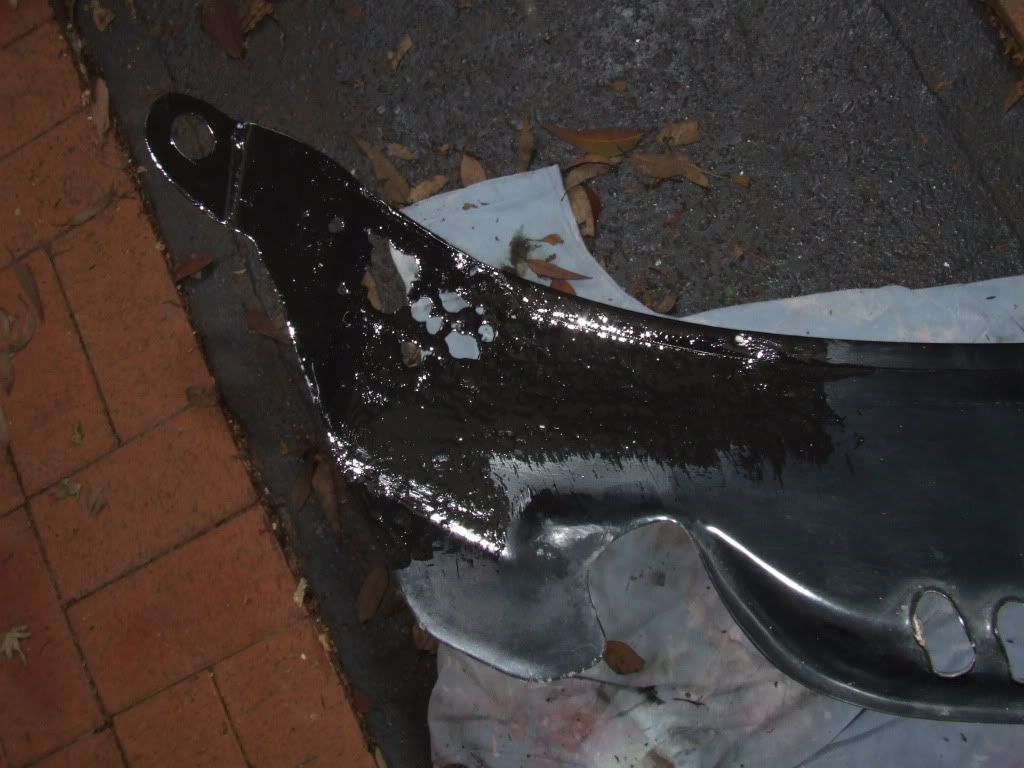
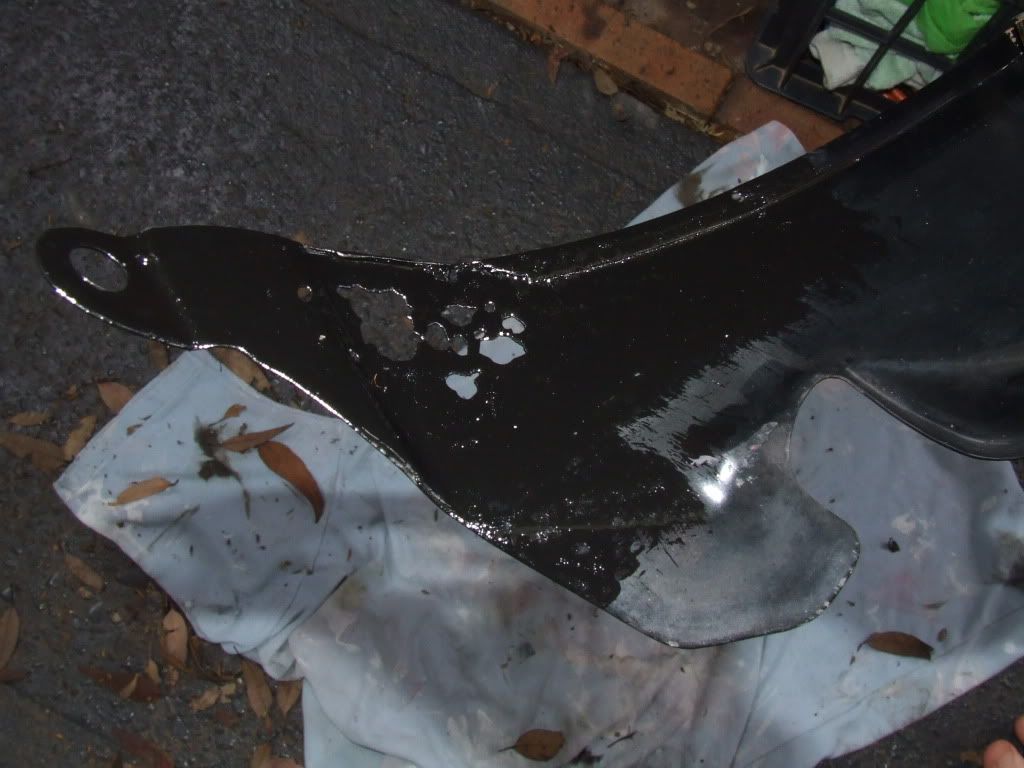
2. I finally got around to taking off my windshield cowl for the 1st time and I knew it had rust since I got the car but it hid it well.
![Image]()
![Image]()
I wire wheeled the shit outta it then I did the three step POR-15 process.
![Image]()
![Image]()
Rust converter:
![Image]()
POR-15 on
![Image]()
![Image]()
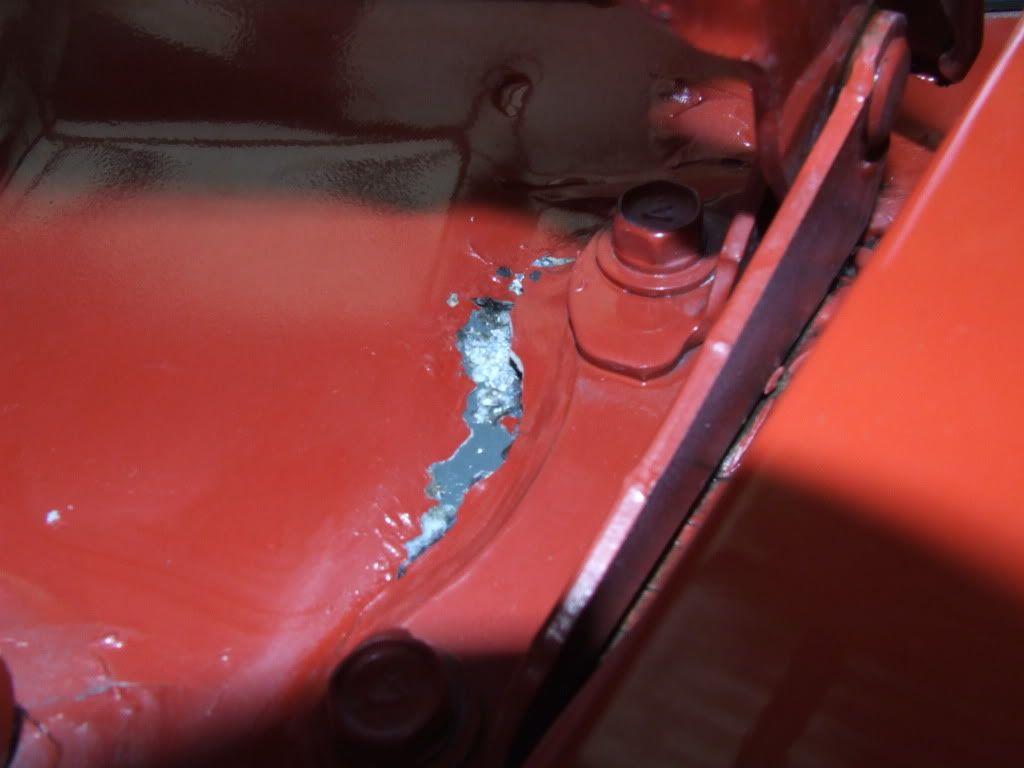
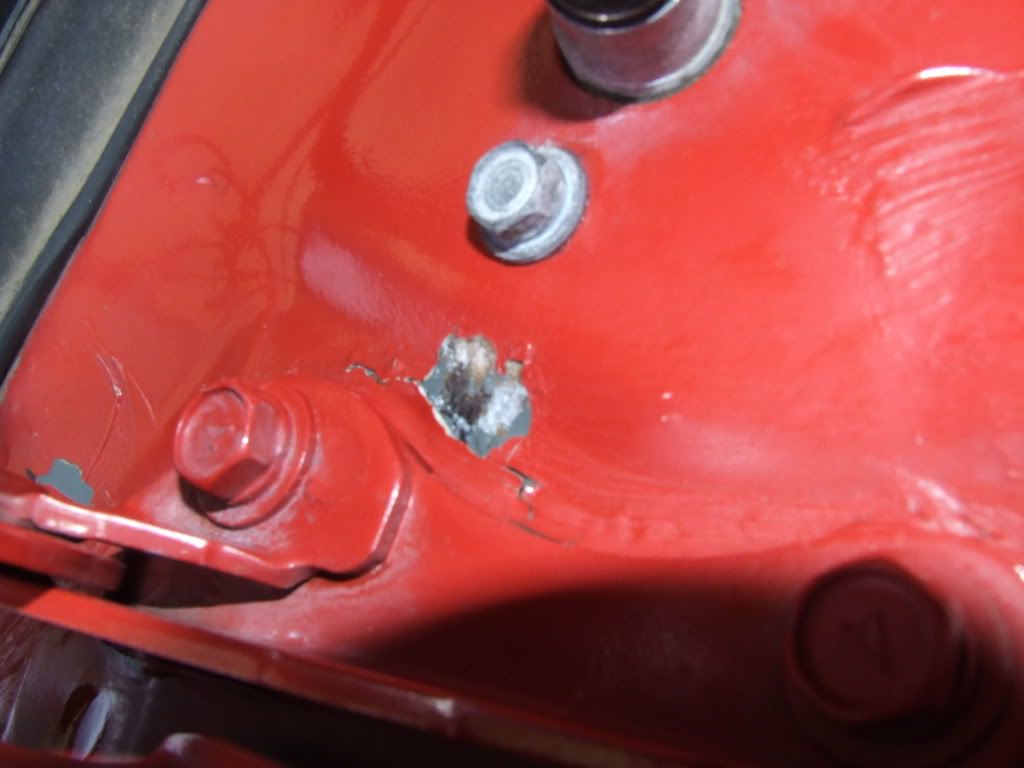
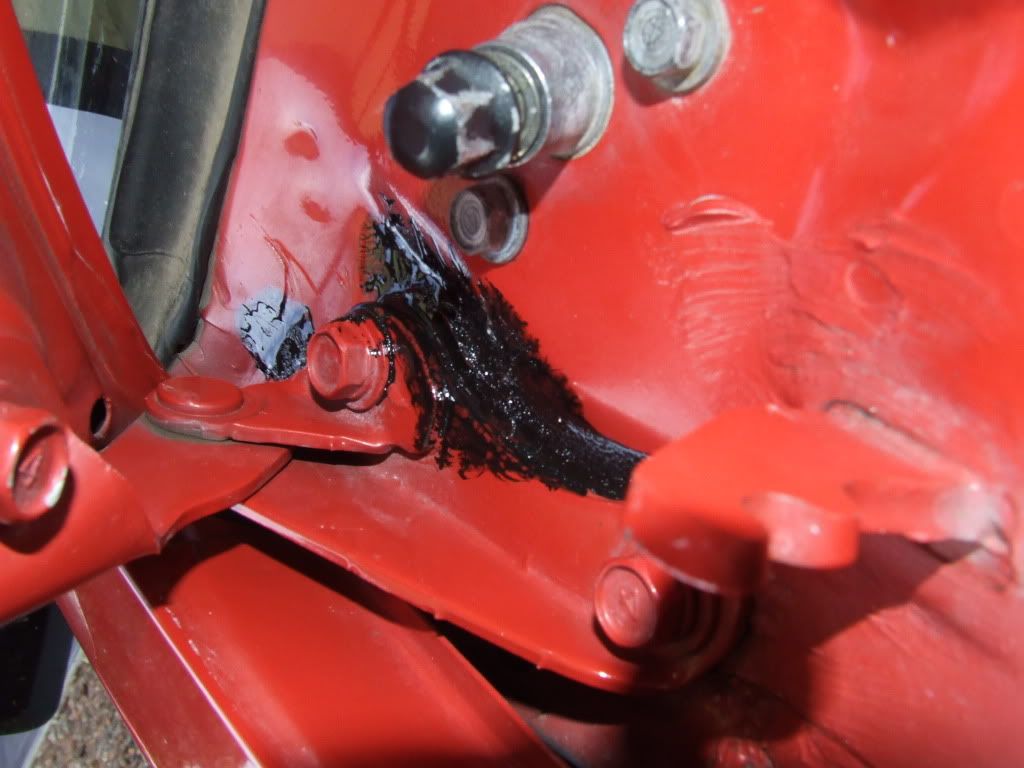
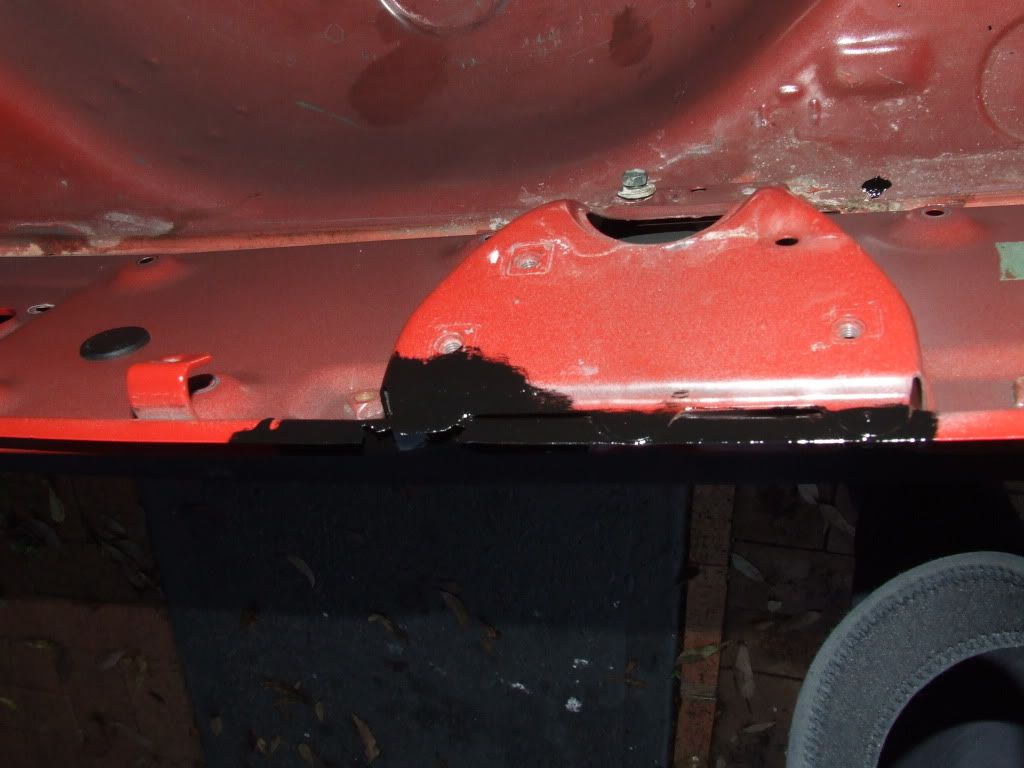
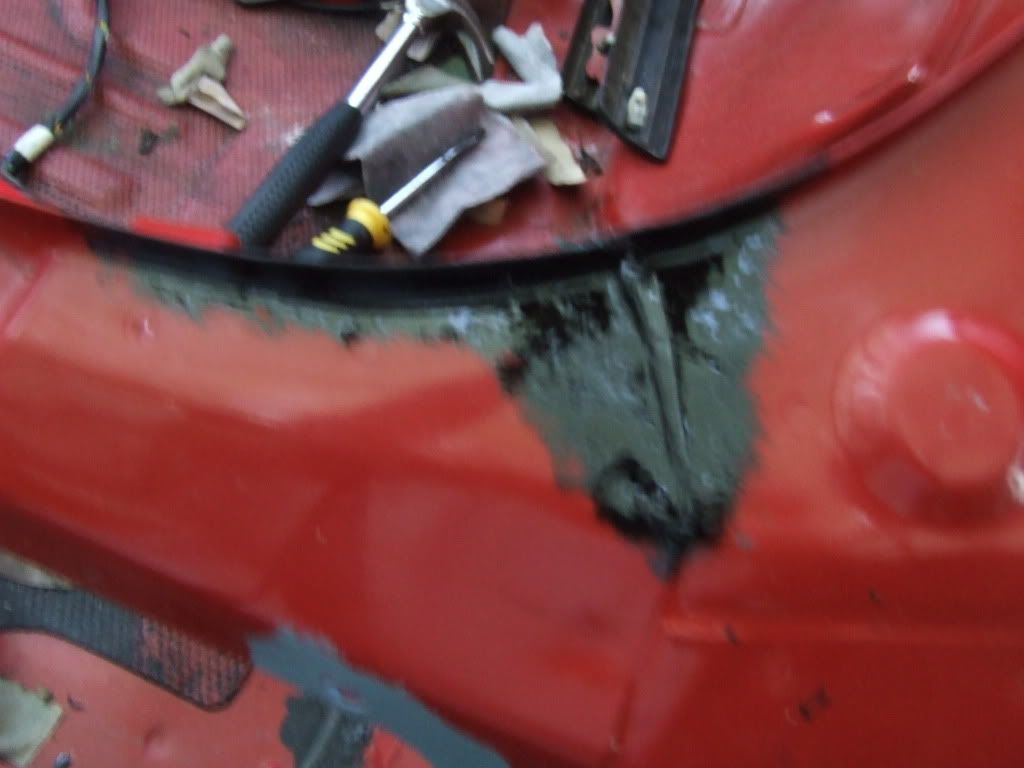
3. The bonnet bolt area rust
I did'nt want to take off the bonnet and hinges to do this because well I have a feeling the hinges are also body bonded and fused into place.
POR-15 actually encourages you to use it on surfaces you just use rust converter on and not hit with a wire wheel and well I did this here and it lived up to what it says it conveted the rust to iron oxide totally step 2's metal ready is really really strong for converting rust more powerful then other converters I've used.
After rust converter:
![Image]()
![Image]()
POR-15 trust me after the recommened 2 coats of this stuff its so hard and so grippy that It's not letting water in the spot for at least 20 years These pics were taken before it has set and before the 2nd coat.
![Image]()
![Image]()
4. The MA61 seats I got off Ivandude who got them from oldjap well I fixed them up.
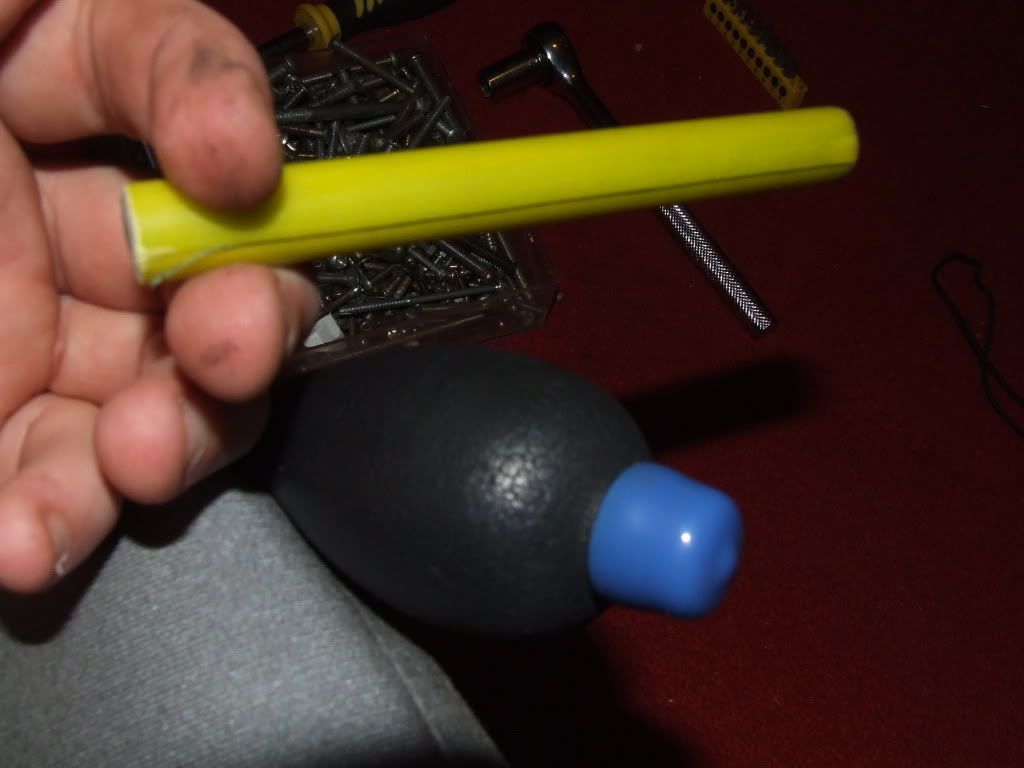
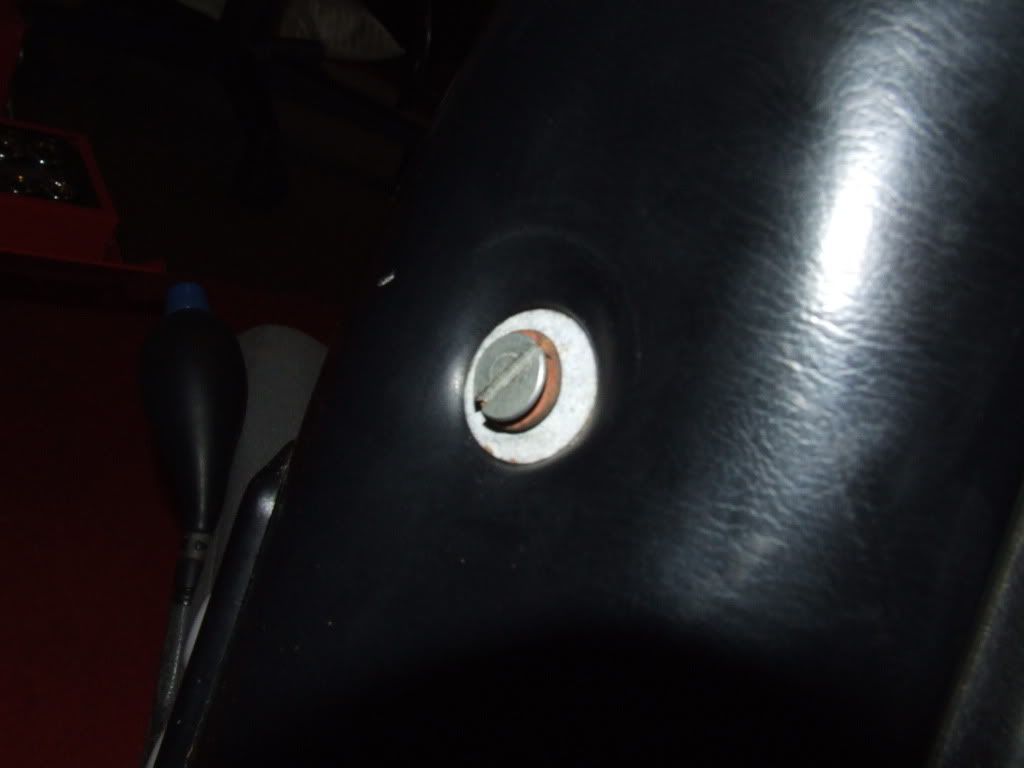
Airpump was missing the stopper and holding your finger over the hole ain't cool. So I searched around my garage for some fix and I cut a small piece from this fibreglass besablock guide of about 1.5cm and shoved it in the hole then I put this blue rubber thing over the top and I reckon it looks good and more importantly it does'nt shoot out like a cannon ball like other plastic pieces I tried did. I reckon it looks kinda oem as well.
![Image]()
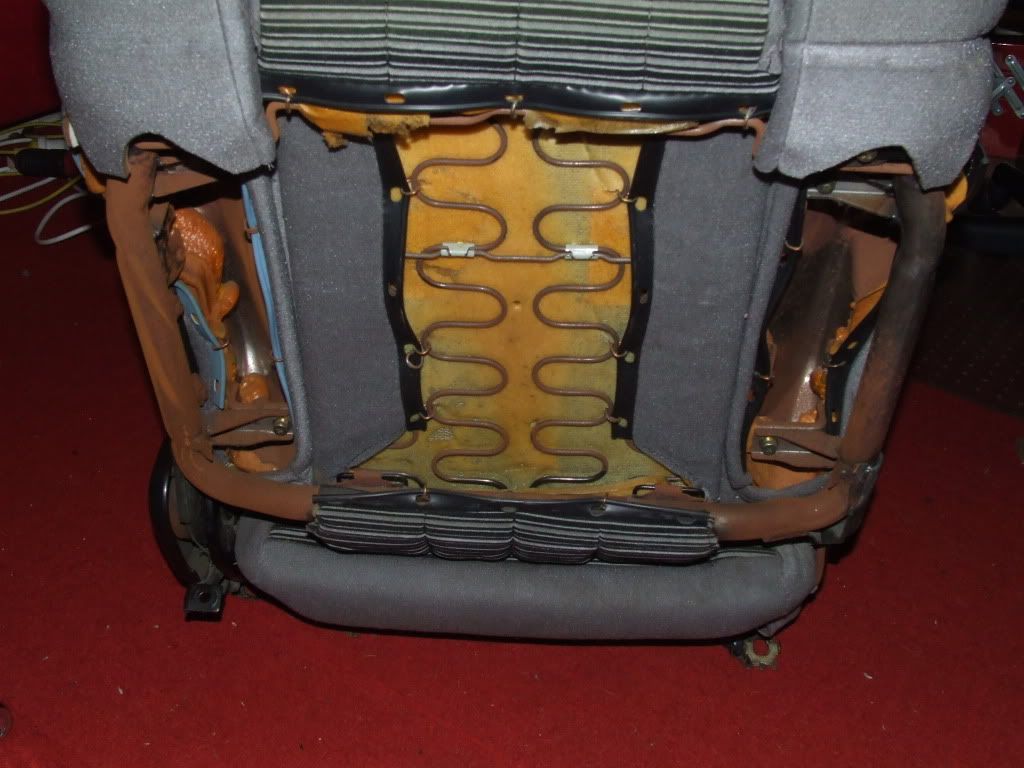
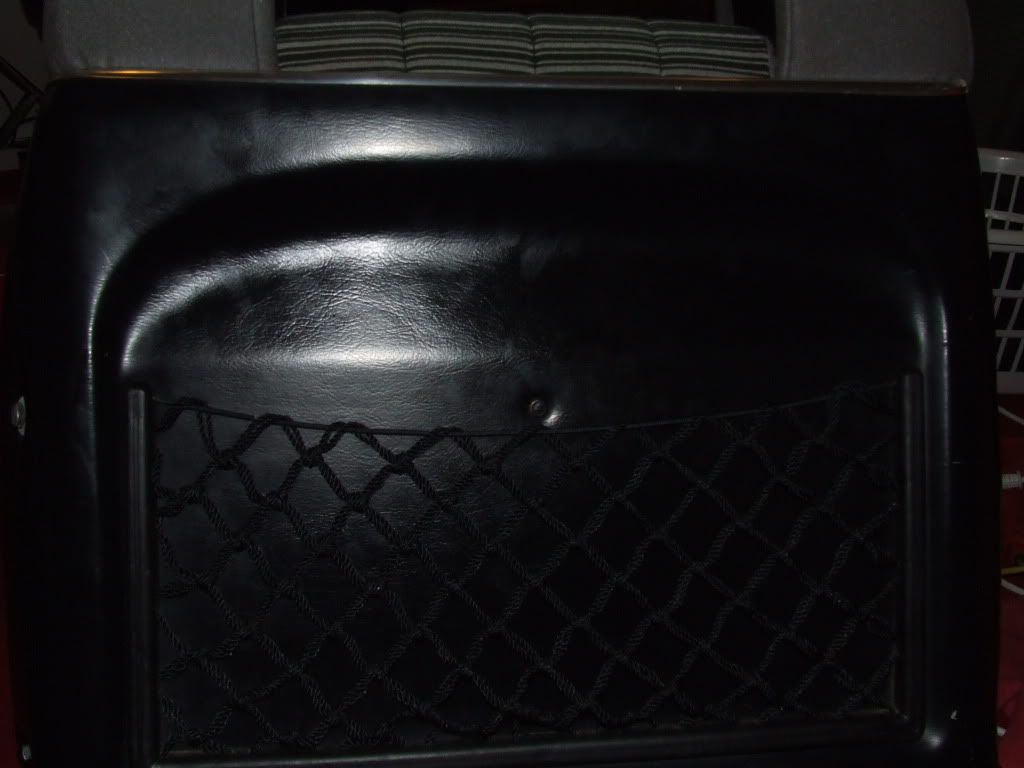
Then I took off the backs of both the seats and fixed the sagging seat pockets.
![Image]()
![Image]()
![Image]()
I followed the guide on celica-supra.com
http://forums.celicasupra.com/showthread.php?4222-Saggy-storage-nets
The front seat has a small rip in it but I can repair that pretty easy and they need a VAX. I will be ordering some replacment chrome seat trim (totally cracked) from an american supplier.
I also had to Macgyver up 3 new screws for the seat backs I'll paint them black at a later stage. I positioned the screws so the stock ones I had left are facing outwards so when u open the door u don't notice anything different screws. Lastly I need to get the plastic push rear access button from my RA60 passenger seat on these MA61 seats. I'll be putting the seats in soon.
![Image]()
Update 22nd November: I removed the interior to clean the carpets and seats. I also checked for rust and I found a 1964 2c piece under back seat and a 1984 $1 under the front seat carpet.
![Image]()
![Image]()
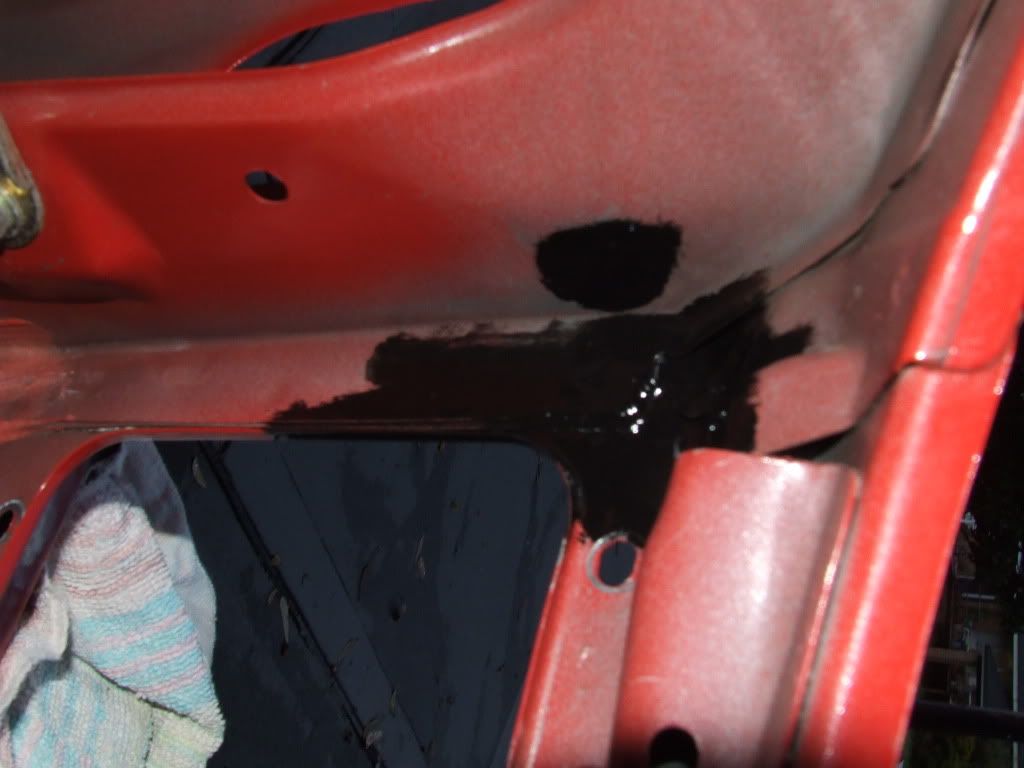
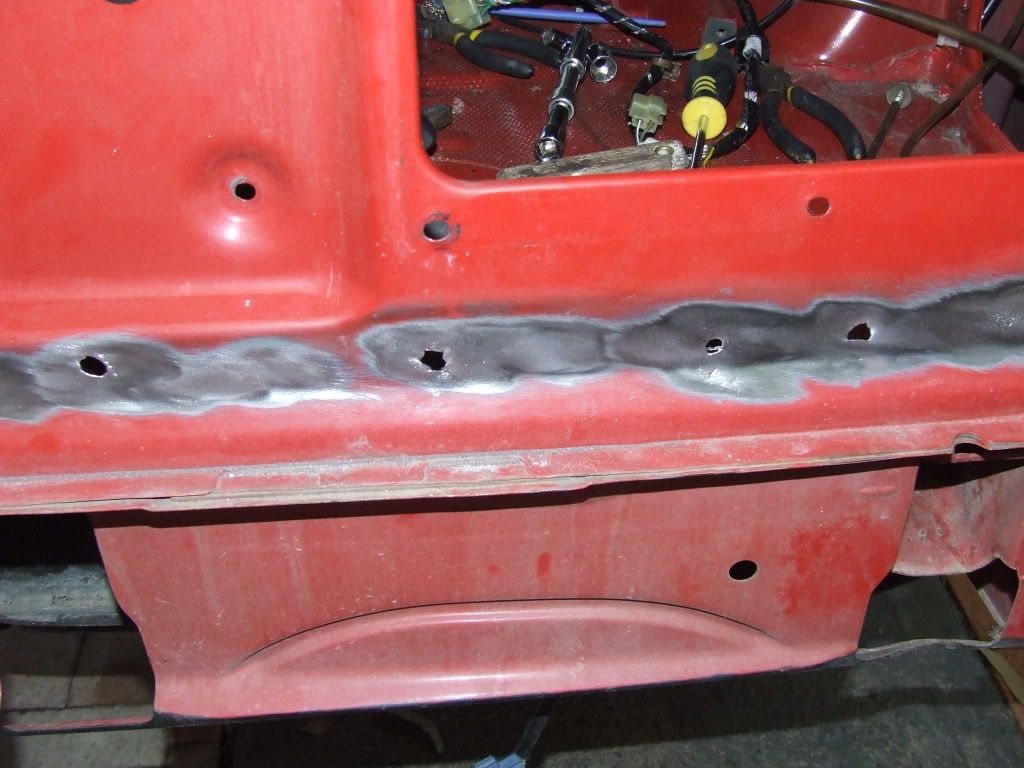
Update 6 December: I did some more rust work in the last 2 days because it was only overcast yesterday and today was the same but luckly little rain. Its been monsoon season in Sydney for the last week and another week to come it looks like screw u rain!
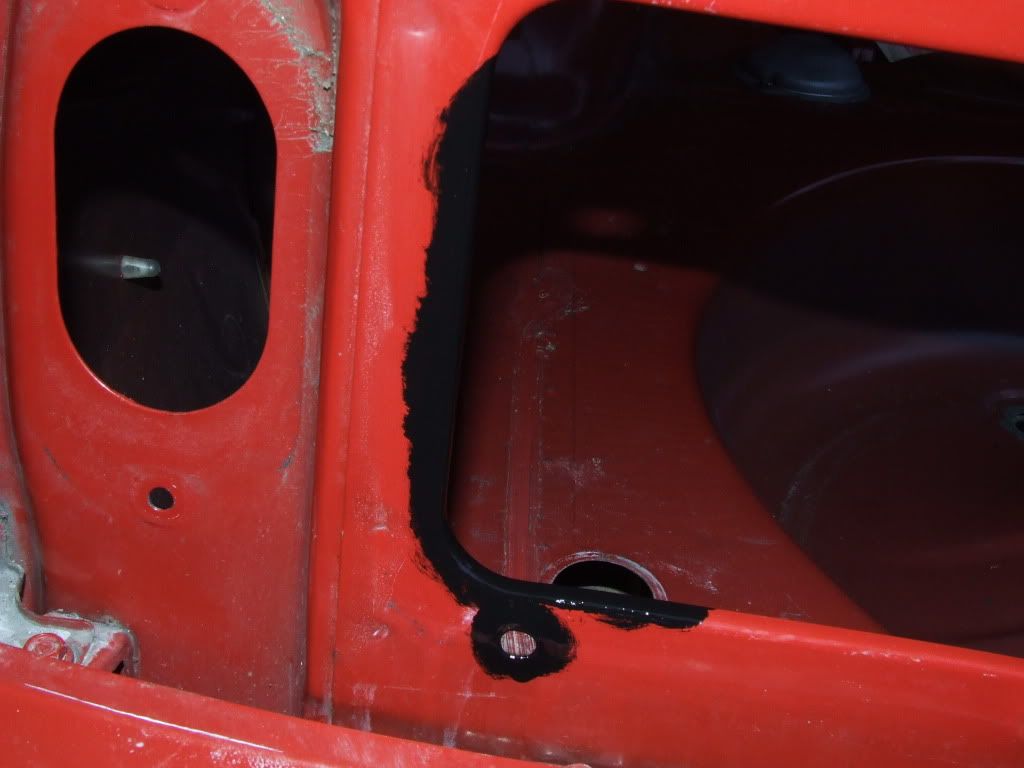
1. Back left interior corner: With this one really had to be sure the leaking left tail-light gasket and the left corner of the hatch leaking had'nt caused rust to start under the mountain of soft filler in the left corner so I got to it with wire wheel and the flat head screw driver. I found some under there which I wheeled and treated.
This 1st pic was before I cleaned up the metal in the area.
![Image]()
After 2 coats of POR-15
![Image]()
![Image]()
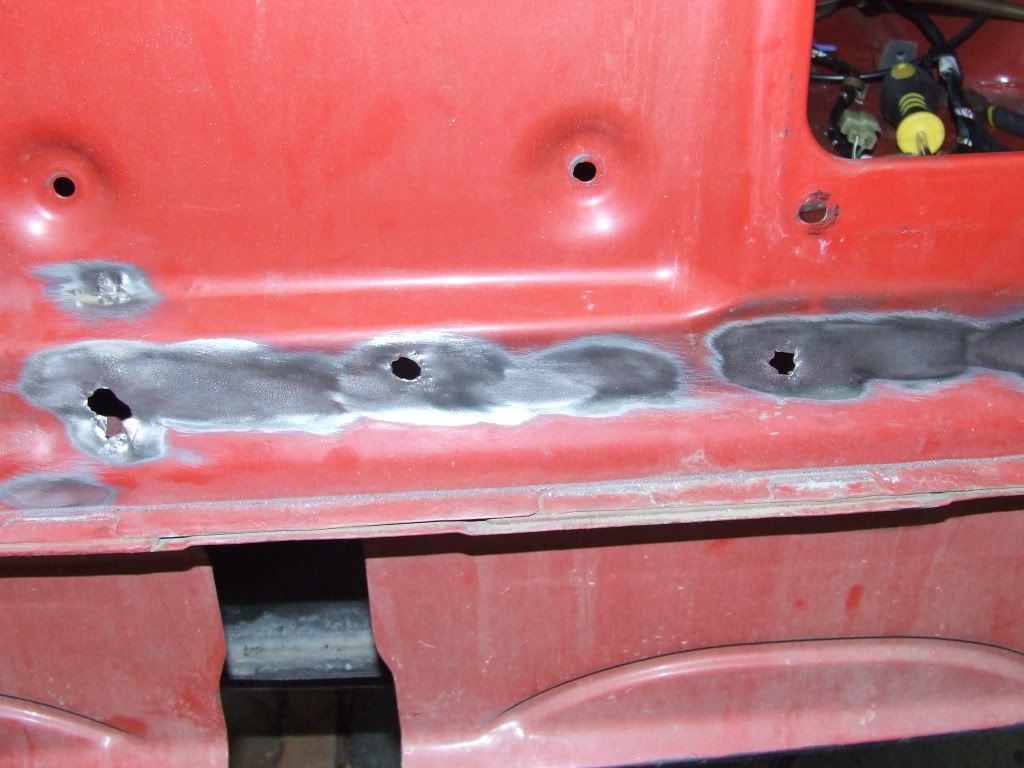
2. Water collecting area: I also coated the area where most of the leaking water collects to prevent rust occuring if I do have leaks in the future.
![Image]()
3.Hatch lip lock area. I am going to be building this back up with POR-15 filler (don't worry its not ordinary filler its strong!)
![Image]()
![Image]()
After 2 coats of POR15
![Image]()
![Image]()
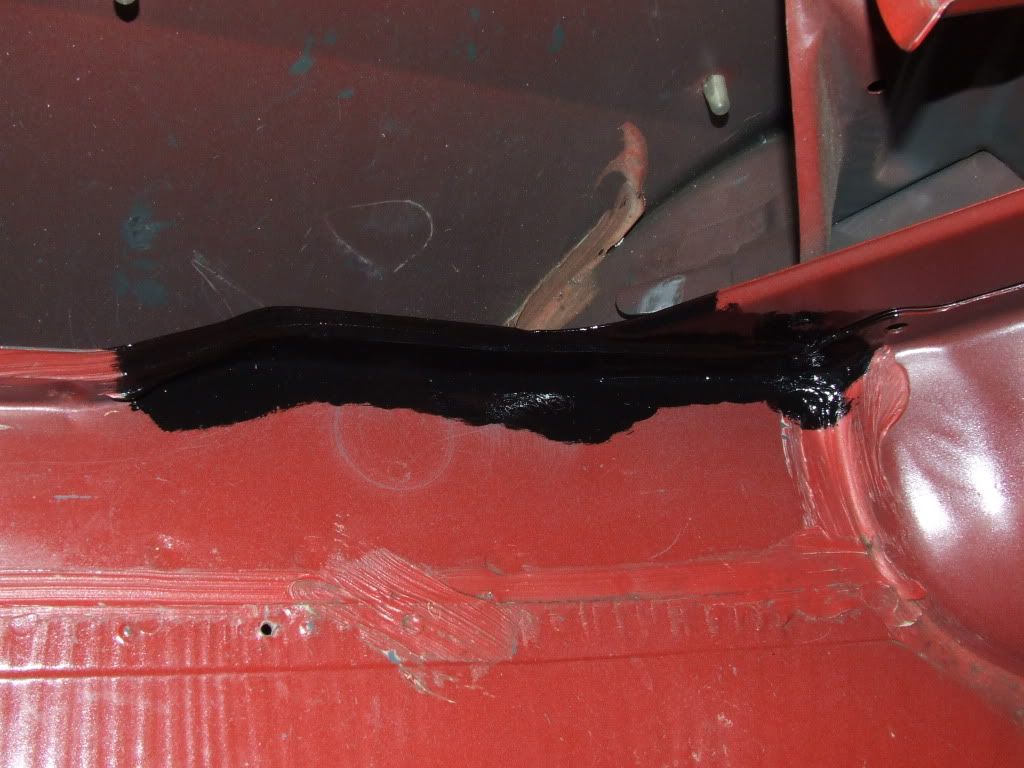
4. Trunk Valiance seal (I think its called that)
![Image]()
After 2 coats of POR15
![Image]()
5. Back right interior top corner
Kinda weard spot since the tail-light gasket was'nt leaking there but its fixed.
![Image]()
After 2 coats of POR15
![Image]()
There is still work to do building up the hatch lip with POR Patch and I'm removing the hatch from the car this week. I need to work when its not raining so I only have a few hours each week to work thanks to Sydney weather. But overall I'm on track for the respray in 2nd week of Jan 2011.
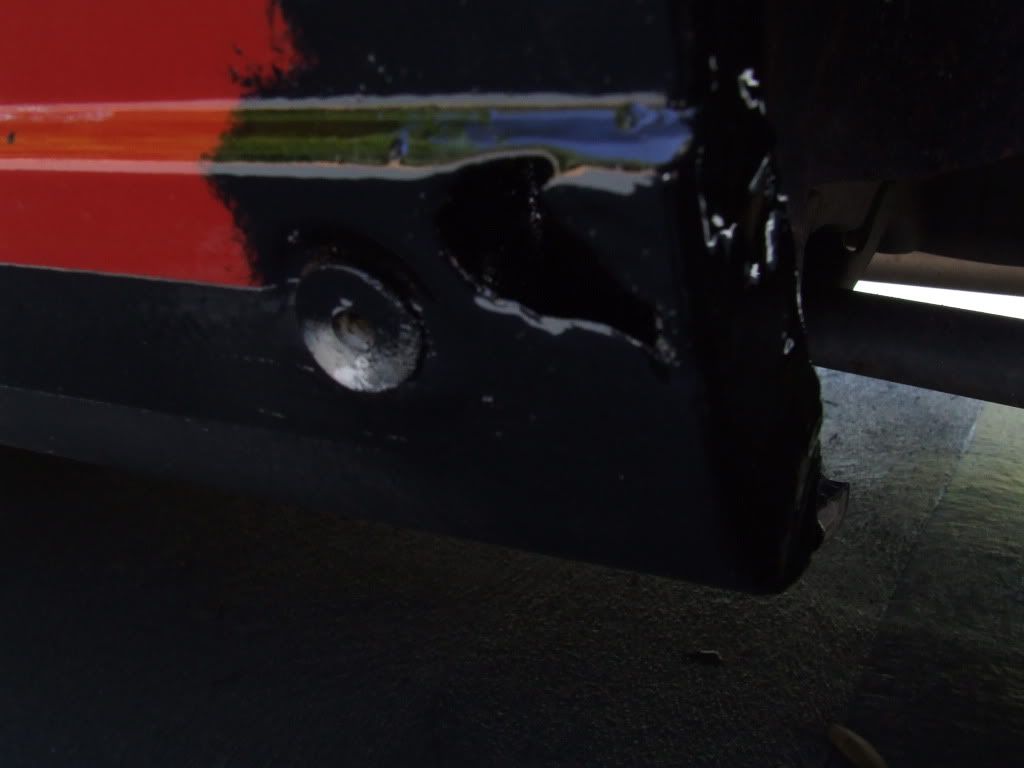
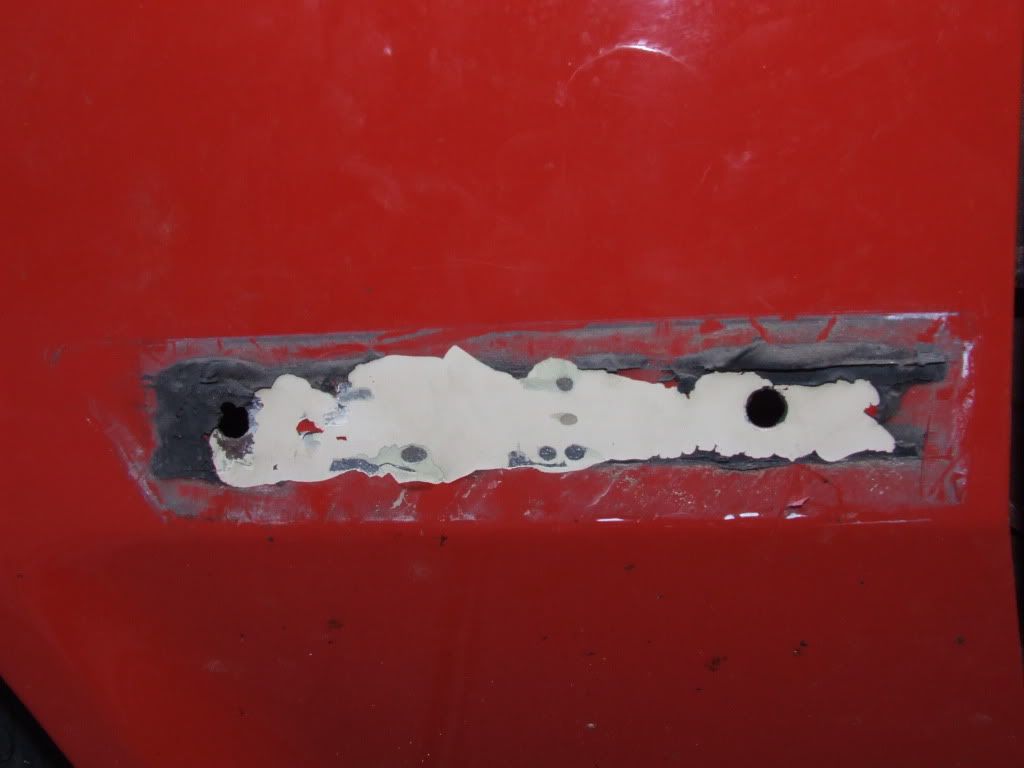
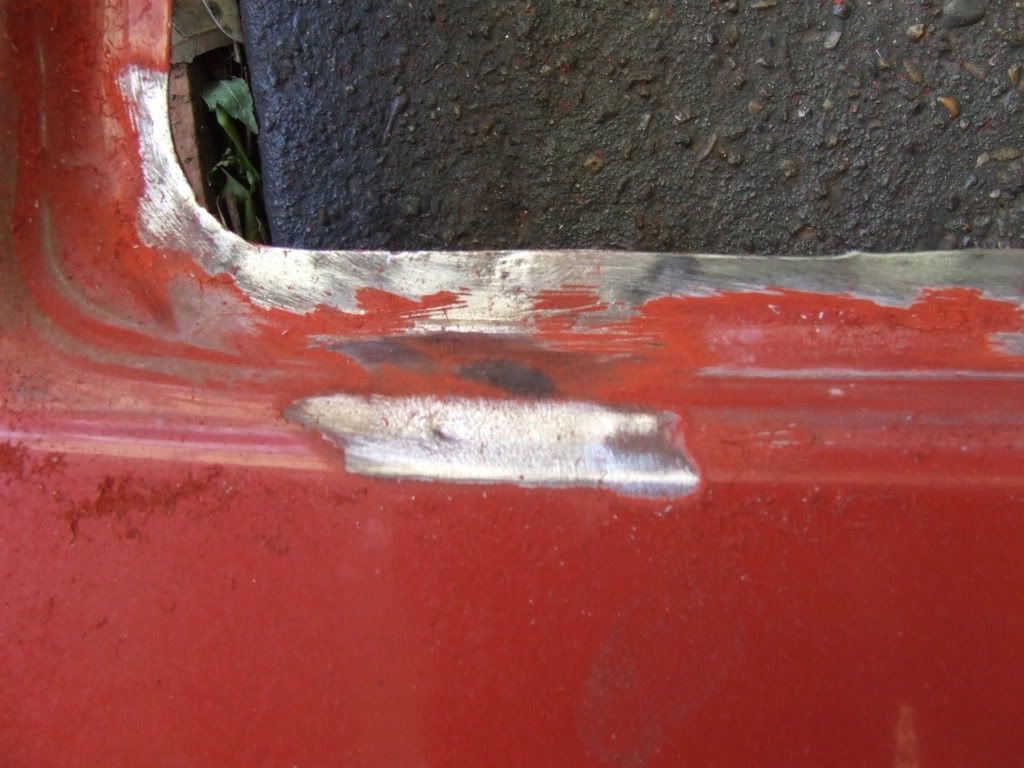
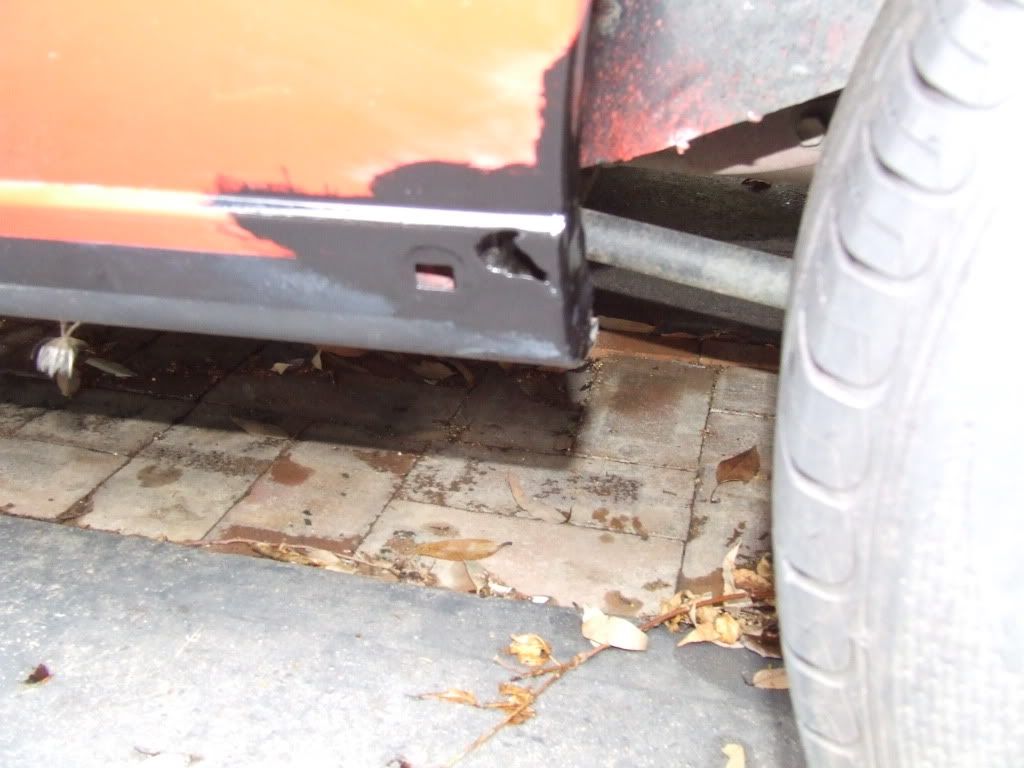
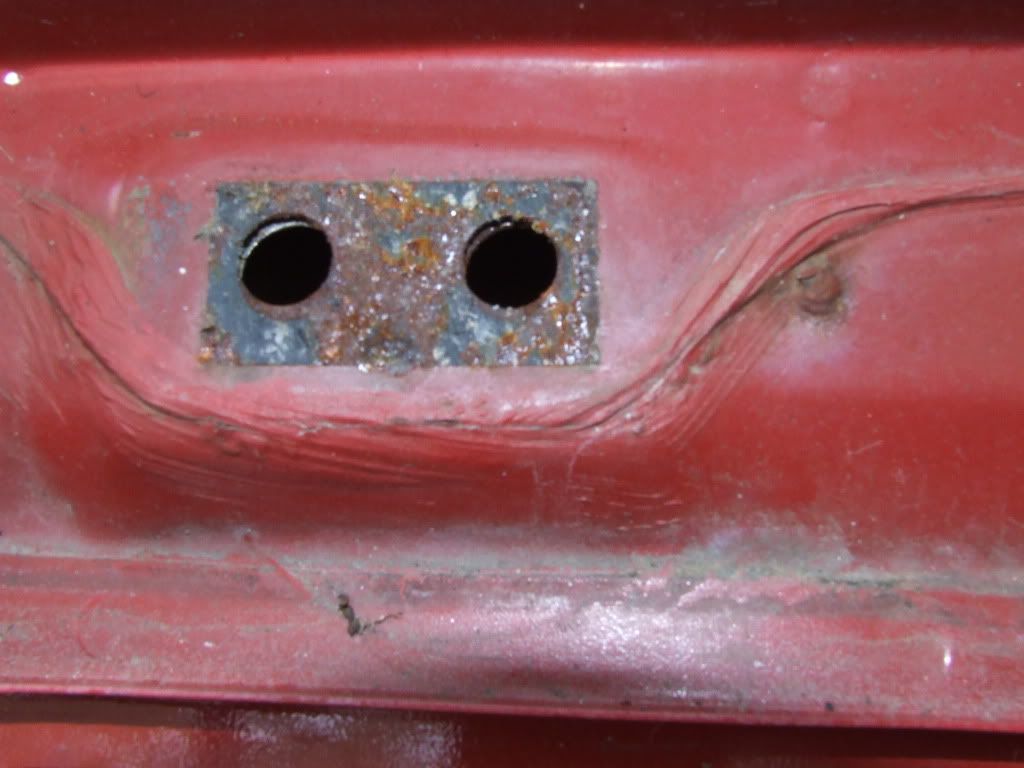
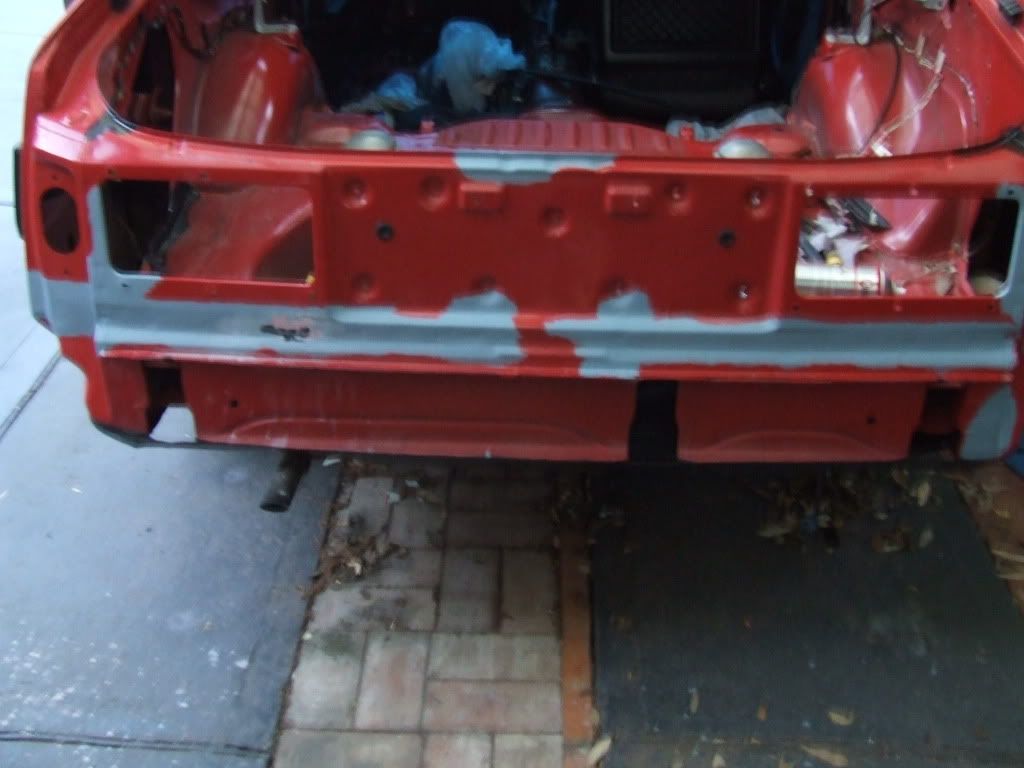
Update December 8th-9th (POR-15 bit is 9th): I removed the bump strips today. Thanks for the pic of the tool a coupe of months ago Roscos I copied it. Anyway all of them came off easy except this one on the passenger side fender behind the left wheel. It was glued on WTF. What was weard was the clips were perfectly fine and still in place and the other strip on the panel was normally mounted without glue. The fender must have been replaced at some stage in its life. I think since the paint underneath looks white its from a white model but then again it could be primer. I just don't understand why 1 was glued and one was'nt.
![Image]()
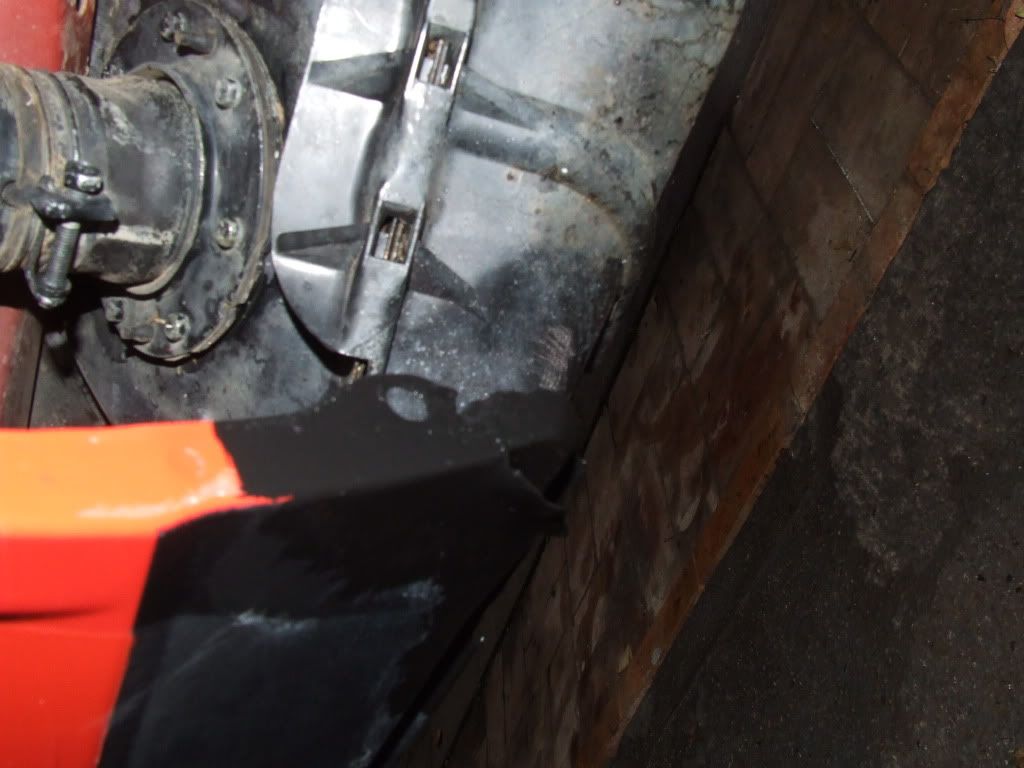
Ok so later that day I removed the mudguards for the 1st time and well the area behind the drivers back wheel was so horiffic that I did'nt take a picture of it that I hit it with a wire wheel within 2 minutes.
Look people while your car looks clean those mudguards have so much dirt and crap trapped in them against the metal that when it gets wet it turns to mud and stays wet for ages. Also it the mud has no where to run because wedged between the mudguard and the body.
To add to this the rubber 1/4 panel grommet on the left side works fine since its at the end of the 1/4 bottom channel. On the right the channel continues for another 6cm providing a space for liquid to sit without the possibility to drain away and you can't get a towel in there. What liquid may you ask has been spilled there I don't think it was leaking tail-lights it was most likely 28 years of people spilling the rear washer refill fluid when refilling. That panel don't get that hot usually and in the bowels of the car it can't really evaporate its a rust spot waiting to happen.
So the moral people is FFS on the weekend just get your screw driver and socket set out and remove your mudguards and just hit the area with the hose clean all the dirt and shit outta them. TAKE THOSE GUARDS OFF AND HOSE THE AREA IF YOU WANT TO PREVENT RUST!! IT WILL ONLY TAKE YOU 10 MINUTES!!
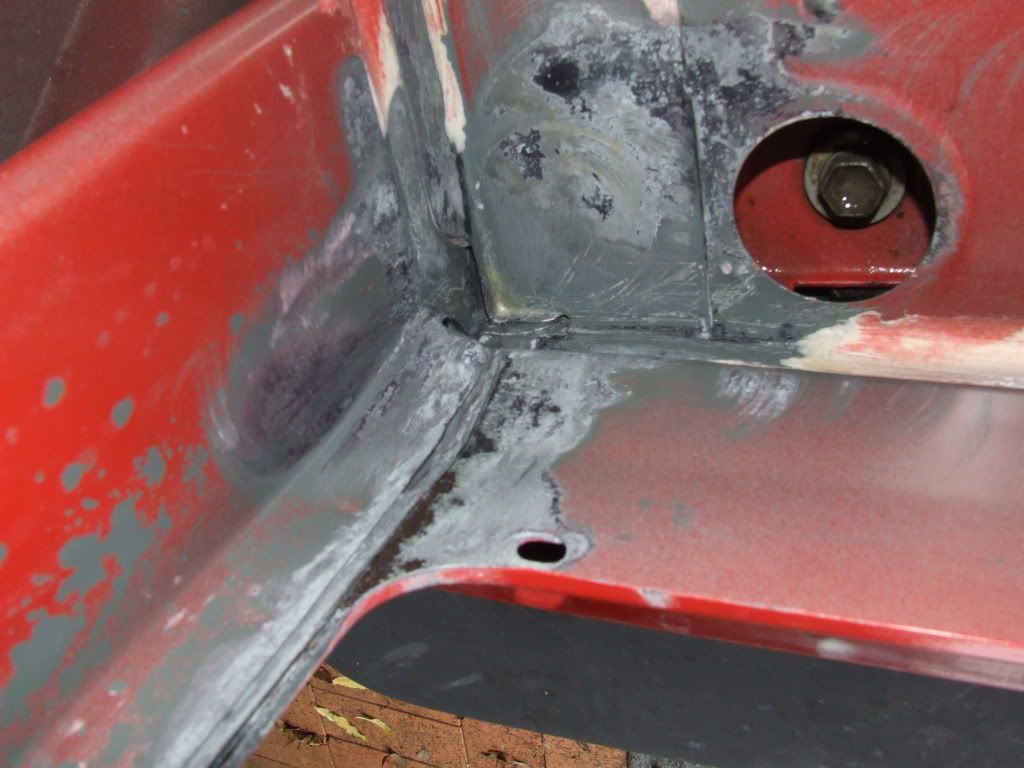
Ok lets get to the main event well I've cut out alot of cancerous metal out of the area. It needed a hellva lot of wire wheeling (sparks ftw) and I also used the clipper plyers you find in any good tool kit to cut out big pieces of metal. I've managed to get it all and I also have used the hammer and flat head screw driver to peel alot of the metal back so I could coat the edges of the good metal areas with POR-15. I'll be doing another coat tomorrow then hammering the metal back and using POR Patch to build up the metal there and trust me I don't need to weld I've saved it. I still needed to cut out alot.
![Image]()
![Image]()
Now people I want to point out there was NO visual indication since I've owned this car that there was such bad rust under there. You know how I am about detail and I tell you now take off your damn mud flaps and hose the area and the flaps down!
![Image]()
A interestering note is that inside that small channel itself did'nt have any red paint it just has some weakass looking primer in the area. When building the car Toyota could'nt psyically paint that area with top coat for some reason. The left 1/4 panel is not affected by this issue only the right 1/4 panel.
![Image]()
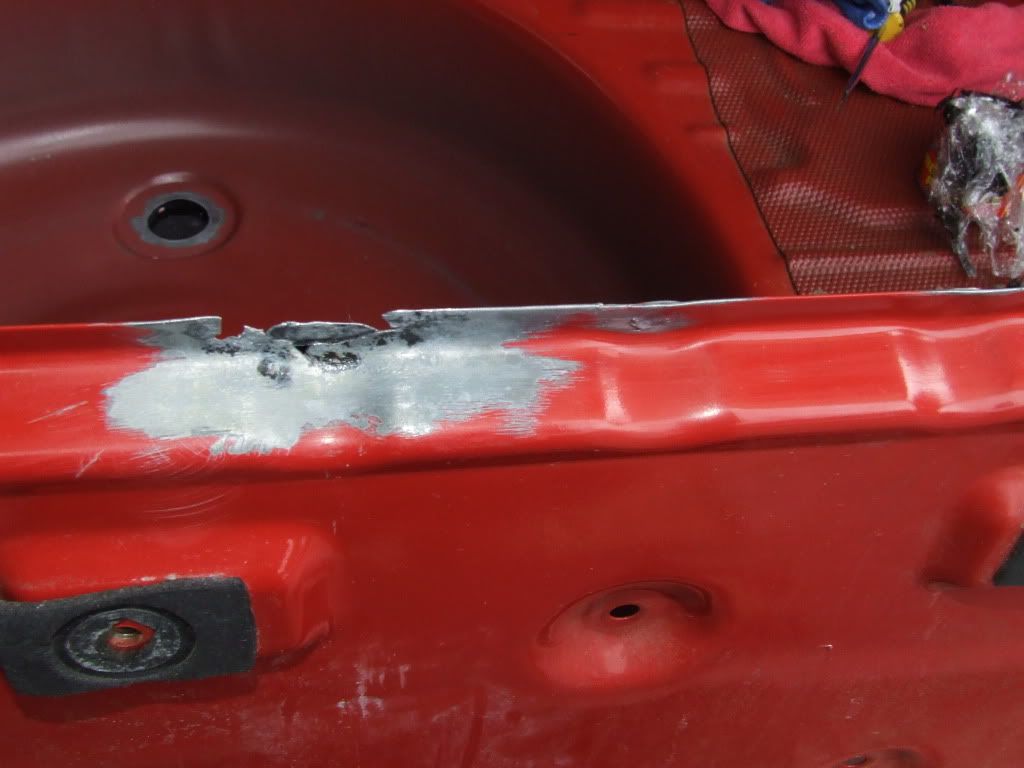
Update December 9th continued: I ground back the metal surounding the holes at the bottom of the wheel well and coated them with POR-15 I will be doing another coat tomorrow.
![Image]()
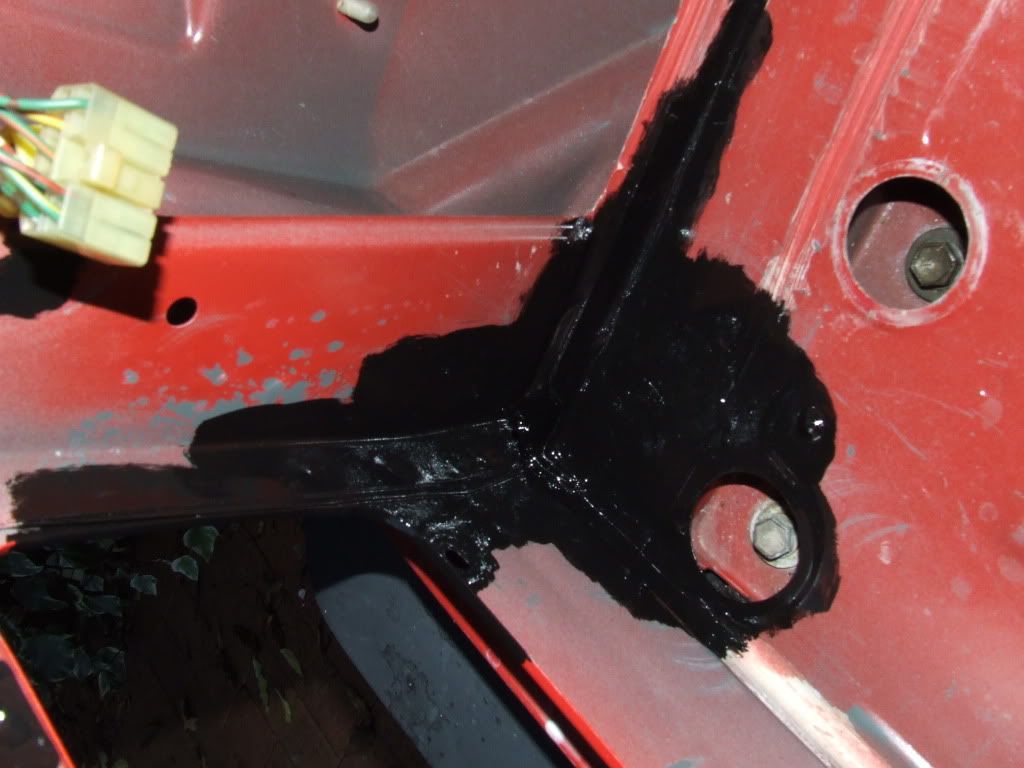
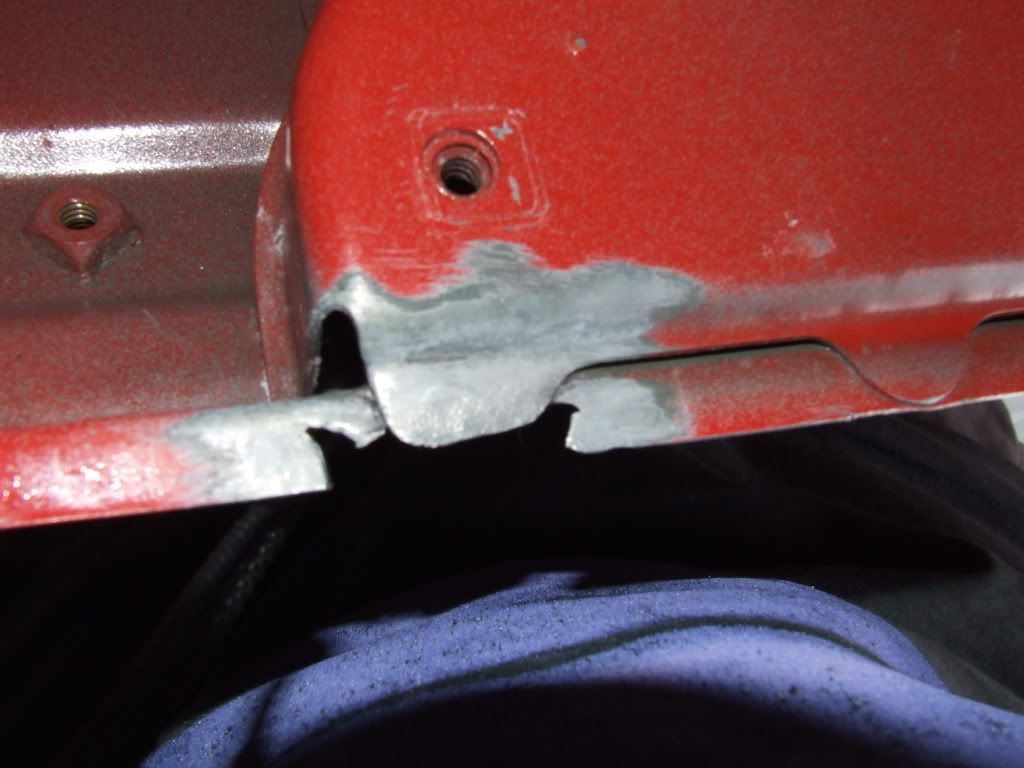
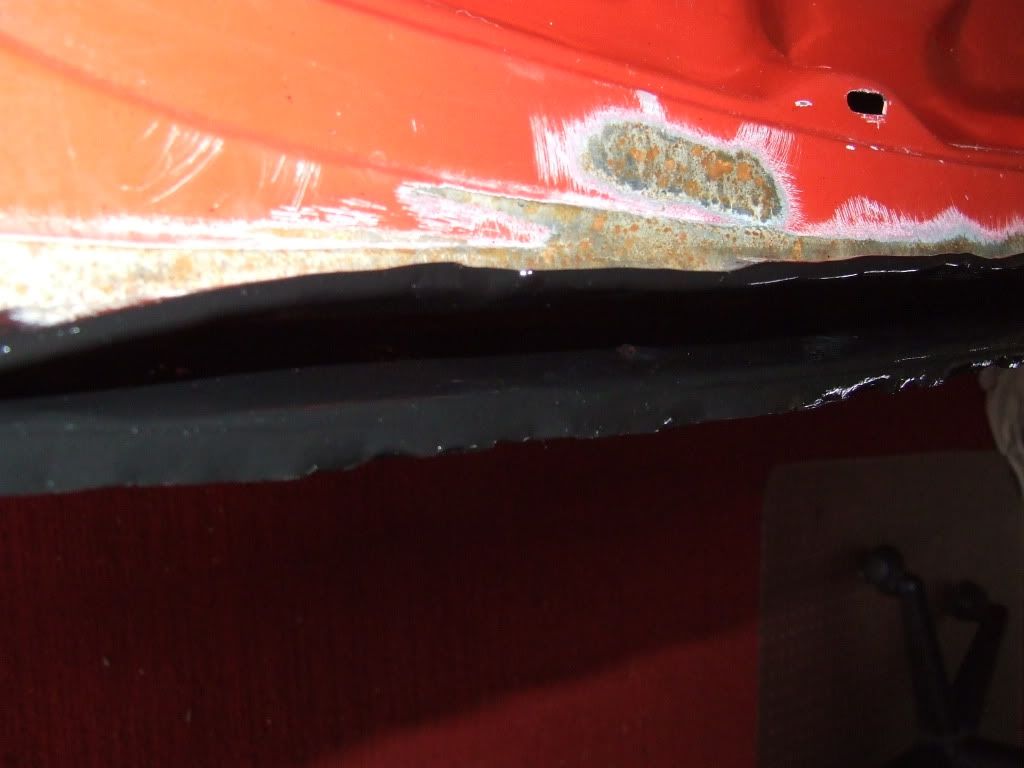
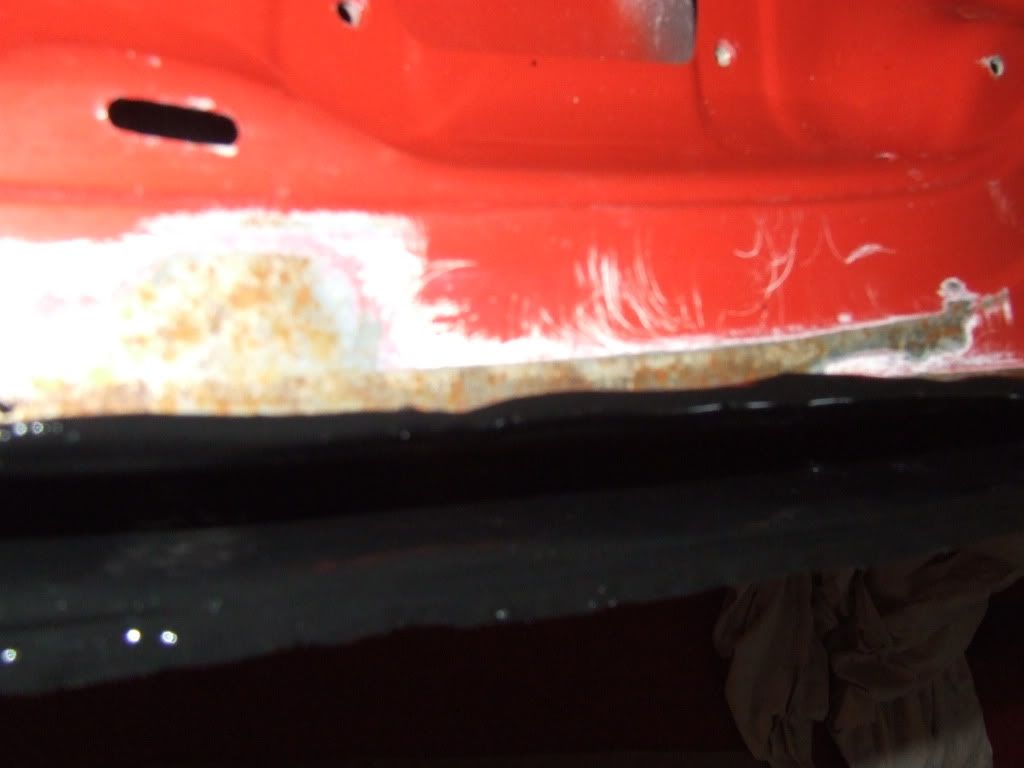
While doing that I took time to look at something I had'nt really removed before the trim piece below the tail-lights. So I took it off and I noticed very very slight dark discolouration so I pried the metal back and well I found a tonne of surface rust and well it's not suprising considering this is a stupid design having these brackets lazly spot welded on the outside of the car where water trickles down and gets trapped all the time.
![Image]()
![Image]()
![Image]()
Now Ivandude or steeko or anyone else is reading this you'll prob thinking your car does'nt have any rust there. Well I call bullshit to you or anyone reading this with a XA6X I dare you to prove me wrong.
![Image]()
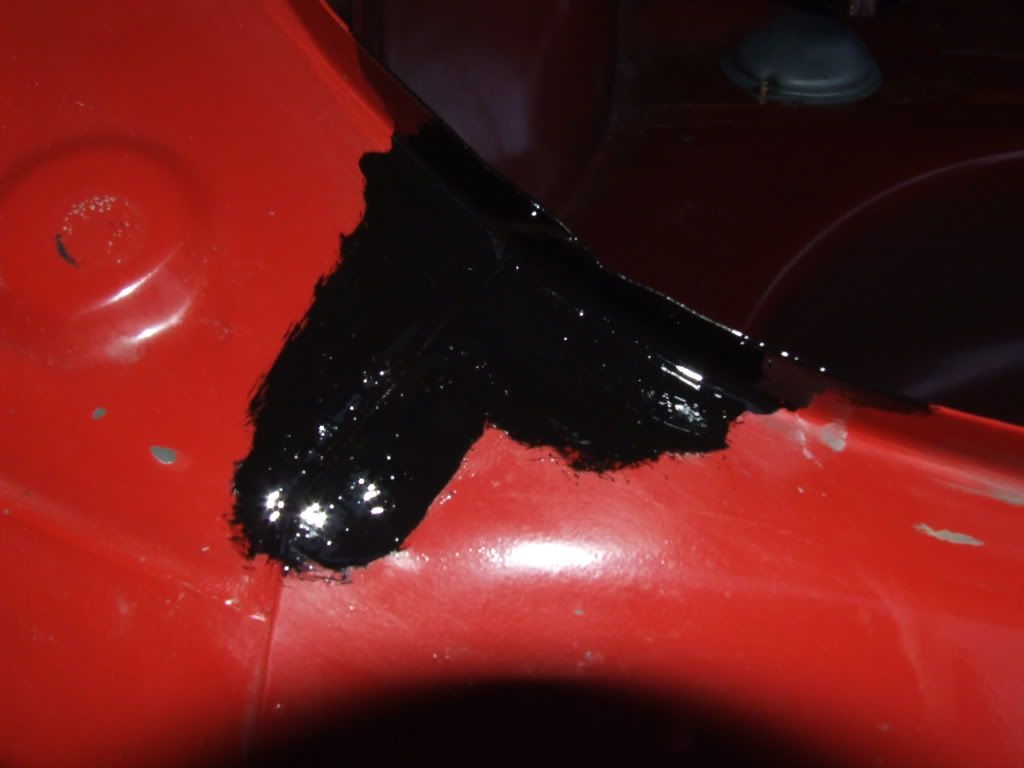
So I thought about drilling out the welds but after investigating it the welds themselves were rusted I just said I'll just hammer them out wire wheel the area and POR Patch the holes which won't be hard to do.
![Image]()
![Image]()
I've decided the trim piece will be fine bolted in with the two left and right mounting brackets which are under tail-light indicators. Oh yea guess what I gotta remove them as well because they have rust behind them to and I'll prob POR Patch the holes and then drill a small hole in the POR Patch and POT river them back on.
Update December 10-11th: Well people I had to do some serious wire wheeling to get rid of the rust caused below tail-light trim piece mounting brackets. Basically I'm going to be deleting the trim piece all together and sometime in the future getting a USDM 84-86 Supra bumper. I've applied the POR-15 and soon I'll be filling the holes soon.
![Image]()
![Image]()
![Image]()
![Image]()
![Image]()
![Image]()
![Image]()
![Image]()
![Image]()
![Image]()
![Image]()
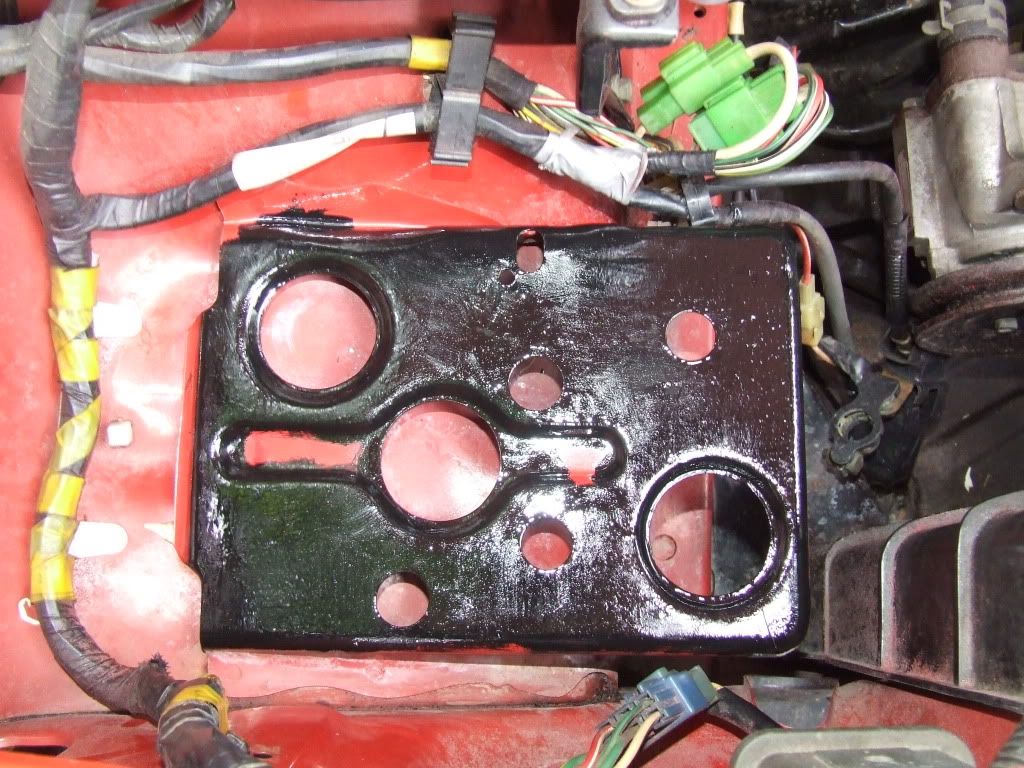
Update December 16th: I have a little rust in the battery tray and I will be doing some more wheeling and coating it with POR-15 soon.
![Image]()
![Image]()
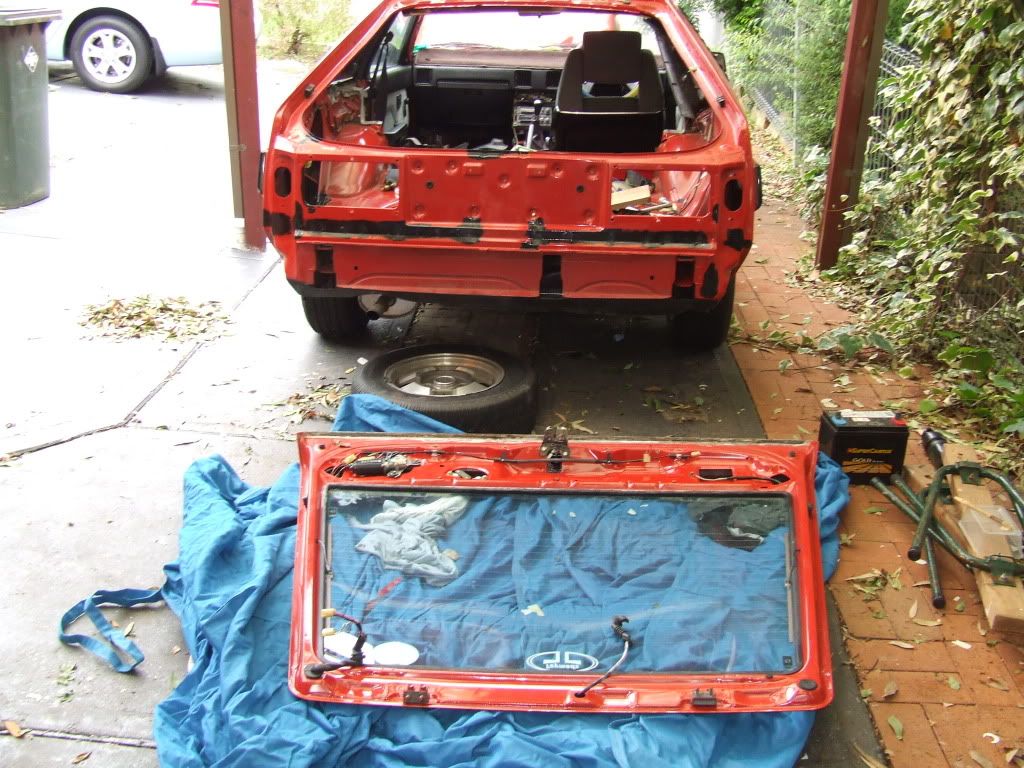
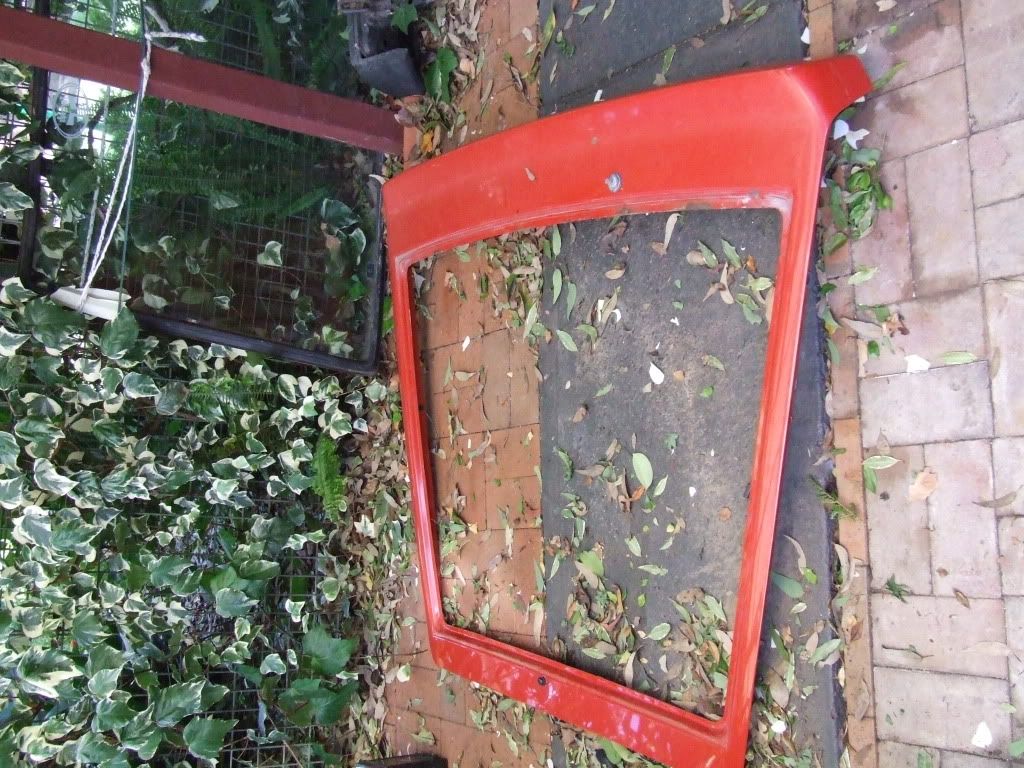
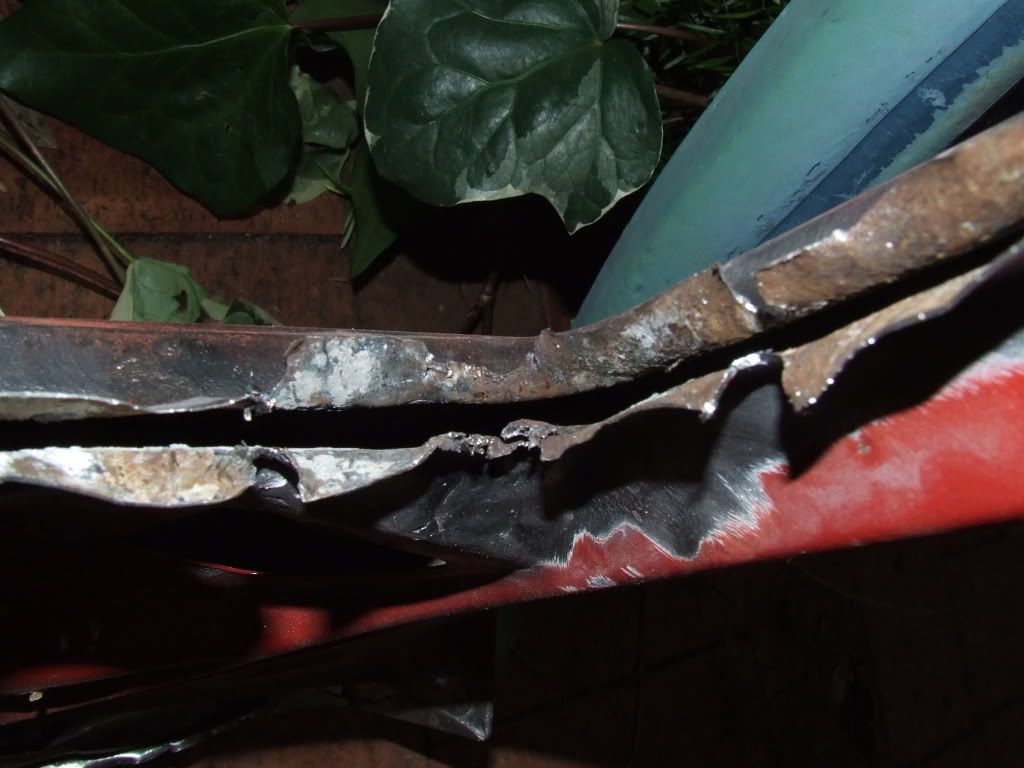
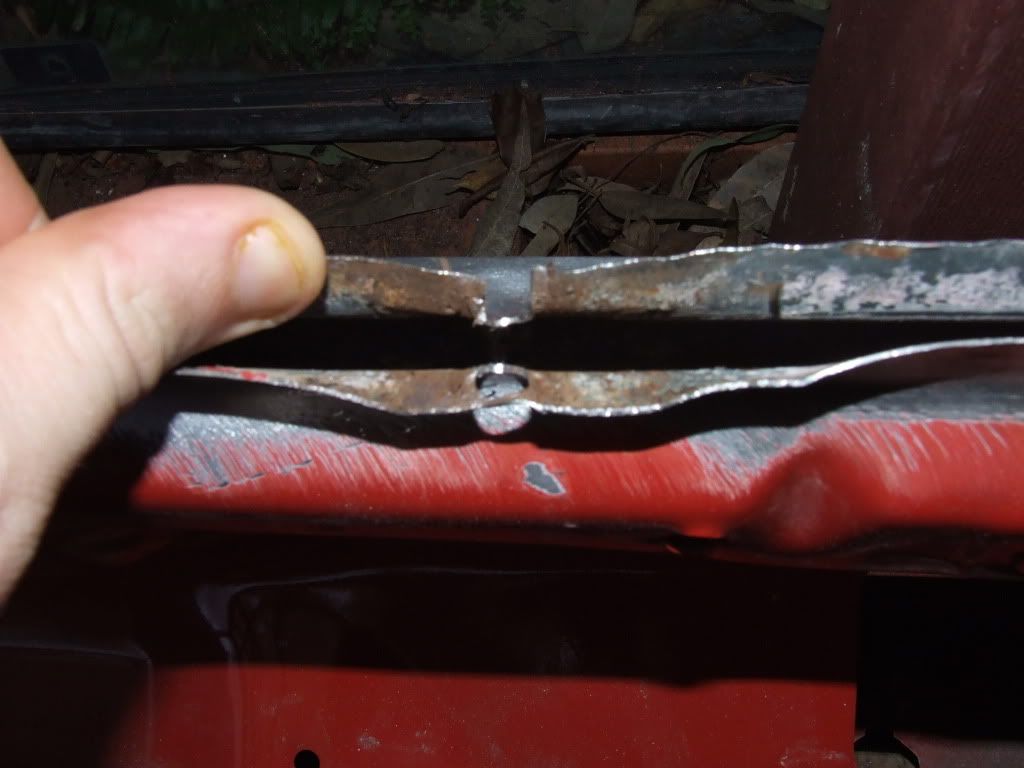
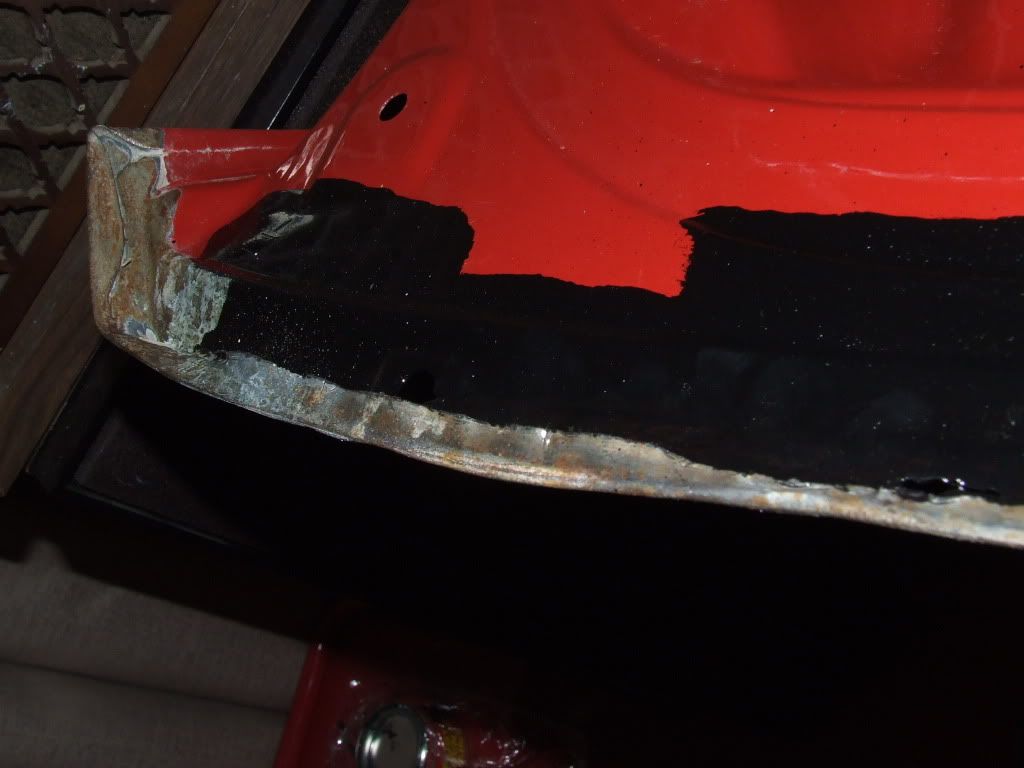
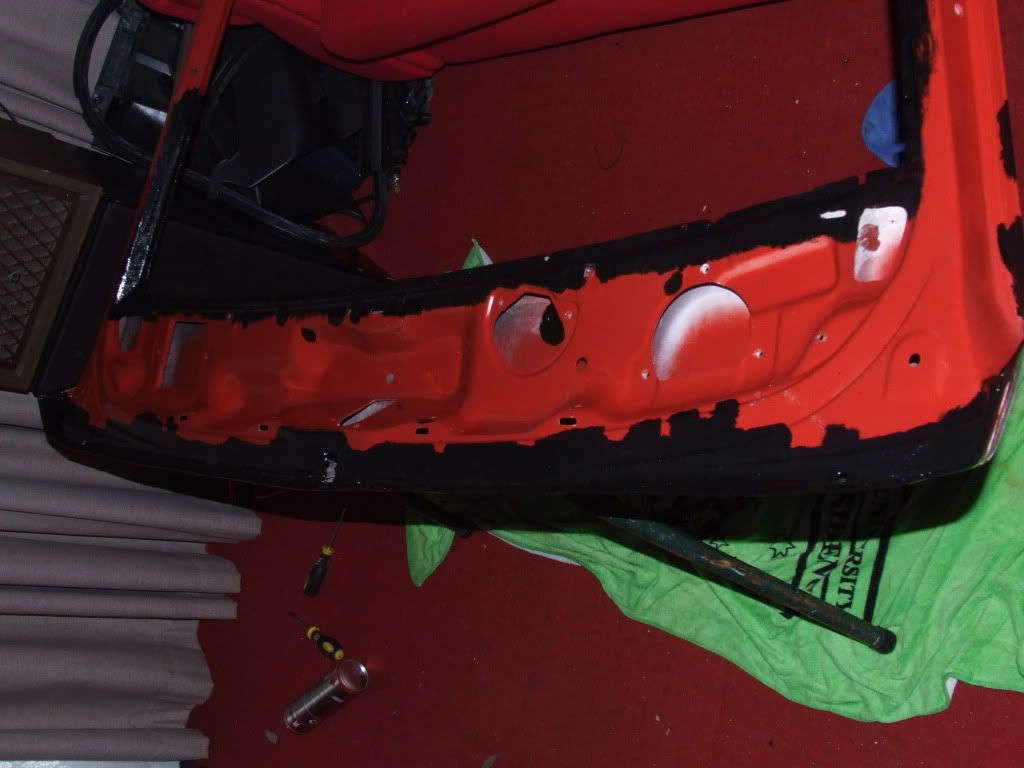
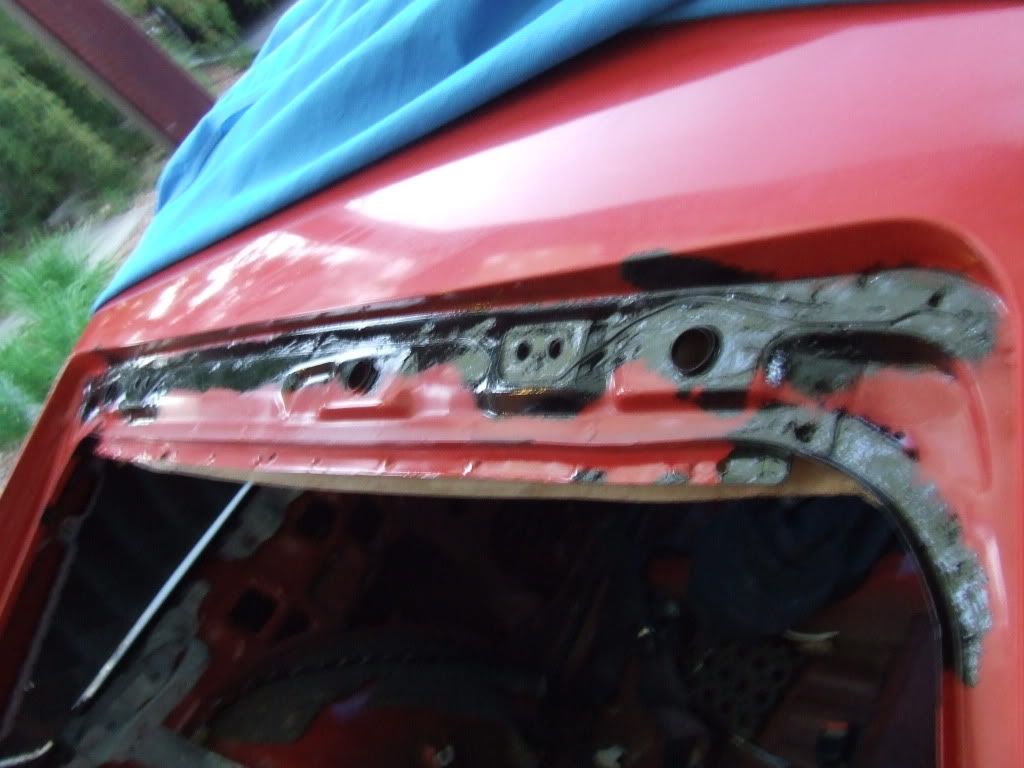
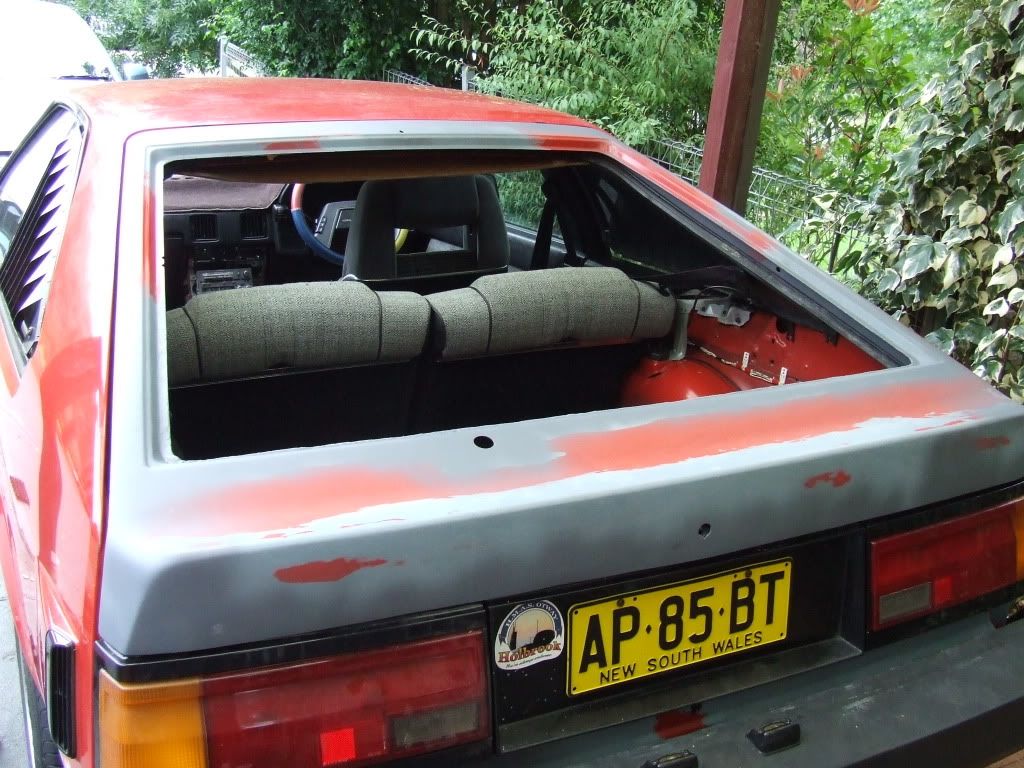
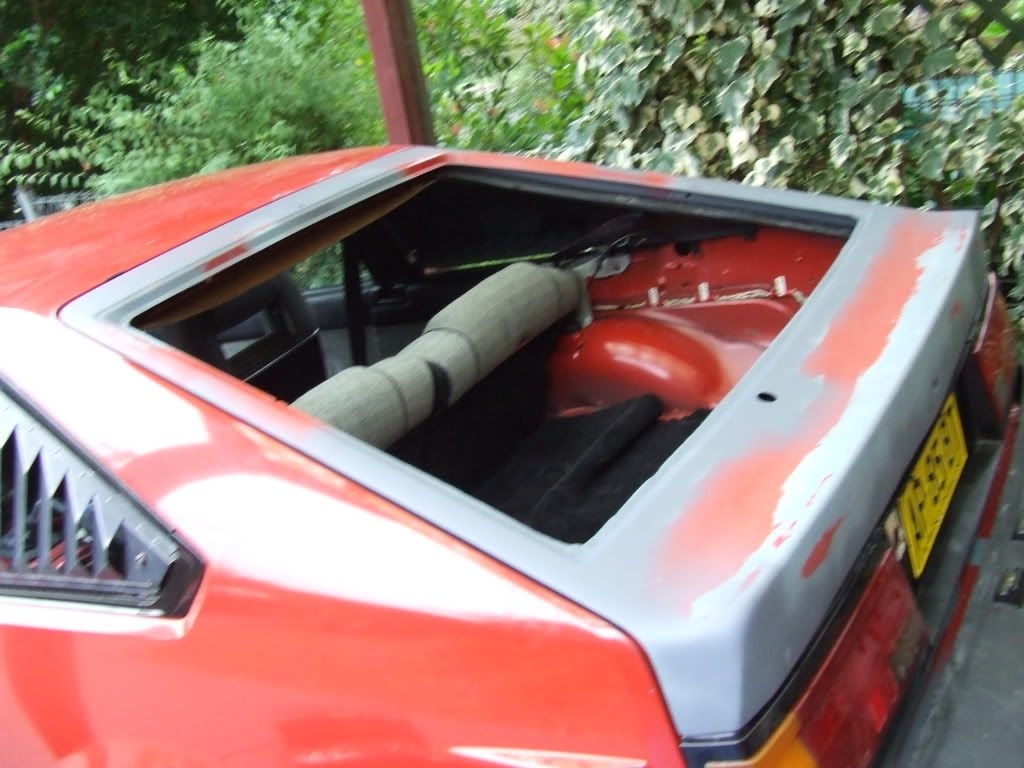
December 18th: I removed the hatch and took out the hatch glass.
![Image]()
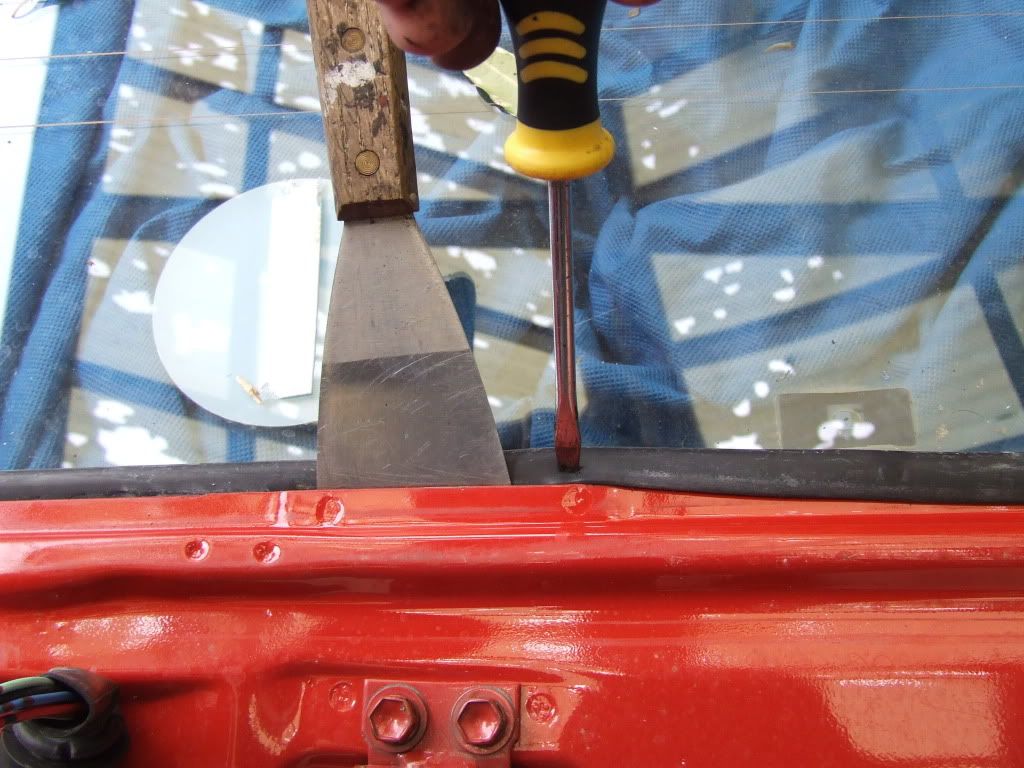
If you've ever wondered how you remove the seal this pic shows you. You get a paint scraper push the lip over the metal hatch lip and then use a screw driver to do the area around it then repeat moving around the hatch seal till its done.
![Image]()
Hatch window out.
![Image]()
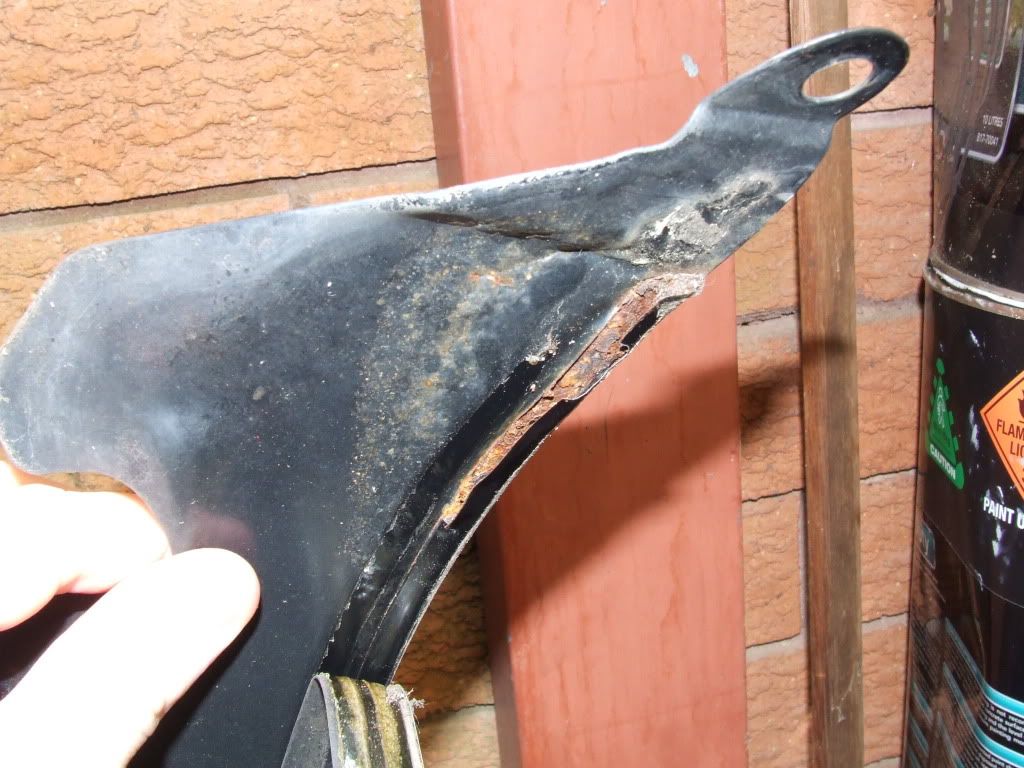
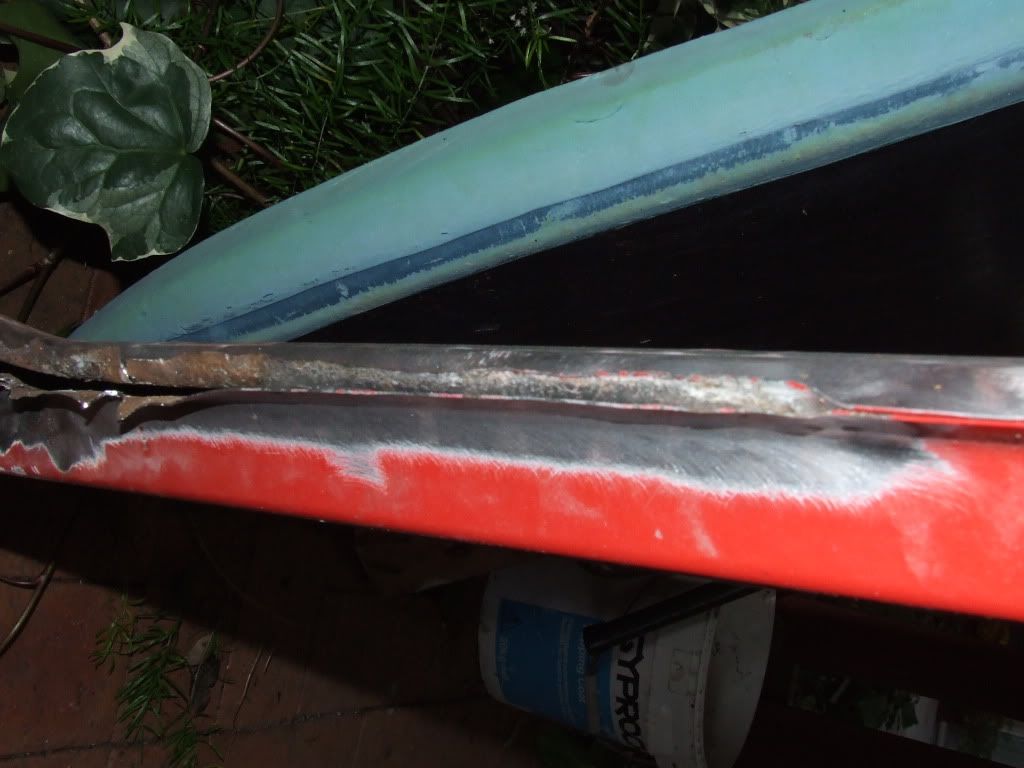
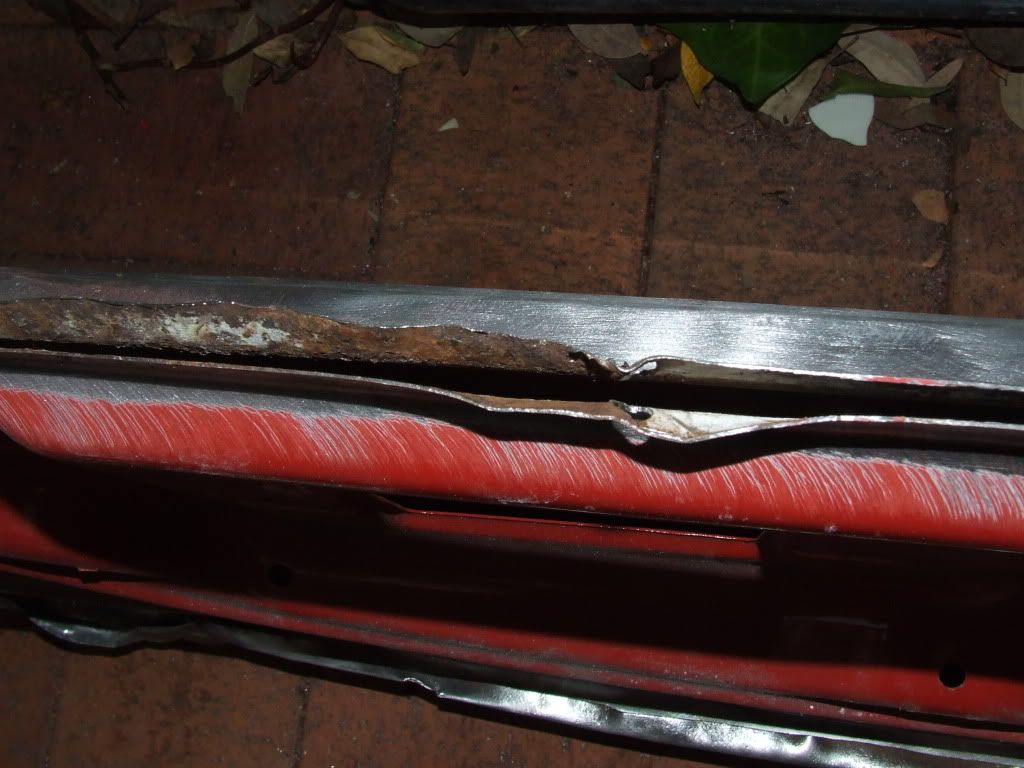
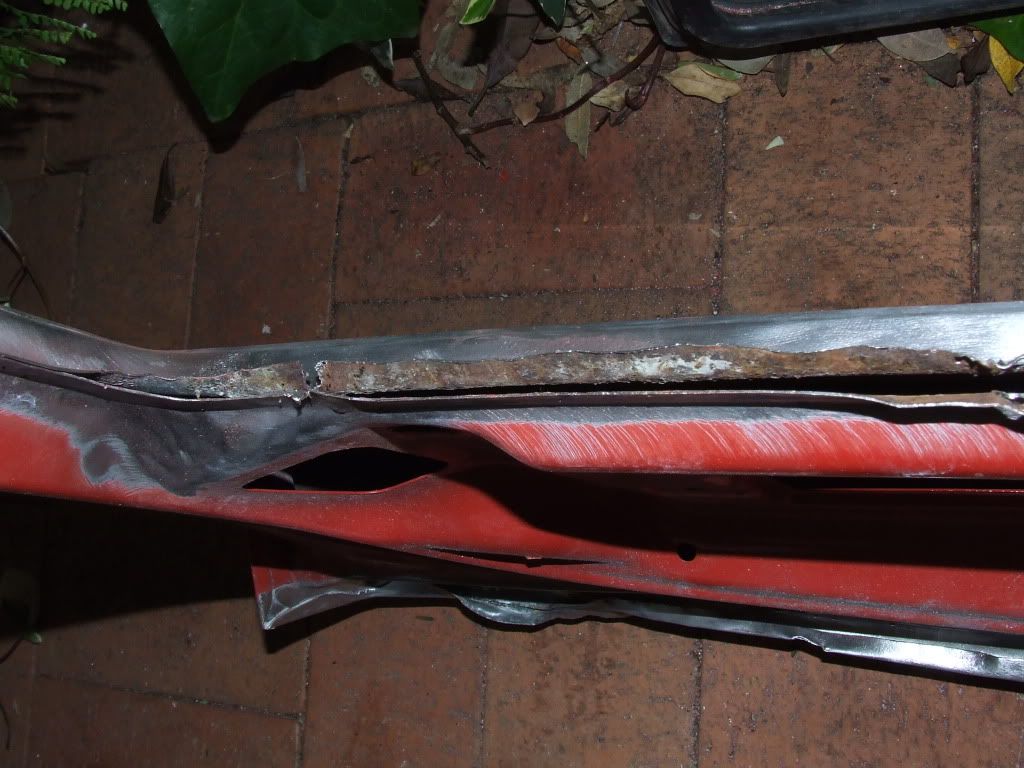
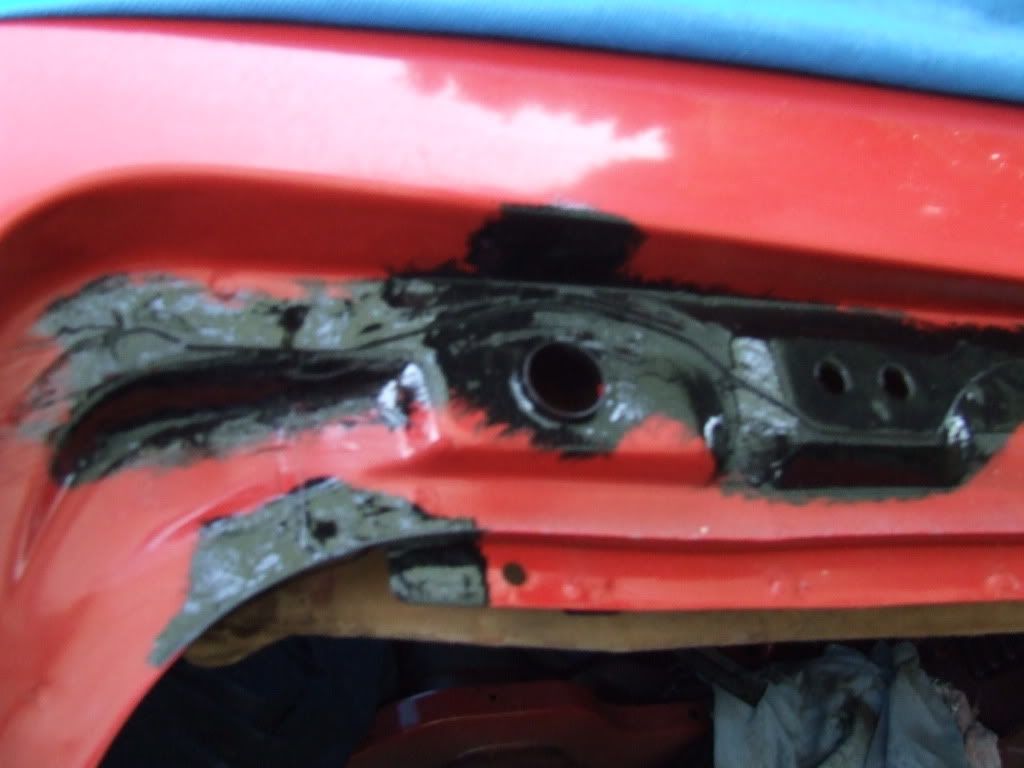
Ok guys now I am gonna call bullshit on you people that said my hatch was toast. Unless your hatches entire subframe is rusted to hell like Roscos's one then your hatch can be fixed.
Hatch rust
![Image]()
![Image]()
![Image]()
![Image]()
![Image]()
![Image]()
![Image]()
![Image]()
![Image]()
This hatch was repaired in 1996 and guess what the welds from that fix have rusted. No matter my finish is gonna be way better then a body shops finish.
Ivan a message for you your hatch is in good nick. If you get it sorted now it won't have any problems for the foreseeable future but finding a rust-free hatch would mean that since its your daily car will just rust again. So best to get your hatch fixed ASAP.
I've opened up the bottom and quatre up the left and right side seams to get at the rust and coat it. I'll just hammer then closed and then POR Patch the seams totally shut. I used small flat head screw driver. I still have a little bit of seam opening to do tomorrow.
![Image]()
![Image]()
![Image]()
![Image]()
![Image]()
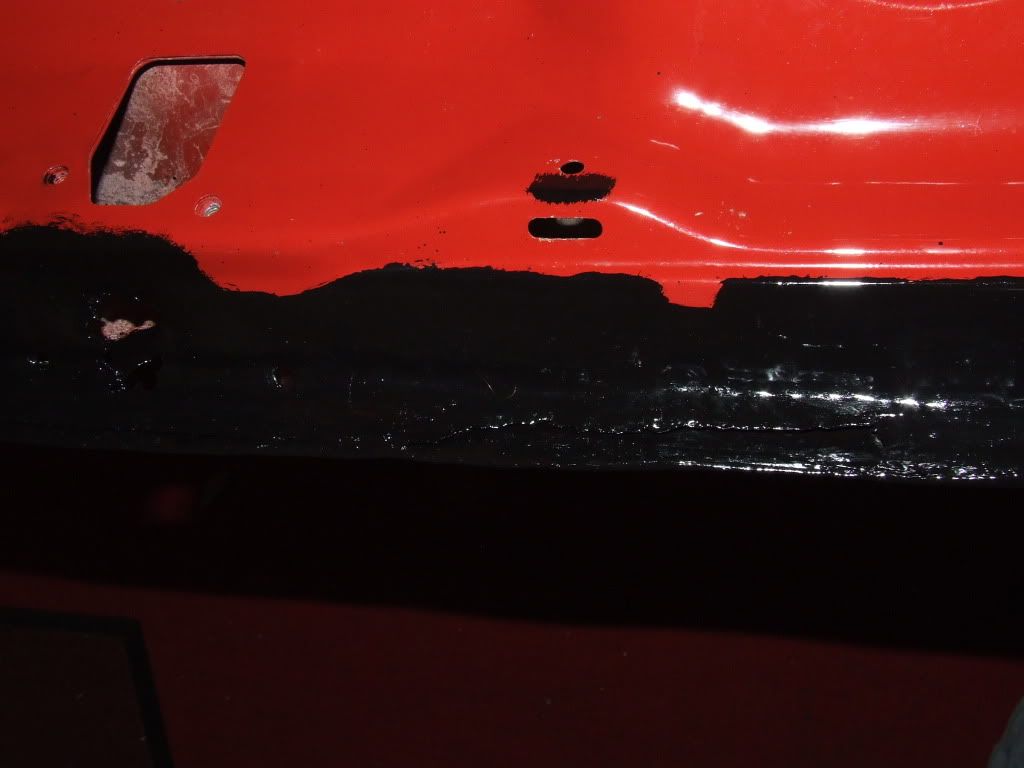
I have also POR Patched all those holes I made when removing the below tail-light trim piece support and I'll be finished on the body moulding holes very soon.
Update December 20-22nd:
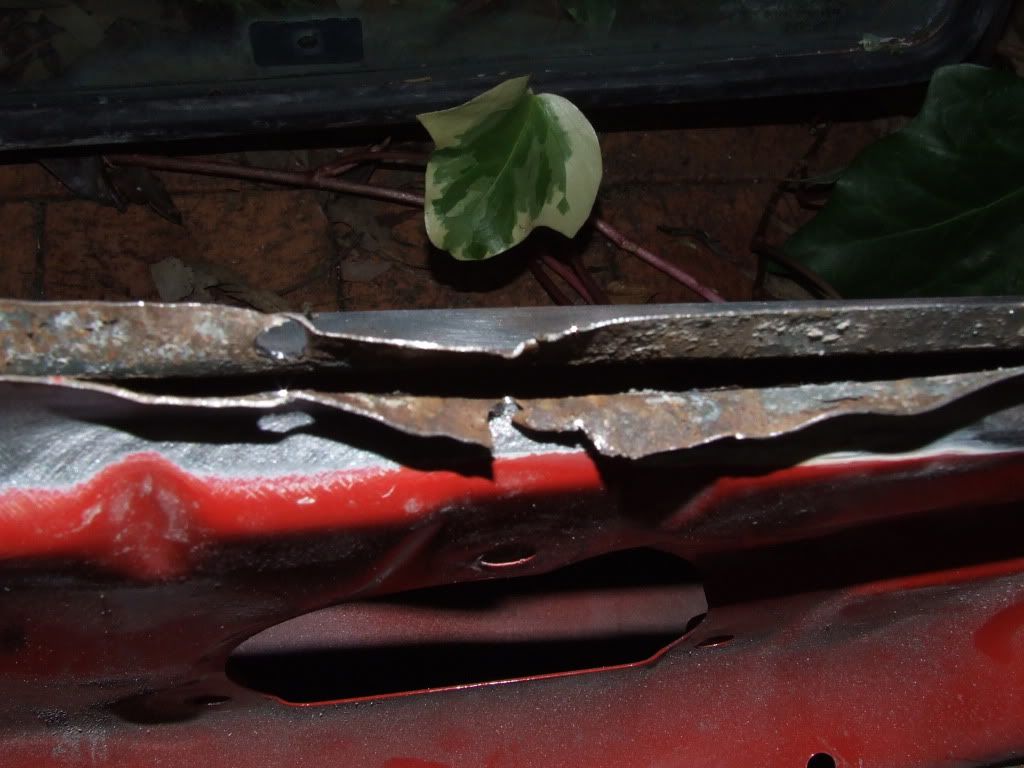
Let me put this bluntly I seriously doubt any of our cars have'nt got a smigen of rust under the folded metal or behind.
I folded back the edge far enough so I could wire wheel inside the actual edge. Think of it like when you cut a sandwich in half. The half line is the edge and I need to bend it back and splay it out so its flat and be able to wire wheel it. To say this is tricky to do on peppered metal is an understatement.
Ok this is what I found when I peeled back the metal and I had to peel back both sides in order to wire wheel and make sure I got all the rust surface which was left and right of the lock area. Remember people inside there they never sprayed red paint its only thin primer so no wonder this happend.
![Image]()
If you look in this pic above if you look on the left you'll see the rust stops when it gets close to the hatch bottom corner presuming that it has those drainage holes there. Another bad design flaw then water collects below the hatch subframe interior lock area and just collects and collects untill it evaporates.
![Image]()
![Image]()
![Image]()
![Image]()
![Image]()
![Image]()
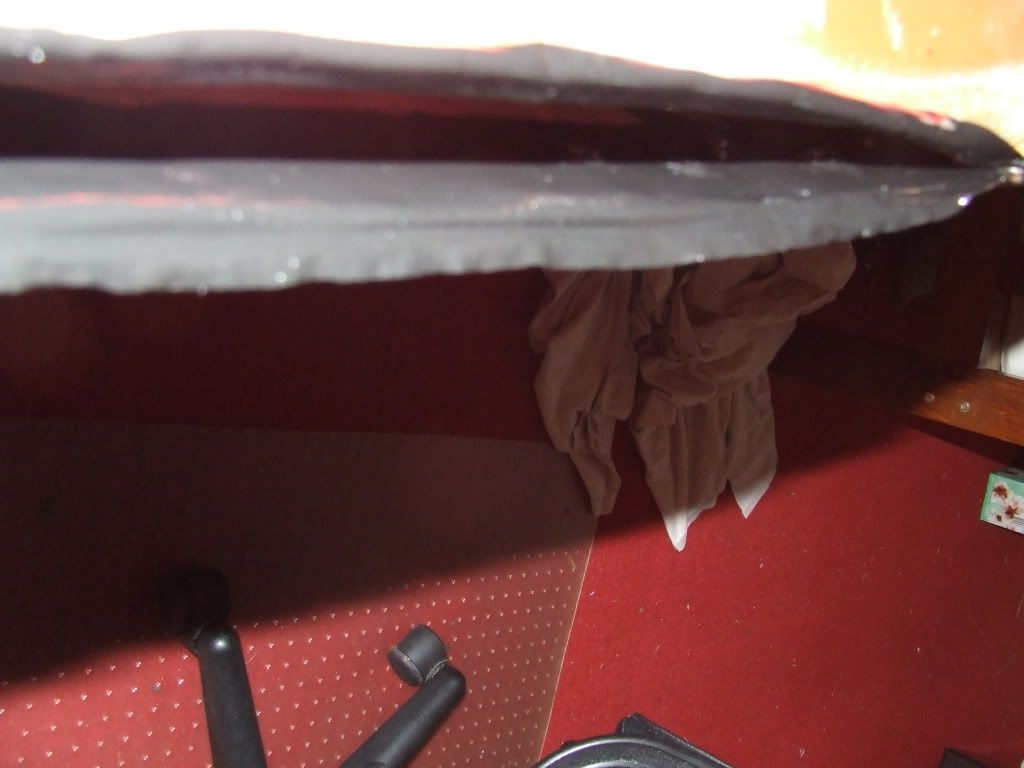
Hatch exterior edge wire wheeled u see why I had to get in that edge. I still had to do more on the other side and down the slit on both sides (I took this pic yesterday and I have cleaned up the area down the slit more today.
![Image]()
![Image]()
![Image]()
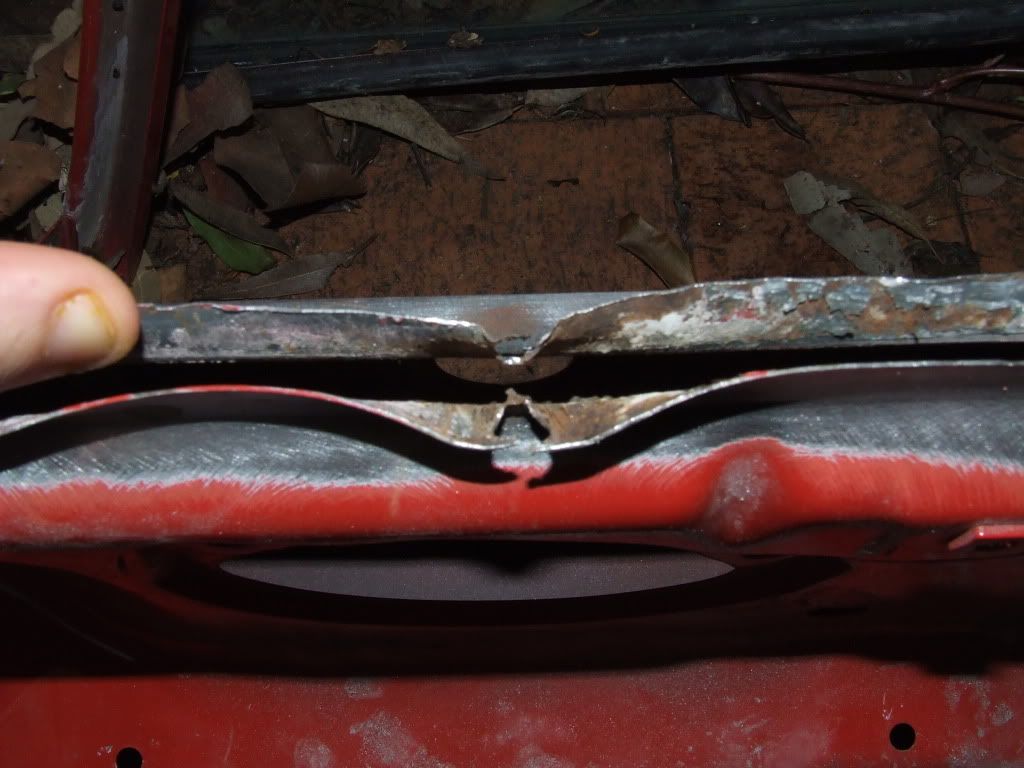
Ok update to the bottom hatch glass tray holder. All the bottom spot welds were rusted so I drilled them out today so I could seperate the metal and get in there for the wire wheel. I will be wire wheeling it tomorrow and the next day. Its tough drilling out a corner weld but it can be done. Weardly it was spot welded in the corner on the bottom left side and not on the bottom right.
![Image]()
![Image]()
![Image]()
![Image]()
![Image]()
![Image]()
![Image]()
Also it looks like because of finances I won't be painting the whole car untill sometime in May 2011. I will be painting the hatch in Jan because well its the only part of the car which needs to be totally completed. So I will get my Two tone car finally even with bits of primer and POR-15 still showing on the main body. Least the thing won't leak or rust after this for a while. I've been talking about it so long heh heh.
Hi,
People I've been holding out on updates till I was sure the hatch would go together well and since Hybrid_Turbo's a panel beater I trust his assessment but I also knew I could get it done with a hellva lot of elbow grease, a chisel, a clamp, hammer, plyers, POR-15 and POR Patch.
I can tell you I've spent about a month on this hatch its so fiddly and making sure the POR-15 is painted inside in problem areas is very difficult and hard considering when your bashing a edge back into shape it chips off little bits so you need to reapply several times to get it to the right.
I also did'nt take enough pictures of my progress wire wheeling the hatch tray edges in the above pics and the inside of the hatch. But suffice it to say there was alot of rust and I had to cut out some weak cancered metal.
Update 22nd Dec 2010 to 17 Jan 2011:
As you can see from the picture I've used POR-15 on the hatch glass tray and the hatch outer edge and inside the frame. I made sure the metal was totally clean before putting the POR-15 on. The rust in the above pics was totally gone.
![Image]()
![Image]()
![Image]()
![Image]()
![Image]()
I got the hatch edge alot flatter then in these pictures with a hammer and a chisel flatting it out.
![Image]()
![Image]()
Sorry about these pics took them at night. POR-15 one side of the edge done.
![Image]()
![Image]()
Before someone cry's out that don't look the same as other hatches the dimentions of the hatch under tray have slightly changed but I've test fitted everything and it all works. From the outside and the inside once its painted it looks the same as stock.
![Image]()
![Image]()
![Image]()
Cleaned the the metal behind the hatch edge and treated with rust converter before POR-15
![Image]()
Test shaping it back into place trust me it got alot more flatter after I kept working at it. I also cleaned off the surface rust again.
![Image]()
I got the hatch edge all in place (Sorry did'nt take a picture when it was done) then I decided well even in stock form the folded metal poses a serious problem which is that it has condensation build on the bottom hatch edge and on the folded metal bit and it rusts slowly. So my solution is I've built a thin wall of POR Patch to cover the folded metal.
Sorry about the pics again took at night.
![Image]()
Por Patch ain't cosmetic stuff its really for strength and protection so even when its painted it'll look like the surface of a besa block when I put some high build primer over it.
![Image]()
It'll look kinda like rust bubbles under the paint (I think) but in all seriousness I'm not selling this car to anyone so who cares.
Better pic end result.
![Image]()
Stage I am at now is resealing the hatch glass tray bottom bit. It had alot of metal cut out of it but luckly it folded back together well and the hatch glass gasket still fits perfectly over the bottom lip even when the metal was seperated.
I weighed up if I should pot rivet or weld the bits back together but what I learnt from this hatch is that the welds themselves rusted causing more rust.
After doing alot of research into metal bonding strength I found the best solution was some kind of adhesive substance because it seals the seams and also distributes the load. So I whipped out my trusty POR Patch and its holding harder the the damn original welds I drilled out. I am going to be using a light coat of bathroom sealant on top of the POR Patch to make sure its sealed.
![Image]()
Major lol at my middle clamp. I had only really 1 clamp that orange thing on the left and the plyers on the right were rusty so they hold their gripping power really well lol rust actually helping me. The clamp holding the plyers in the middle is so stupid it won't grip anything under 1cm because the thread stops before it can tighten on itself so I had to get creative with the middle plyers.
![Image]()
Right now I'm slowly sealing the seam with those plyers doing a 6cm section every 7 hours. So it'll be done in a couple of days.
Ok so now I still need to spray the etch primer on the bare metal sections and paint the tie-coat high build primer on the POR-15 and etch primer areas and sand it down to a smooth finish. Then it's painting time I've booked my hatch in for Febuary 7th. Toyota Gloss Black (202).
Thanks for the praise dude.
I know these cars so well to know that my hatch was pretty good condition compared to most others out there. Most people who do these restores don't open up the seems and just do the visible rust and just delay the hatch rusting for the future.
Yea I am aware about weld through primers and yes it is the best solution when the welds are done in conjunction with the primer.
This restore has only cost me about $50 excluding the $150 I'll spend on respraying it.
Small Update 20th January:
Battery Tray rust
![Image]()
I ground all the rust out and I've applied the 1st of 2 coats of POR-15 (the camera makes the paint look bad but 1 more coat and it'll look clean.
![Image]()
POR-15ed this rust hole going to be POR Patching it soon.
![Image]()
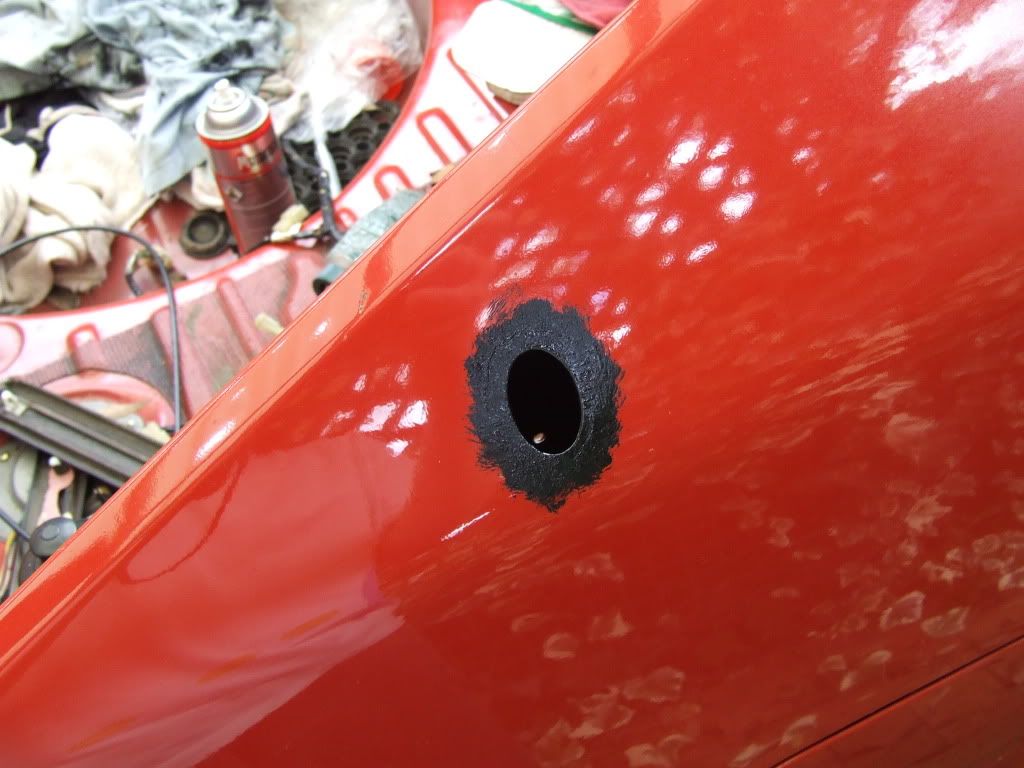
Aerial hole rust removed and POR-15'ed 1st of 2 coats done.
![Image]()
Plugged body moulding holes POR Patched with POR-15 behind.
![Image]()
![Image]()
Update 26 January 2011:
Got around to tackleing the last rear end rusty bits on the car today. There is some rust under the bonnet bolts but I'll deal with that later.
![Image]()
Top right hatch lip rusty bit gave me many lulz because the paint actually came off with the rubber gasket leaving bare rust.
![Image]()
![Image]()
![Image]()
![Image]()
So I ground the rust back and found a little more hidden in the seam then I treated it and POR-15'ed it with 2 coats.
![Image]()
![Image]()
![Image]()
I also ground and POR-15'ed the rust which was hidden under the very back of the headliner.
![Image]()
I looked real close and I saw some very light surface rust on the bottom right rear valance seam so I ground it out and POR-15'ed it.
![Image]()
![Image]()
![Image]()
I've started applying the Tie-coat primer which is POR's high build primer which is designed to adhere to the POR-15 surface since alot of other primers flare up and don't work making a real mess. All I need to do with this now is sand it flat when its painting time and the top coats will go on no problem.
Also as mentioned in the XA6X thread I made up some tail-light gaskets here is the link to the forum post with detailed diagrams how to make your own http://www.toymods.org.au/forums/showpost.php?p=1280152&postcount=2648
![Image]()
Update: January 6th 2011
Well Sydney's heatwave combined with living near Penrith (the hottest place in the southern hemisphere) left me with little motivation to take photo's since I had to paint, sand and put my interior back together.
Finishing up last rust spot
![Image]()
![Image]()
Little bit of bear metal was scraped off wasn't rusted but may as well POR-15 it.\
![Image]()
![Image]()
I sealed the bottom window tray seal with bathroom sealant which worked very well.
![Image]()
![Image]()
![Image]()
This is how my room looked at nearly its worst. I just couldn't do all this outside with the heat and not be able to work at night.
After many hours of sanding I've gotten it finger smooth and I've decided its at the stage I find acceptable to take to the painters.
![Image]()
![Image]()
![Image]()
![Image]()
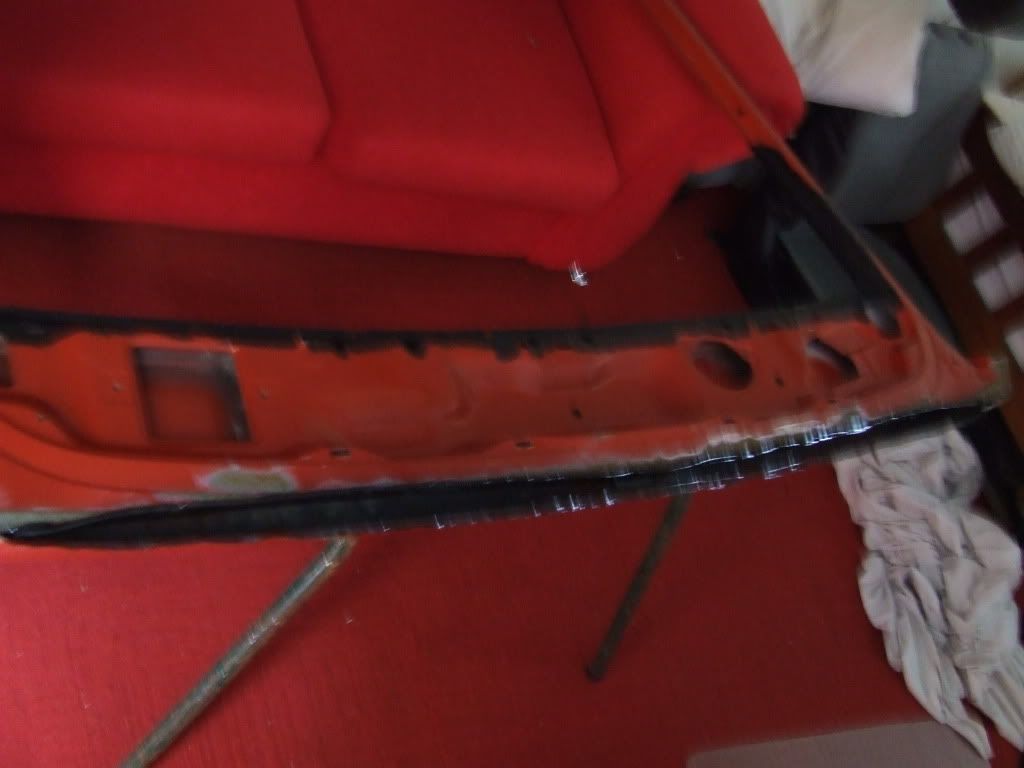
Interior mostly put back together trust me after 2 months I was itching to drive a 5 speed 21R again.
![Image]()
![Image]()
It's going to the painters on the 7th of February and the hatch is only being done for now and the rest will be done in a couple of months. I'm going to get them to put another coat of high fill on it before they 2k it.
Currently the hatch is at the paint shop and is coming along very well. The rest of the car will be resprayed in about 4 months in the original red Toyota paint code.
Hi,
I'm actually a big frequenter of Celica-GTS forums, Toymods and Celica-Supra. I own a 1982 RA60 with the 21R-C engine. I have not posted here because I made the conscious decision to get my RA60 over a MA61 because I like the RA60 much better in terms of looks but yeah that's my small minority view.

Cars done 130,000km's
Here a picture sideshow of what I've done to it since I got it ages ago.
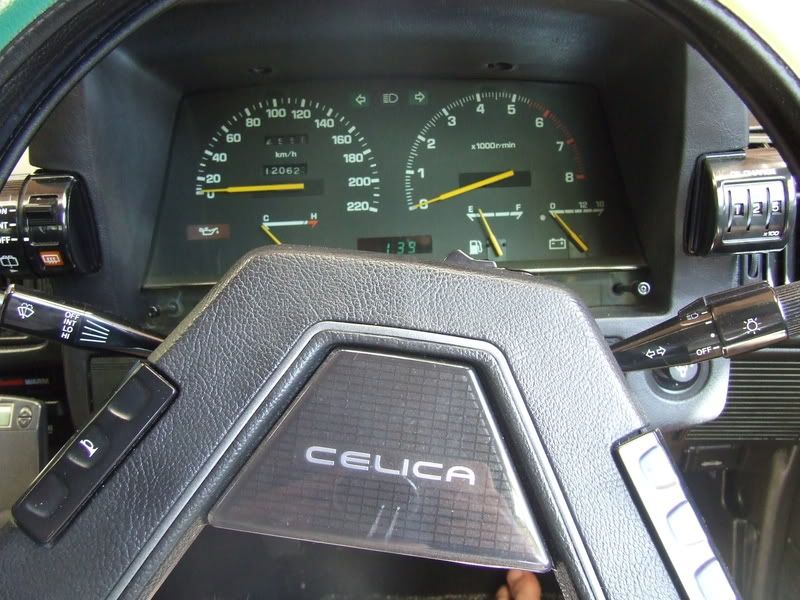
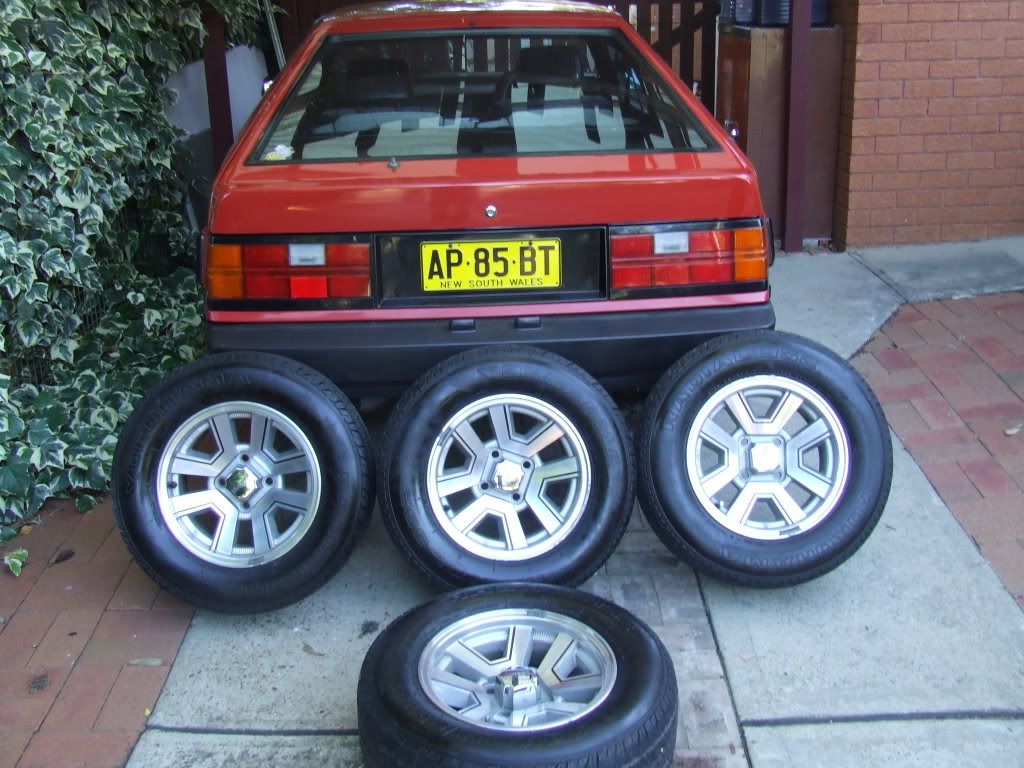
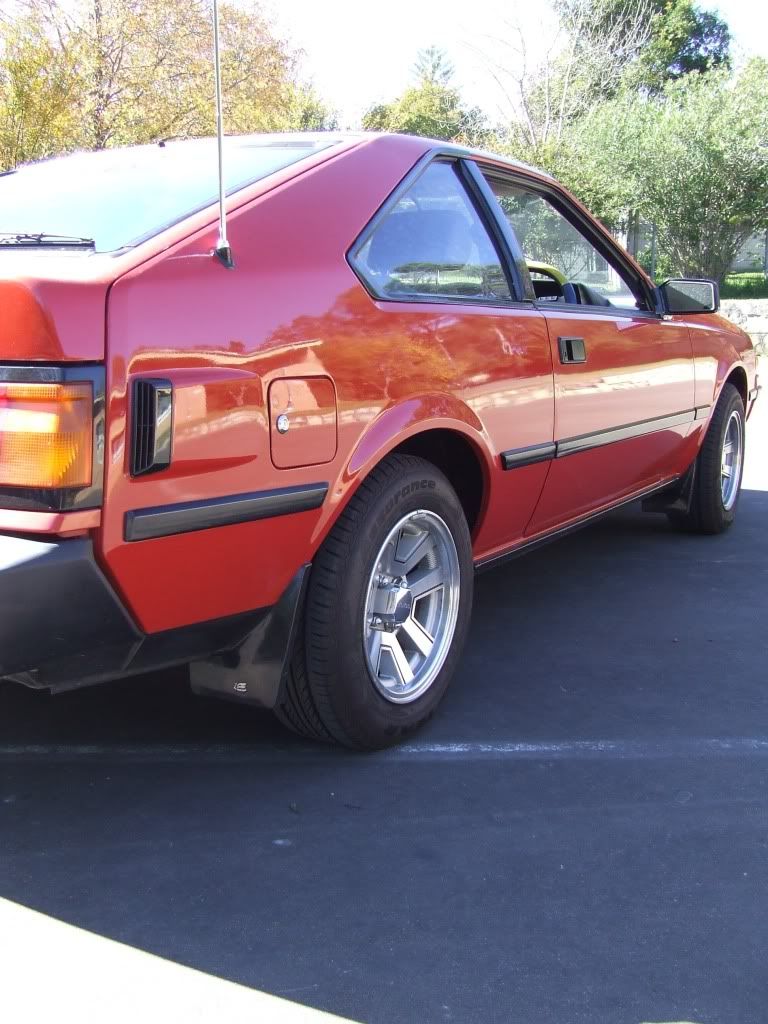
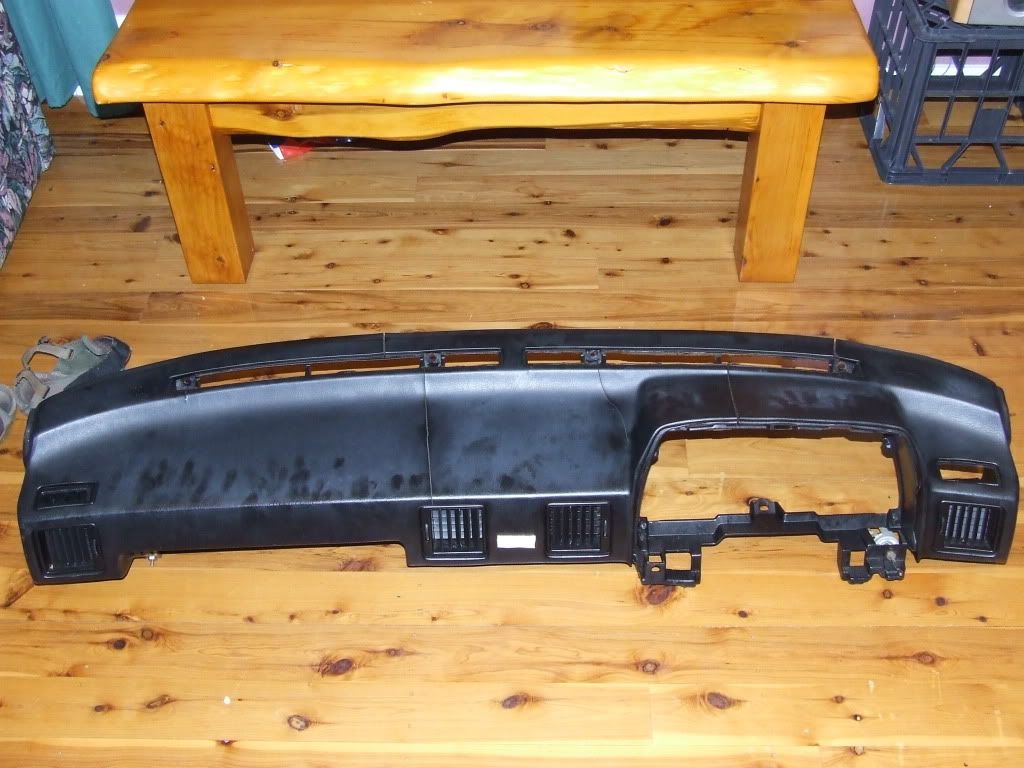
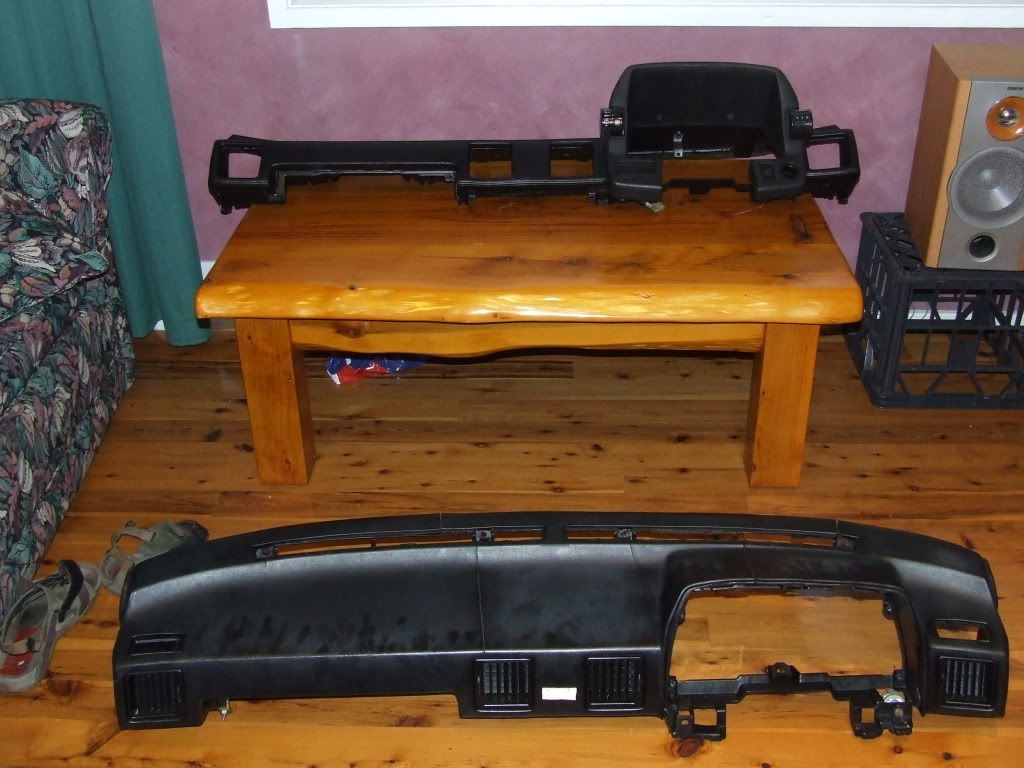
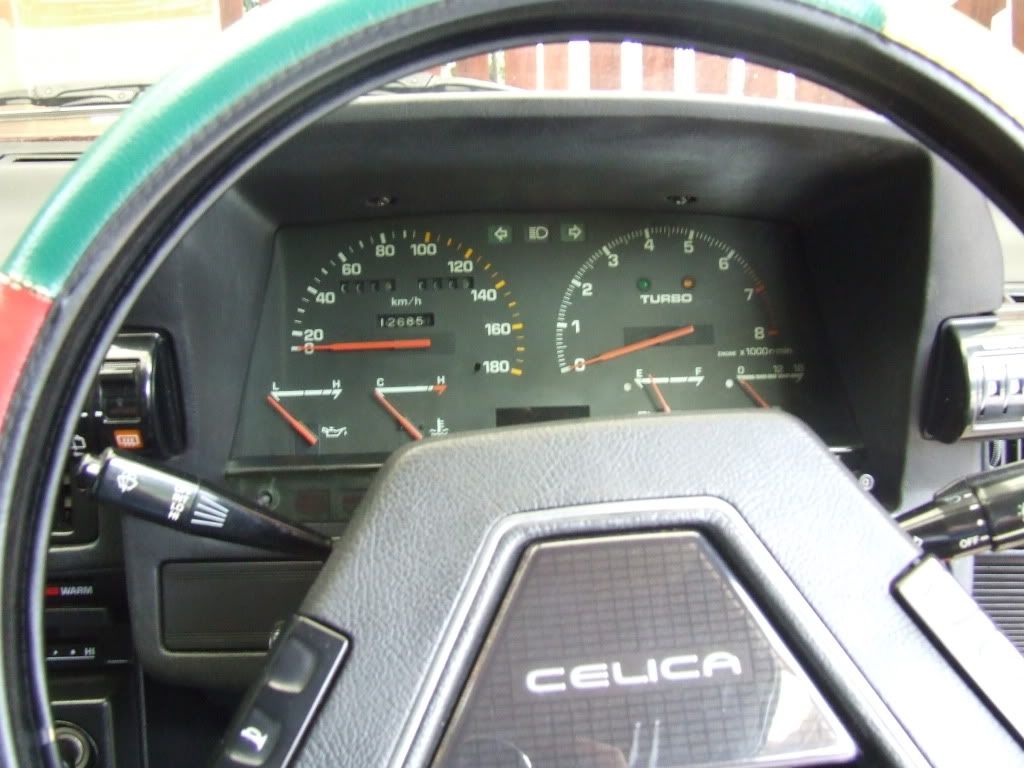

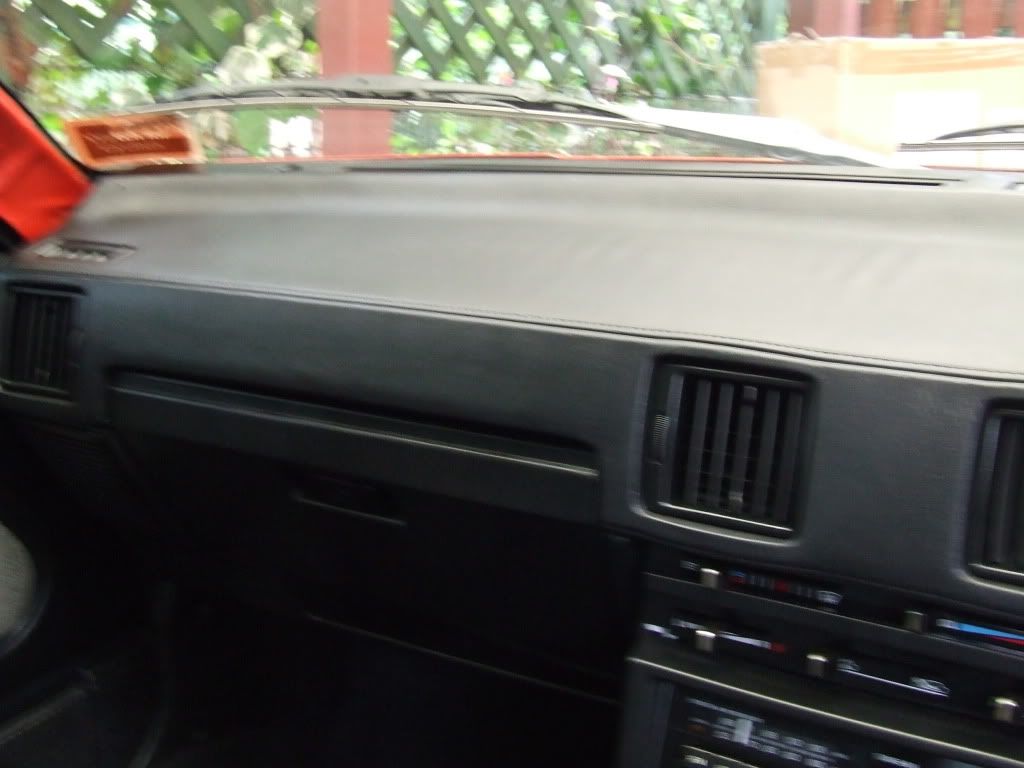
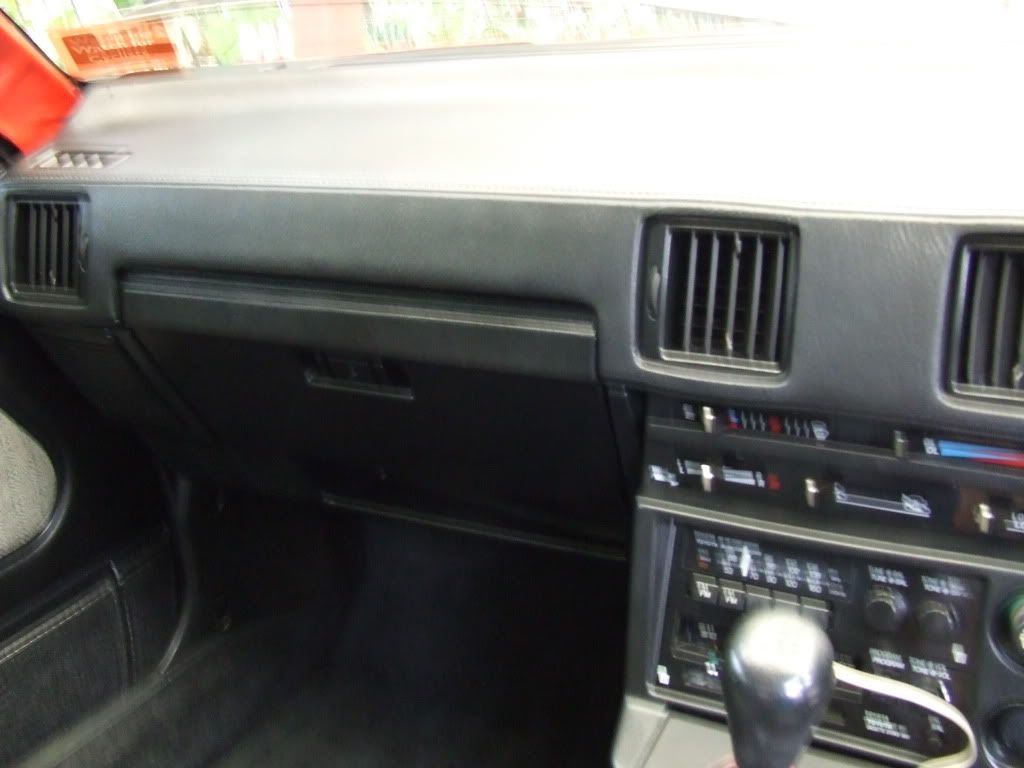
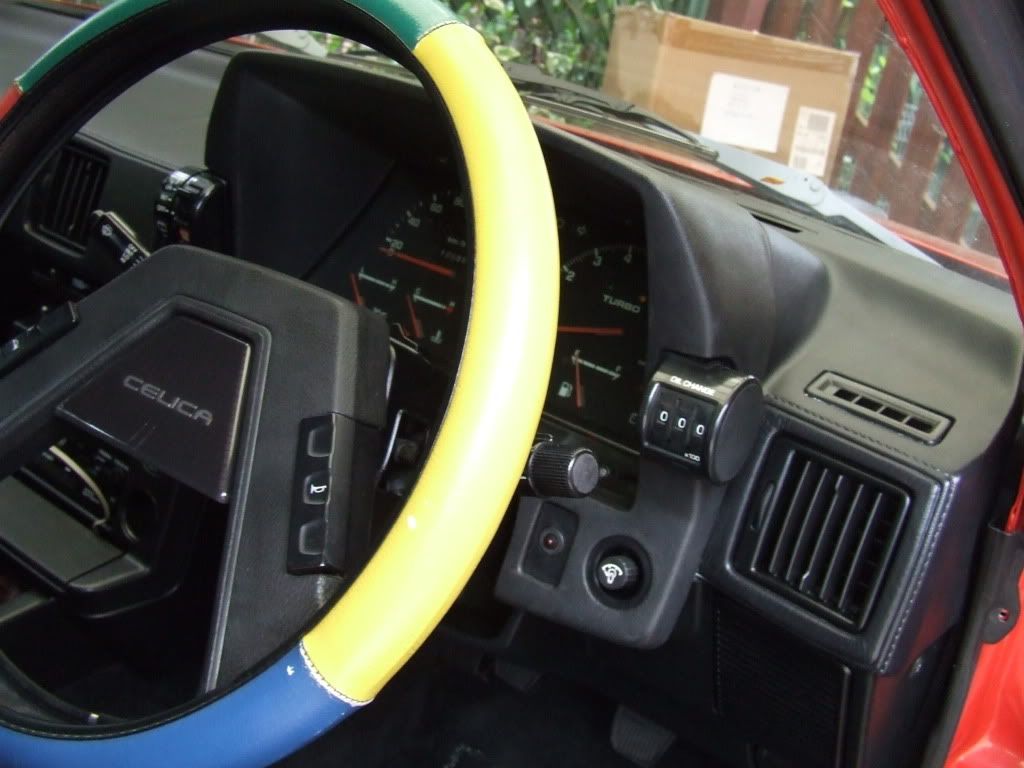
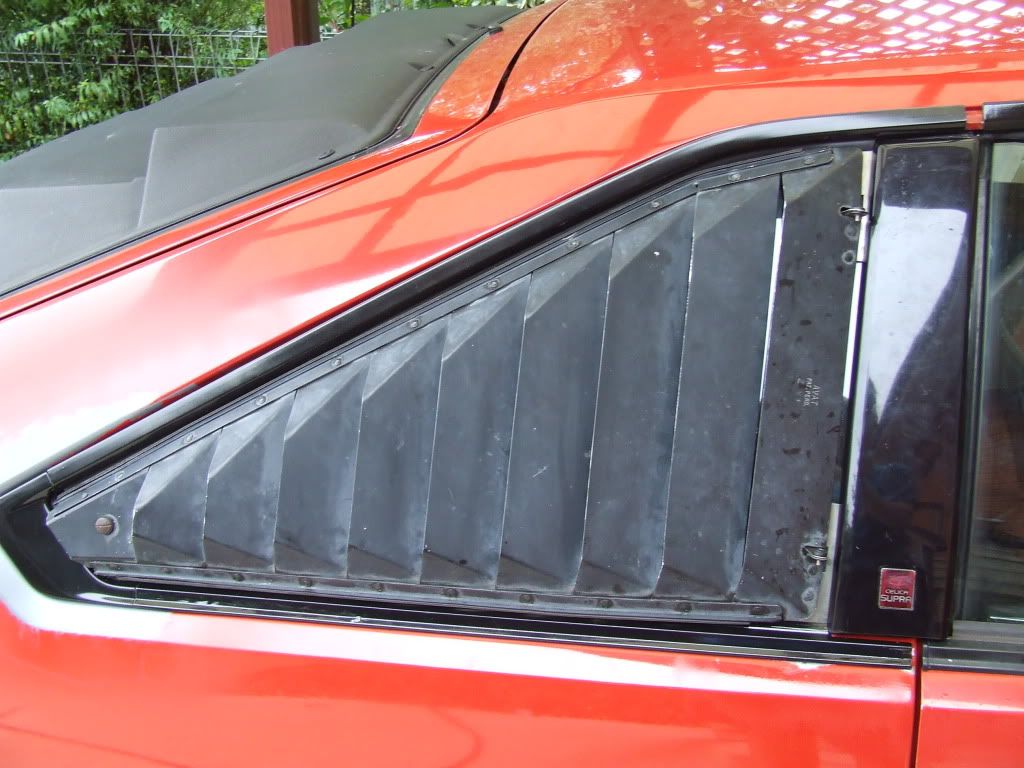
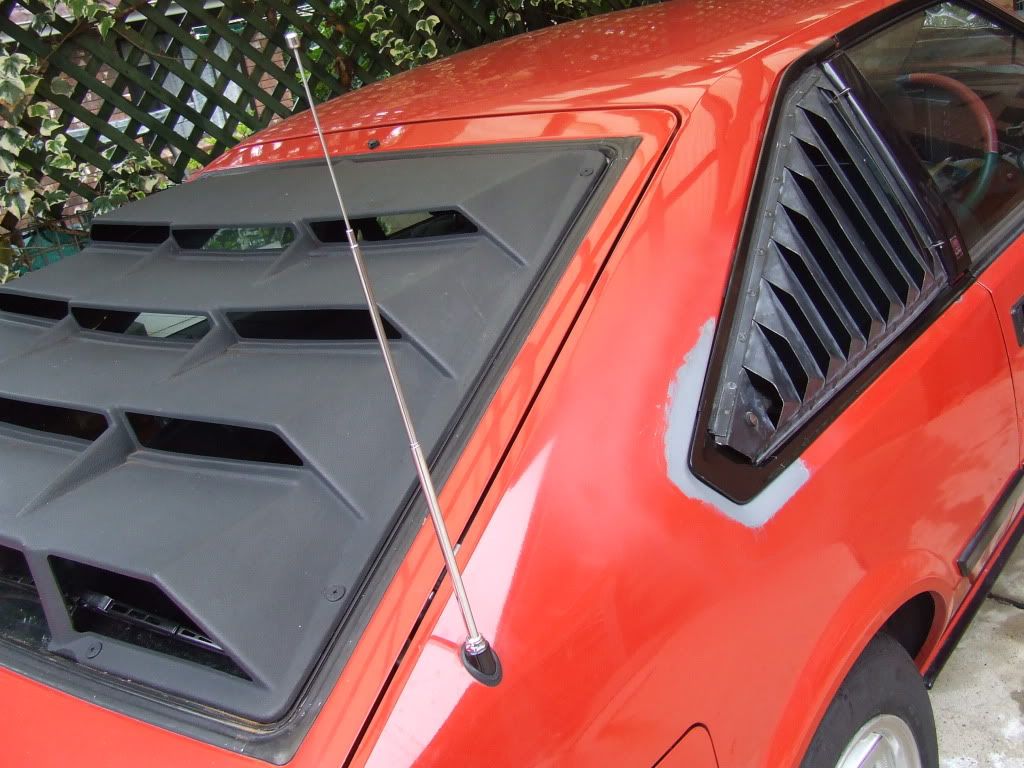
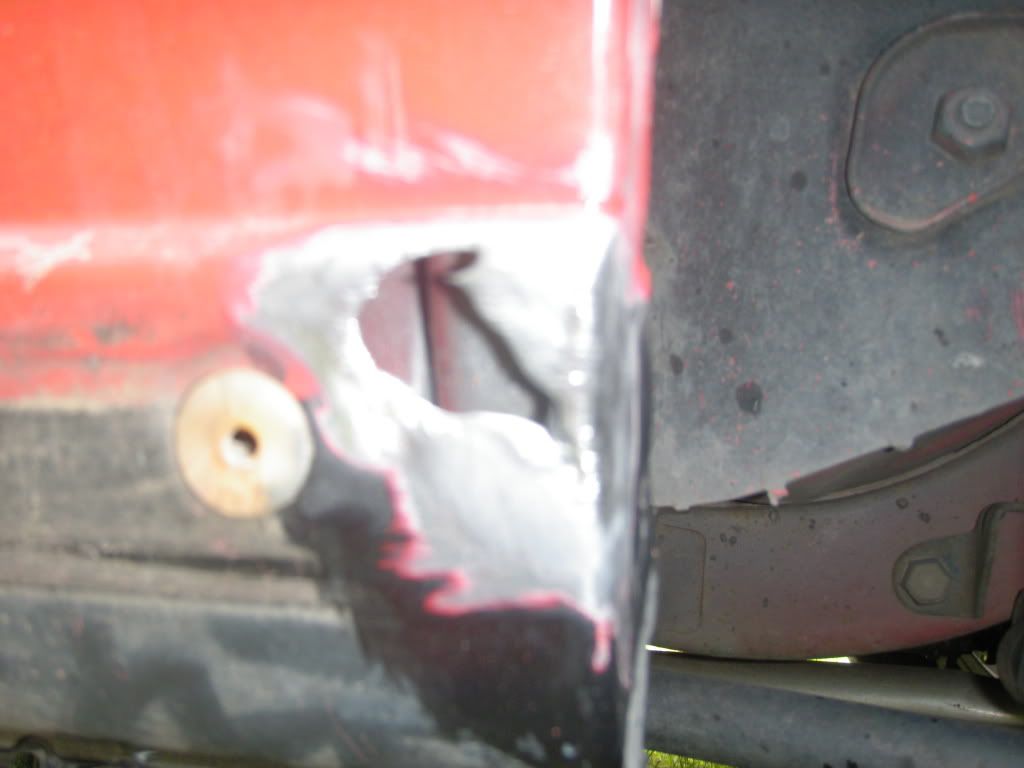
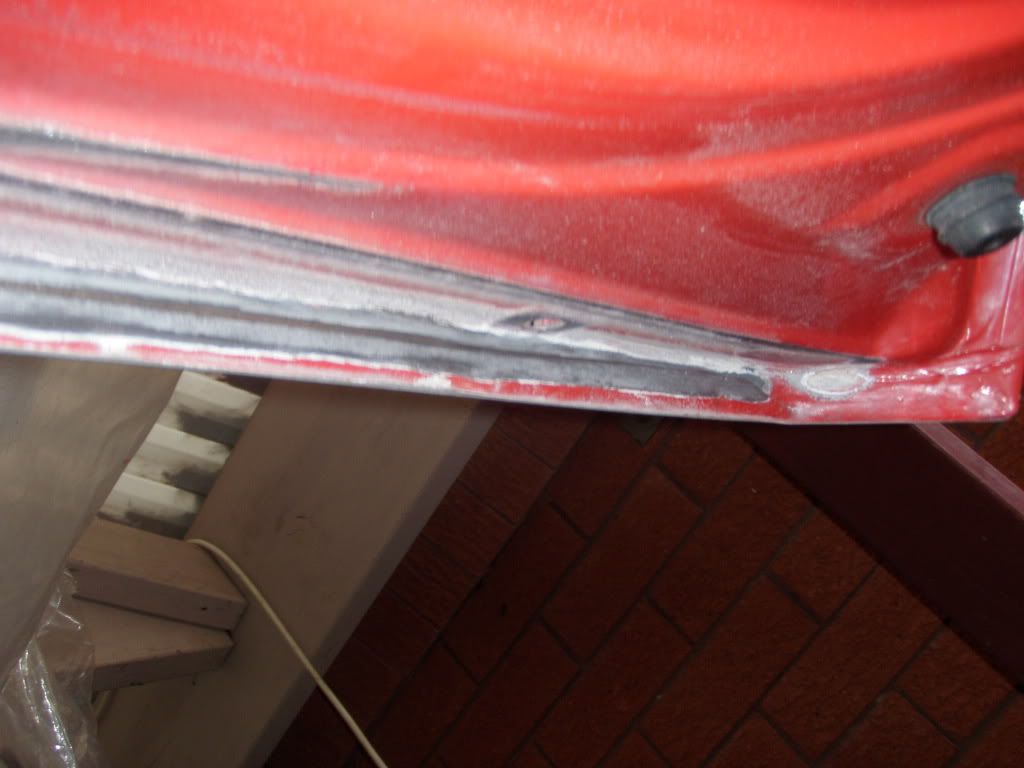


As you can see I've done alot: Uncracked MK2 dash swap, wired up a rare TA63 cluster (was tricky and not fun but it's awesome now), Rust work is a bitch the car was rust free but yeah it's happening again been wire wheeling and primering and clear coating the bare metal, I will be dropping the hatch glass out and attacking the rust under there at the end of the year and will respray the entire car when I'm doing that", USDM metal side louvres (rare as anything and no I'm not selling they were hard enough to get and I will be spraying them when the entire car gets done btw thanks Supradad) also in the picture it looks that they don't fit right well I've solved that there is no gap between the b pillar and the side louvre, Aussie Aunger brand rear louvre, Celica-Supra b pillar badges (yea I know sorry but those stock ones I hated and well I know it's not a MA61 be happy), I felt kind of bad cutting into the paint to remove the rust and leaving ugly primer and metal but I reckon it's better then leaving it.
Ok I am transplanting my Toymods forum thread below now:
Ok pics I did not take pics of the hatch because its a nightmare of bare metal lol.just realised youd updated this after i sent the PM.
i wanna see this "ghetto blaster
curious, what will you use to make the rubber seals?
I get so many people telling me it looks like "That back to the future car" or as us car guys know the mighty DMC Delorian.
I did'nt get around to the rear tail-light seals yet. I'm looking into it next Friday.
I really like this crown radio because even though it has a microphone input they configured it for stereo.

Alright Update: Operation Rust WAR!
Ok so 1st up after alot of reading I decided to use the POR-15 anti-rust system for my car look it up its the best product on the market period. They do say its best applied by brush and well that's totally right but its not neat but then again its a under seal so you do put high fill primer and then top coat over it. U should buy alot of 68c brushes from bunnings because this totally ruins a brush in 3 hours and putting it in water trying to clean it just makes it set harder and quicker lol POR-15 is awesome.
This is what I've done the last 2 days.
In January I posted areas that I had wire wheeled rust out of well now I'm getting around to getting ready to paint them.
1. Passenger side rear wheel arch left bottom coated with POR-15 dries super hard with a ceramic hard glassy finish. Just needs some high-build primer and then top-coat.
2. I finally got around to taking off my windshield cowl for the 1st time and I knew it had rust since I got the car but it hid it well.
I wire wheeled the shit outta it then I did the three step POR-15 process.
Rust converter:
POR-15 on
3. The bonnet bolt area rust
I did'nt want to take off the bonnet and hinges to do this because well I have a feeling the hinges are also body bonded and fused into place.
POR-15 actually encourages you to use it on surfaces you just use rust converter on and not hit with a wire wheel and well I did this here and it lived up to what it says it conveted the rust to iron oxide totally step 2's metal ready is really really strong for converting rust more powerful then other converters I've used.
After rust converter:
POR-15 trust me after the recommened 2 coats of this stuff its so hard and so grippy that It's not letting water in the spot for at least 20 years
These pics were taken before it has set and before the 2nd coat.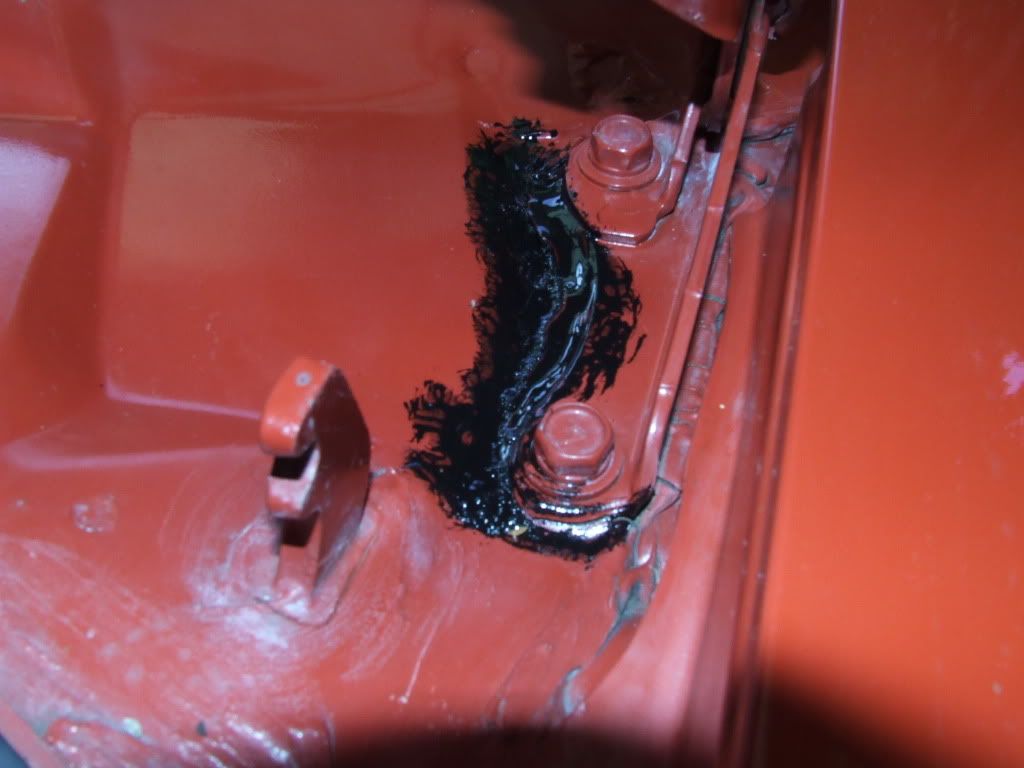
4. The MA61 seats I got off Ivandude who got them from oldjap well I fixed them up.
Airpump was missing the stopper and holding your finger over the hole ain't cool. So I searched around my garage for some fix and I cut a small piece from this fibreglass besablock guide of about 1.5cm and shoved it in the hole then I put this blue rubber thing over the top and I reckon it looks good and more importantly it does'nt shoot out like a cannon ball like other plastic pieces I tried did. I reckon it looks kinda oem as well.
Then I took off the backs of both the seats and fixed the sagging seat pockets.

I followed the guide on celica-supra.com
http://forums.celicasupra.com/showthread.php?4222-Saggy-storage-nets
The front seat has a small rip in it but I can repair that pretty easy and they need a VAX. I will be ordering some replacment chrome seat trim (totally cracked) from an american supplier.
I also had to Macgyver up 3 new screws for the seat backs I'll paint them black at a later stage. I positioned the screws so the stock ones I had left are facing outwards so when u open the door u don't notice anything different screws. Lastly I need to get the plastic push rear access button from my RA60 passenger seat on these MA61 seats. I'll be putting the seats in soon.
Update 22nd November: I removed the interior to clean the carpets and seats. I also checked for rust and I found a 1964 2c piece under back seat and a 1984 $1 under the front seat carpet.


Update 6 December: I did some more rust work in the last 2 days because it was only overcast yesterday and today was the same but luckly little rain. Its been monsoon season in Sydney for the last week and another week to come it looks like screw u rain!
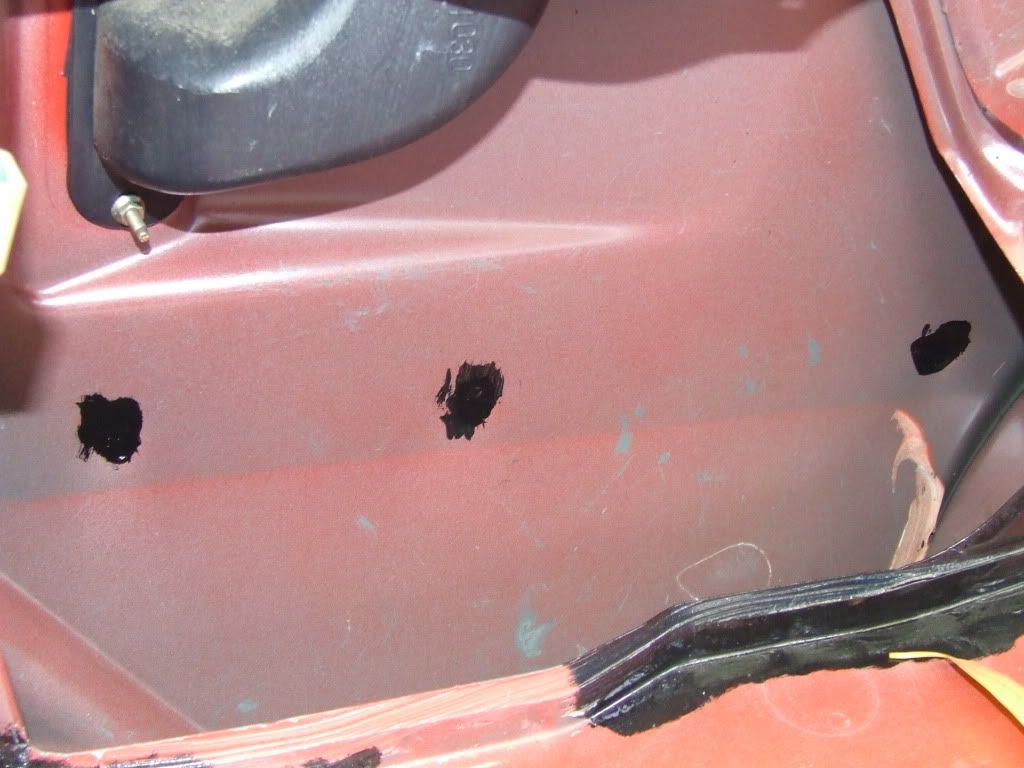
1. Back left interior corner: With this one really had to be sure the leaking left tail-light gasket and the left corner of the hatch leaking had'nt caused rust to start under the mountain of soft filler in the left corner so I got to it with wire wheel and the flat head screw driver. I found some under there which I wheeled and treated.
This 1st pic was before I cleaned up the metal in the area.
After 2 coats of POR-15
2. Water collecting area: I also coated the area where most of the leaking water collects to prevent rust occuring if I do have leaks in the future.
3.Hatch lip lock area. I am going to be building this back up with POR-15 filler (don't worry its not ordinary filler its strong!)
After 2 coats of POR15
4. Trunk Valiance seal (I think its called that)
After 2 coats of POR15
5. Back right interior top corner
Kinda weard spot since the tail-light gasket was'nt leaking there but its fixed.
After 2 coats of POR15
There is still work to do building up the hatch lip with POR Patch and I'm removing the hatch from the car this week. I need to work when its not raining so I only have a few hours each week to work thanks to Sydney weather. But overall I'm on track for the respray in 2nd week of Jan 2011.
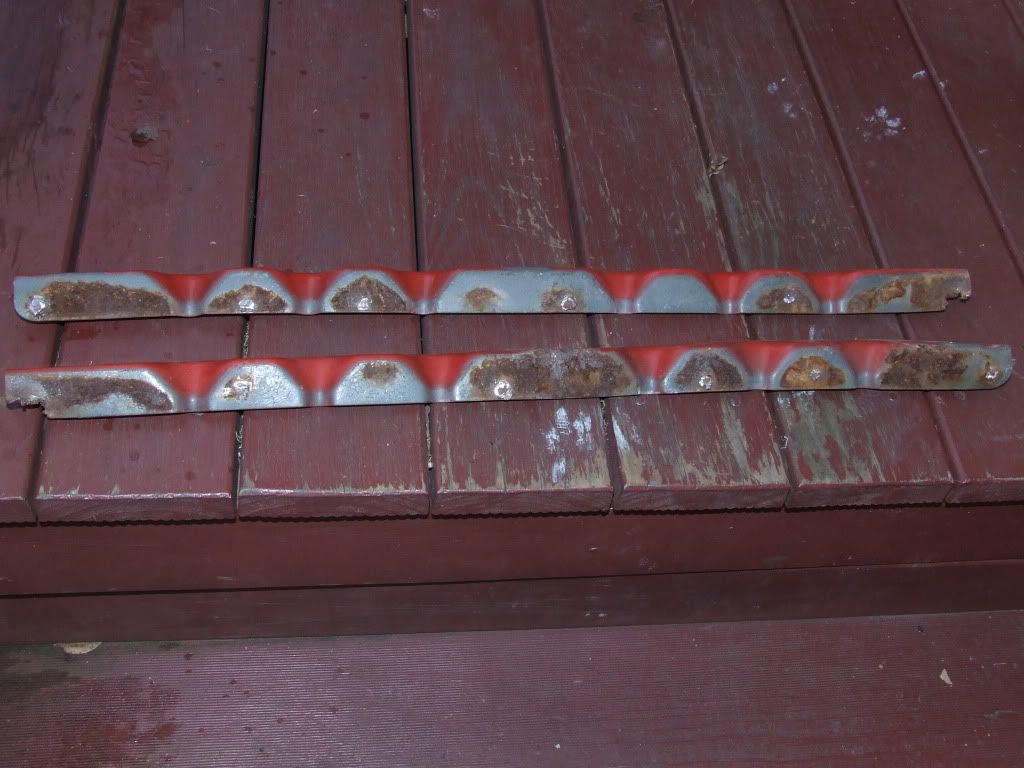
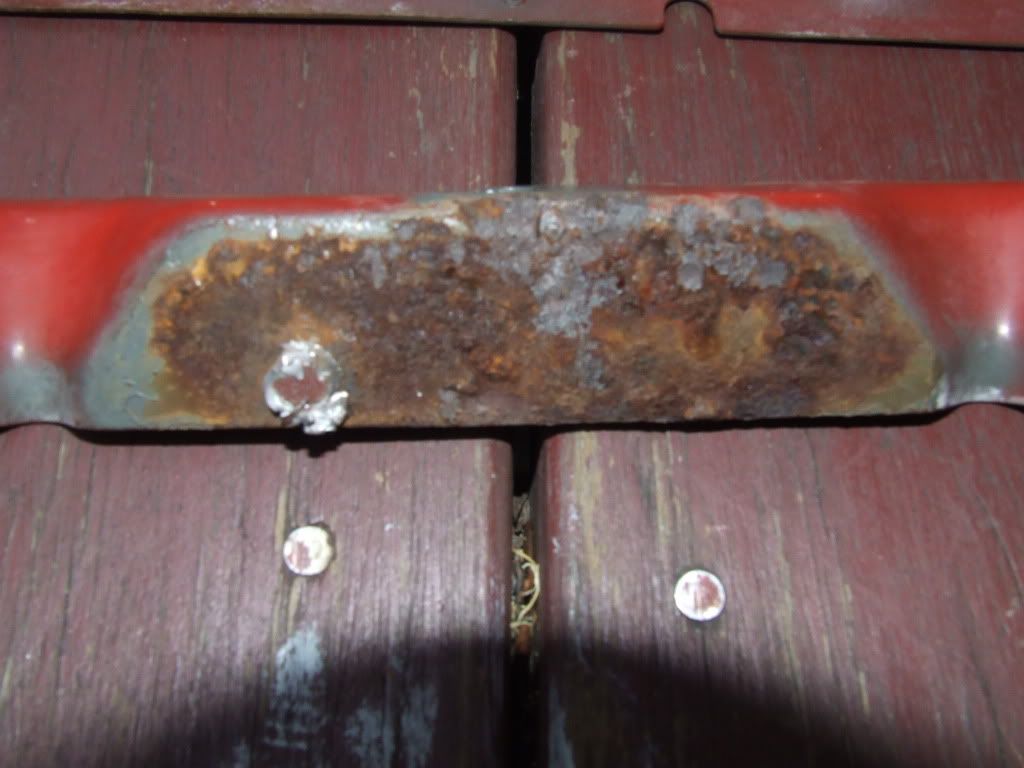
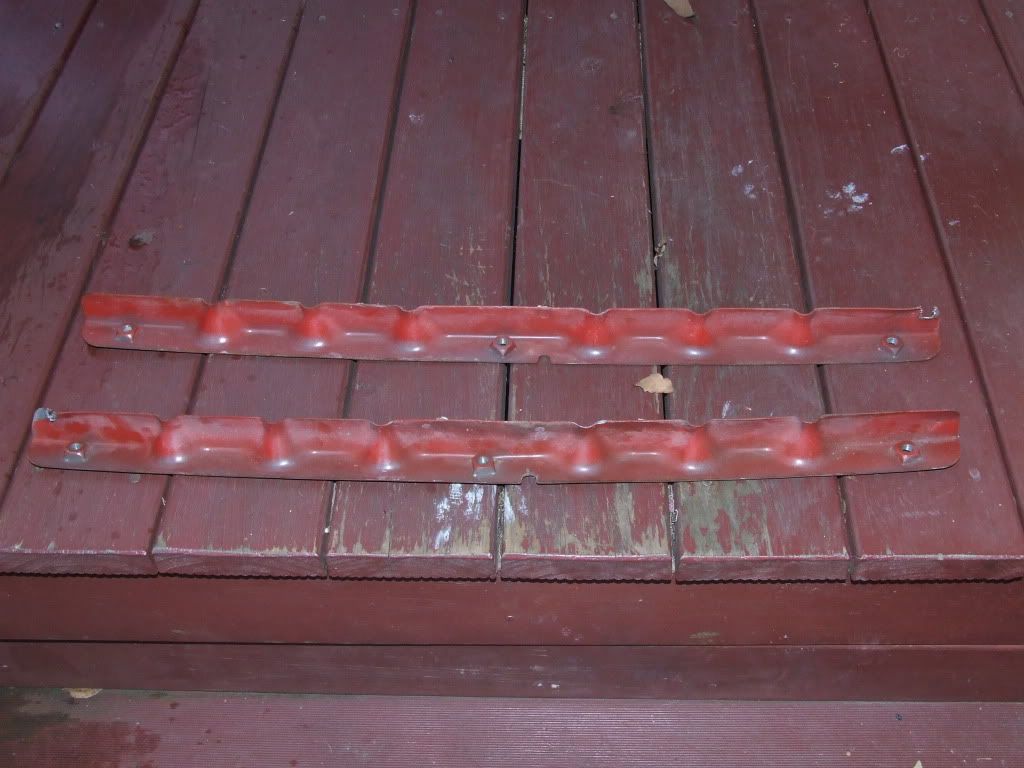
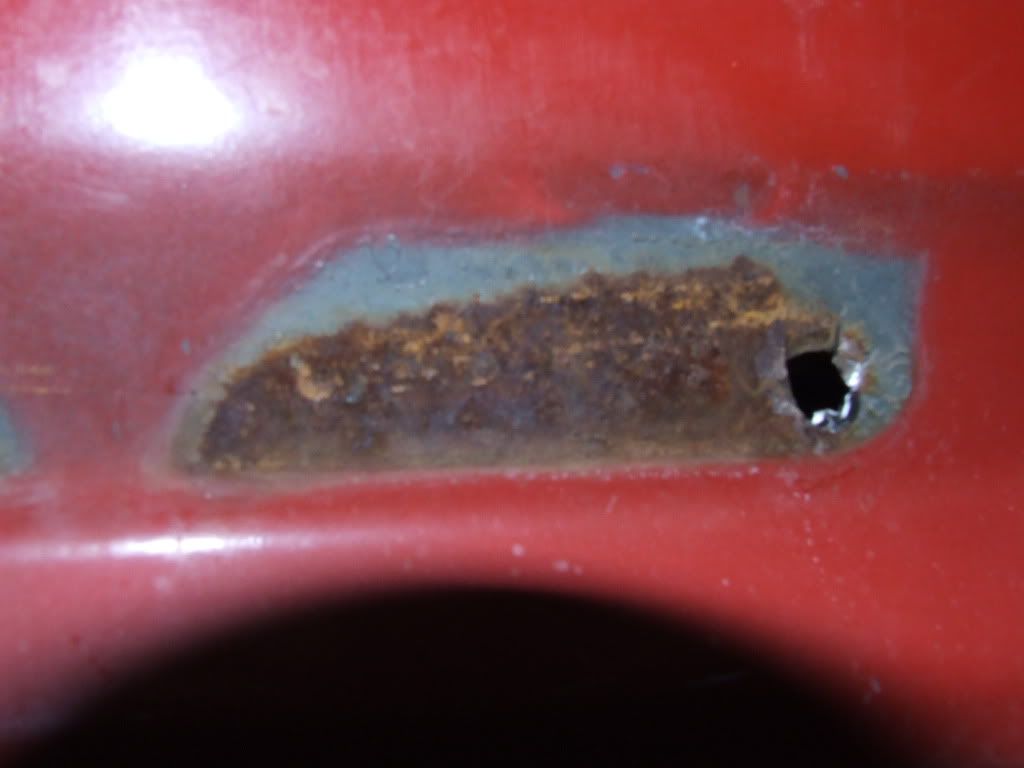
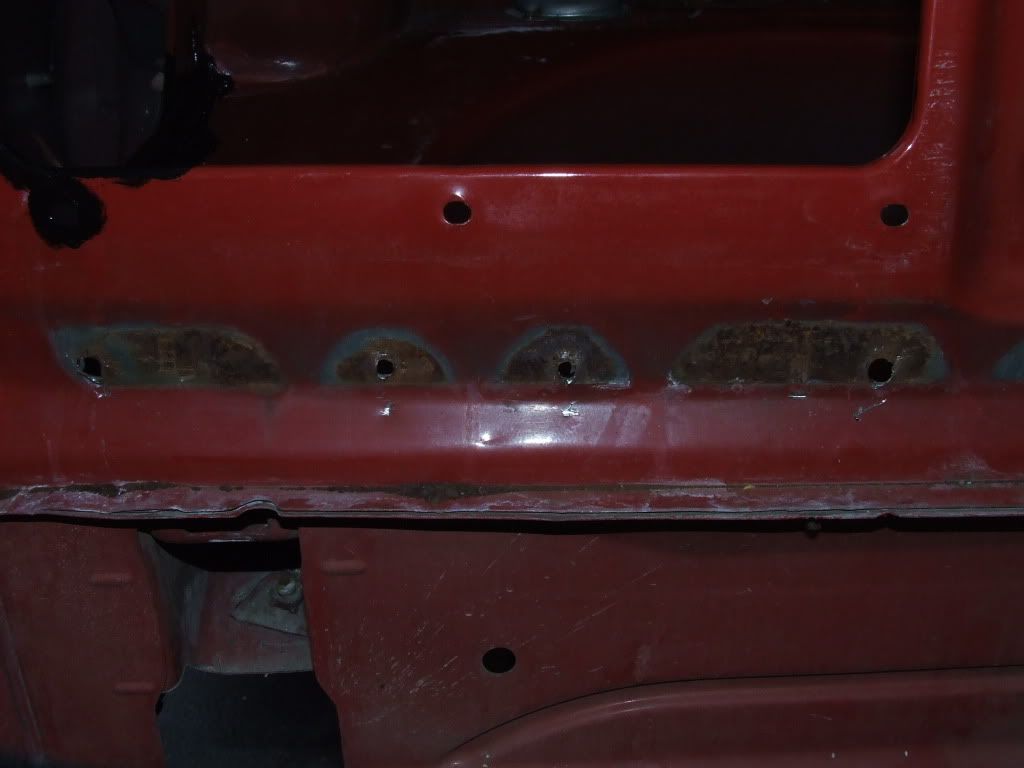
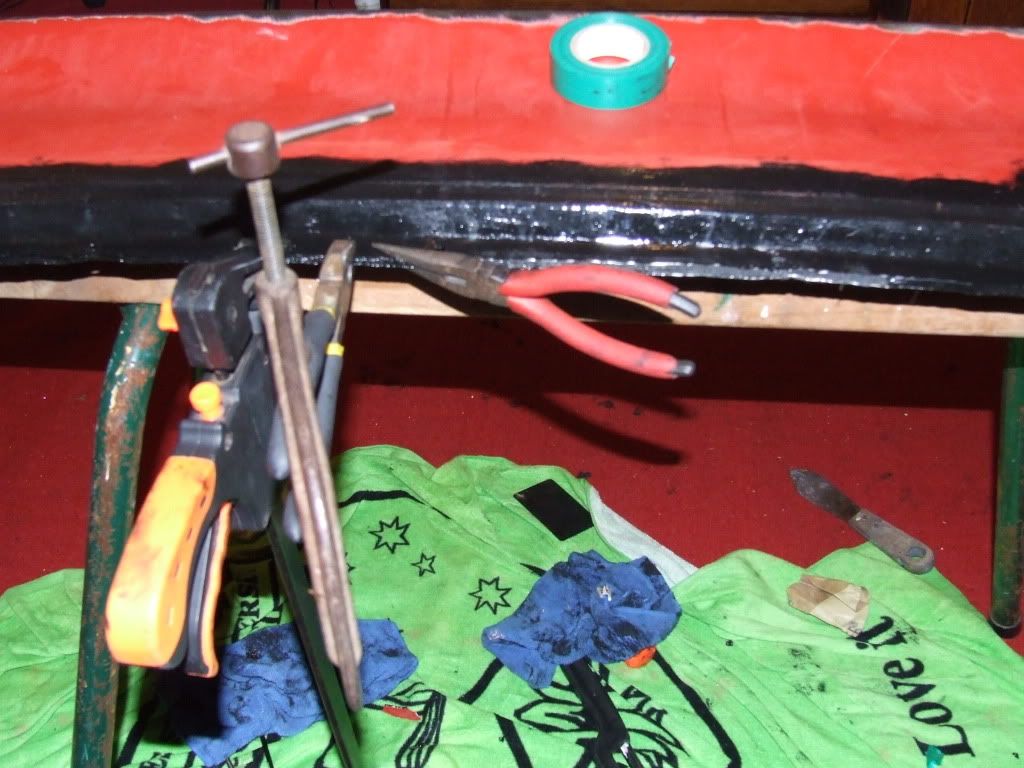
Update December 8th-9th (POR-15 bit is 9th): I removed the bump strips today. Thanks for the pic of the tool a coupe of months ago Roscos I copied it. Anyway all of them came off easy except this one on the passenger side fender behind the left wheel. It was glued on WTF. What was weard was the clips were perfectly fine and still in place and the other strip on the panel was normally mounted without glue. The fender must have been replaced at some stage in its life. I think since the paint underneath looks white its from a white model but then again it could be primer. I just don't understand why 1 was glued and one was'nt.
Ok so later that day I removed the mudguards for the 1st time and well the area behind the drivers back wheel was so horiffic that I did'nt take a picture of it that I hit it with a wire wheel within 2 minutes.
Look people while your car looks clean those mudguards have so much dirt and crap trapped in them against the metal that when it gets wet it turns to mud and stays wet for ages. Also it the mud has no where to run because wedged between the mudguard and the body.
To add to this the rubber 1/4 panel grommet on the left side works fine since its at the end of the 1/4 bottom channel. On the right the channel continues for another 6cm providing a space for liquid to sit without the possibility to drain away and you can't get a towel in there. What liquid may you ask has been spilled there I don't think it was leaking tail-lights it was most likely 28 years of people spilling the rear washer refill fluid when refilling. That panel don't get that hot usually and in the bowels of the car it can't really evaporate its a rust spot waiting to happen.
So the moral people is FFS on the weekend just get your screw driver and socket set out and remove your mudguards and just hit the area with the hose clean all the dirt and shit outta them. TAKE THOSE GUARDS OFF AND HOSE THE AREA IF YOU WANT TO PREVENT RUST!! IT WILL ONLY TAKE YOU 10 MINUTES!!
Ok lets get to the main event well I've cut out alot of cancerous metal out of the area. It needed a hellva lot of wire wheeling (sparks ftw) and I also used the clipper plyers you find in any good tool kit to cut out big pieces of metal. I've managed to get it all and I also have used the hammer and flat head screw driver to peel alot of the metal back so I could coat the edges of the good metal areas with POR-15. I'll be doing another coat tomorrow then hammering the metal back and using POR Patch to build up the metal there and trust me I don't need to weld I've saved it. I still needed to cut out alot.
Now people I want to point out there was NO visual indication since I've owned this car that there was such bad rust under there. You know how I am about detail and I tell you now take off your damn mud flaps and hose the area and the flaps down!
A interestering note is that inside that small channel itself did'nt have any red paint it just has some weakass looking primer in the area. When building the car Toyota could'nt psyically paint that area with top coat for some reason. The left 1/4 panel is not affected by this issue only the right 1/4 panel.
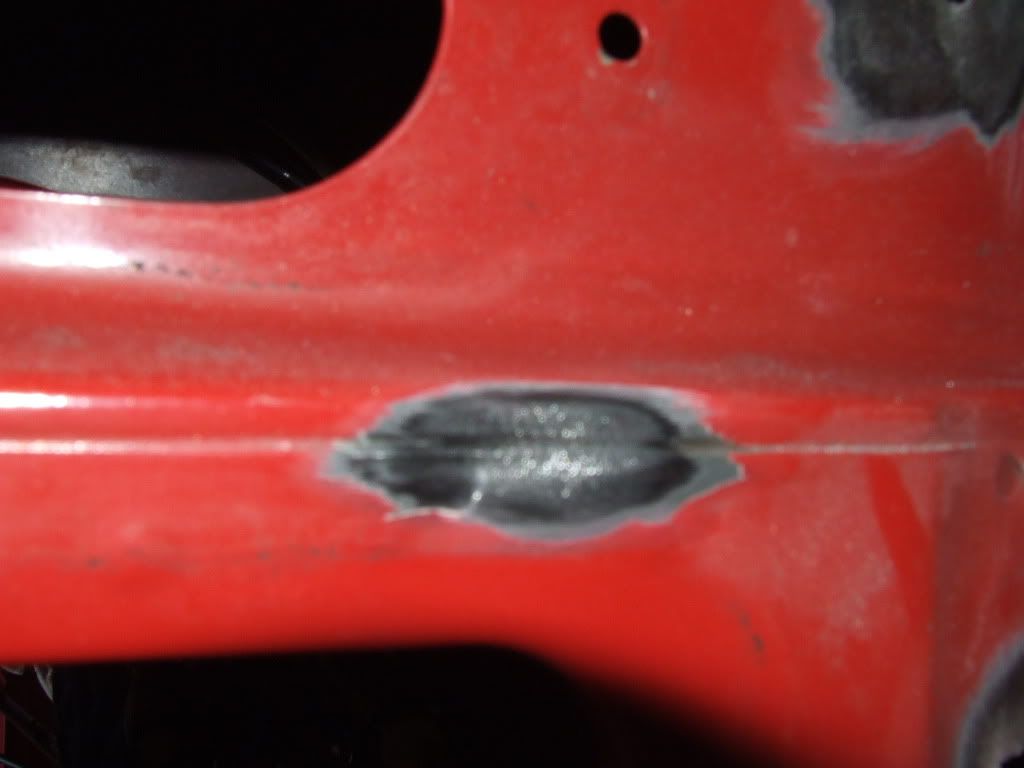
Update December 9th continued: I ground back the metal surounding the holes at the bottom of the wheel well and coated them with POR-15 I will be doing another coat tomorrow.
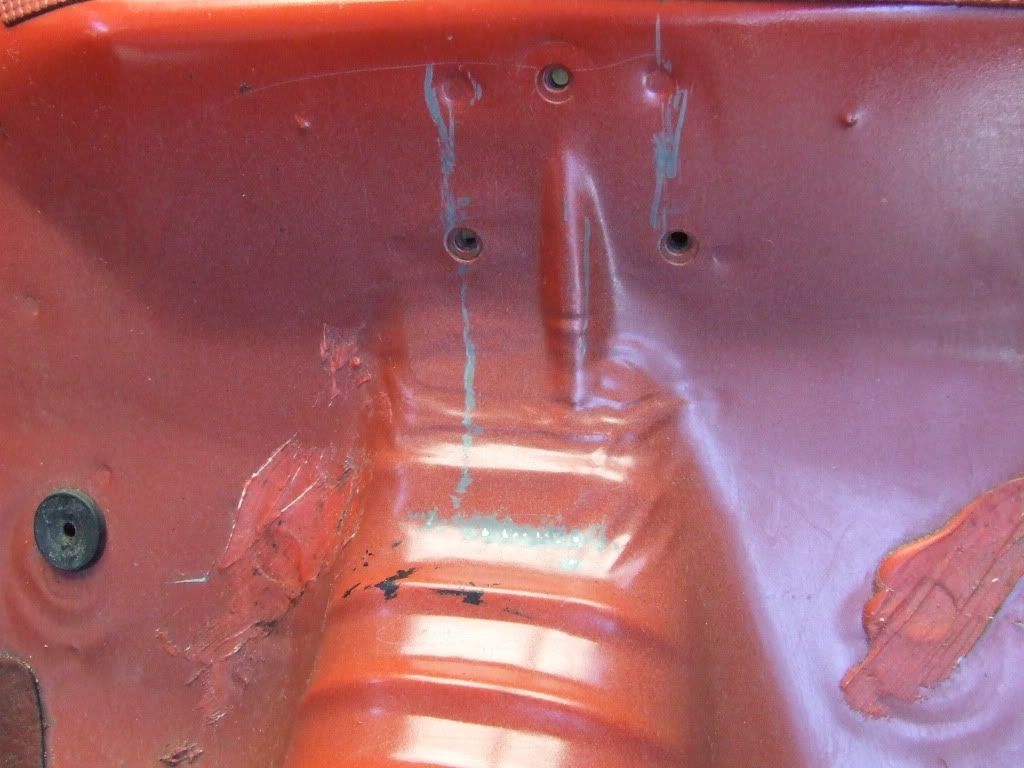
While doing that I took time to look at something I had'nt really removed before the trim piece below the tail-lights. So I took it off and I noticed very very slight dark discolouration so I pried the metal back and well I found a tonne of surface rust and well it's not suprising considering this is a stupid design having these brackets lazly spot welded on the outside of the car where water trickles down and gets trapped all the time.
Now Ivandude or steeko or anyone else is reading this you'll prob thinking your car does'nt have any rust there. Well I call bullshit to you or anyone reading this with a XA6X I dare you to prove me wrong.
So I thought about drilling out the welds but after investigating it the welds themselves were rusted I just said I'll just hammer them out wire wheel the area and POR Patch the holes which won't be hard to do.
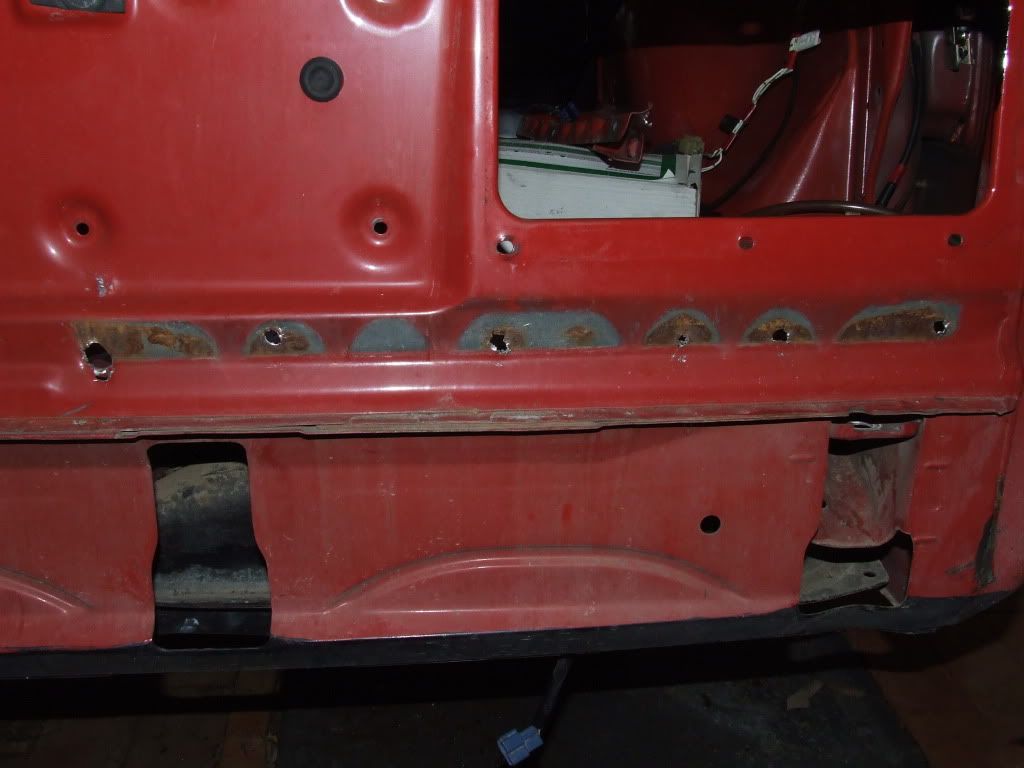
I've decided the trim piece will be fine bolted in with the two left and right mounting brackets which are under tail-light indicators. Oh yea guess what I gotta remove them as well because they have rust behind them to and I'll prob POR Patch the holes and then drill a small hole in the POR Patch and POT river them back on.
Update December 10-11th: Well people I had to do some serious wire wheeling to get rid of the rust caused below tail-light trim piece mounting brackets. Basically I'm going to be deleting the trim piece all together and sometime in the future getting a USDM 84-86 Supra bumper. I've applied the POR-15 and soon I'll be filling the holes soon.
Update December 16th: I have a little rust in the battery tray and I will be doing some more wheeling and coating it with POR-15 soon.

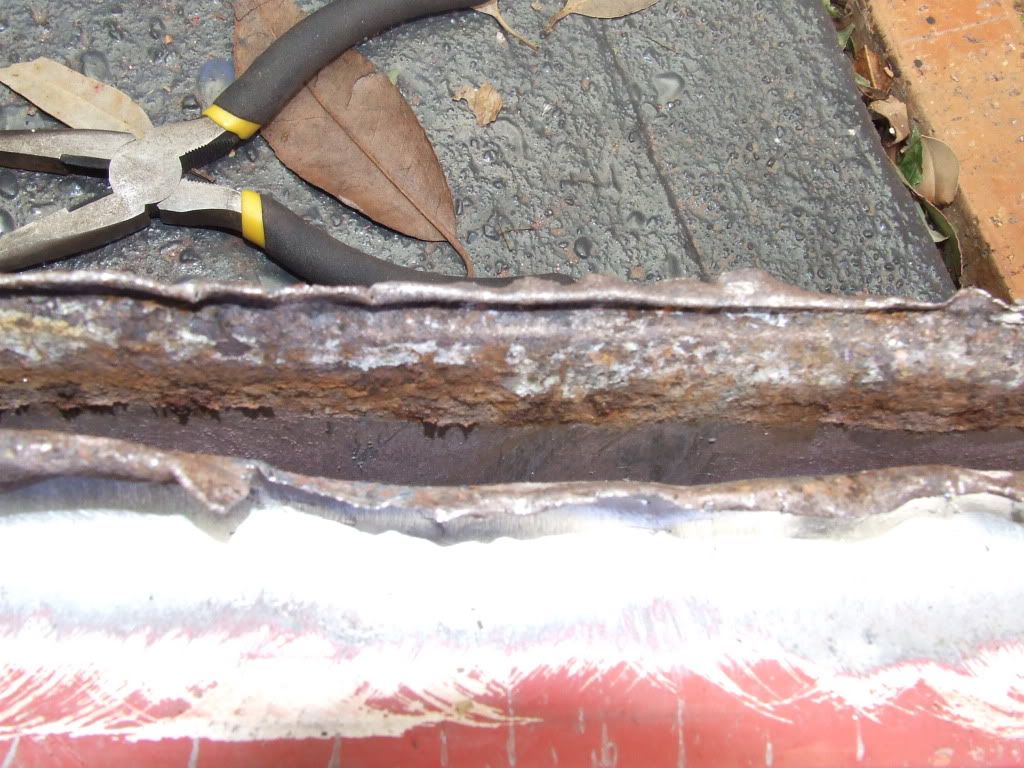
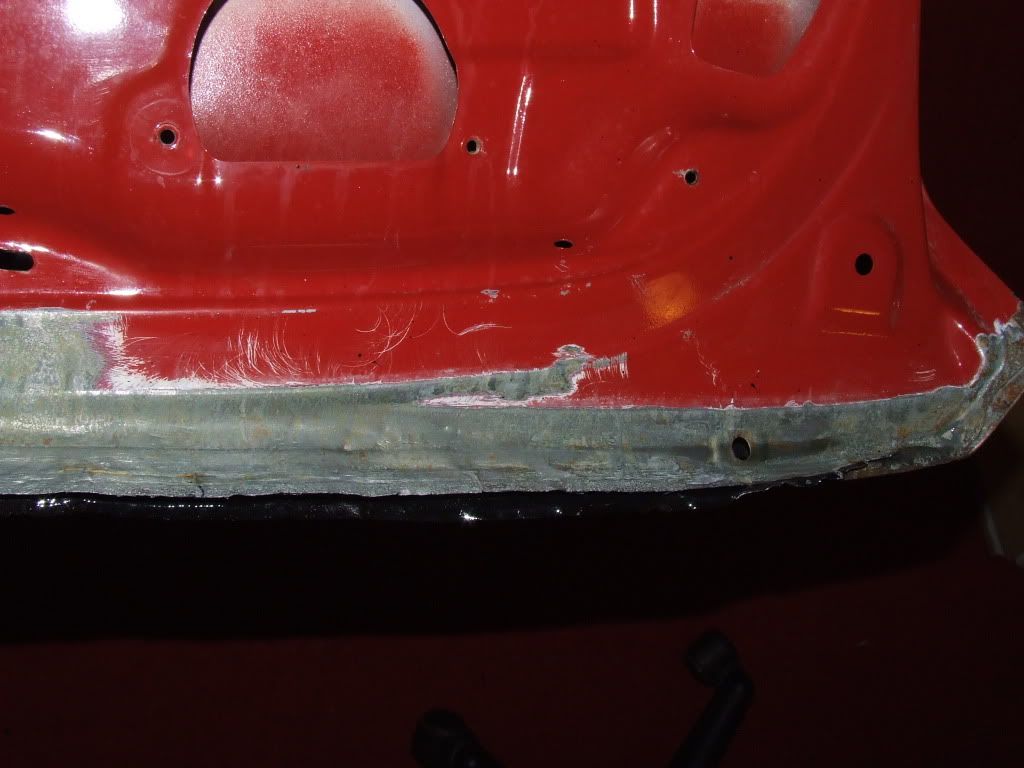
December 18th: I removed the hatch and took out the hatch glass.
If you've ever wondered how you remove the seal this pic shows you. You get a paint scraper push the lip over the metal hatch lip and then use a screw driver to do the area around it then repeat moving around the hatch seal till its done.
Hatch window out.
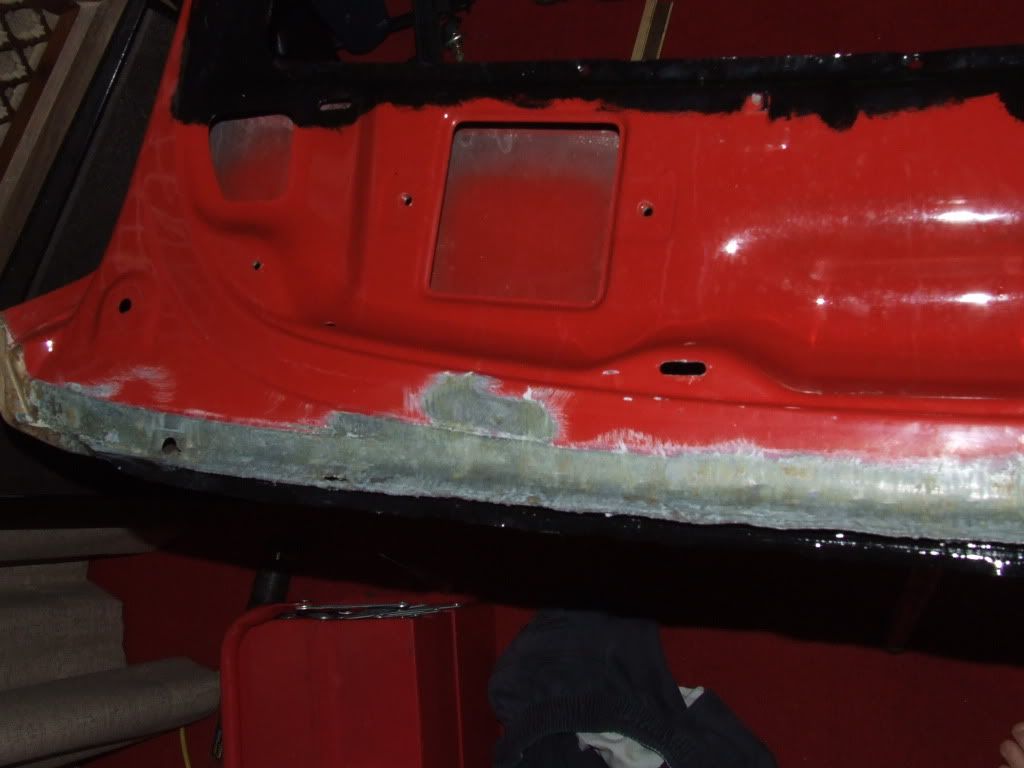
Ok guys now I am gonna call bullshit on you people that said my hatch was toast. Unless your hatches entire subframe is rusted to hell like Roscos's one then your hatch can be fixed.
Hatch rust
This hatch was repaired in 1996 and guess what the welds from that fix have rusted. No matter my finish is gonna be way better then a body shops finish.
Ivan a message for you your hatch is in good nick. If you get it sorted now it won't have any problems for the foreseeable future but finding a rust-free hatch would mean that since its your daily car will just rust again. So best to get your hatch fixed ASAP.
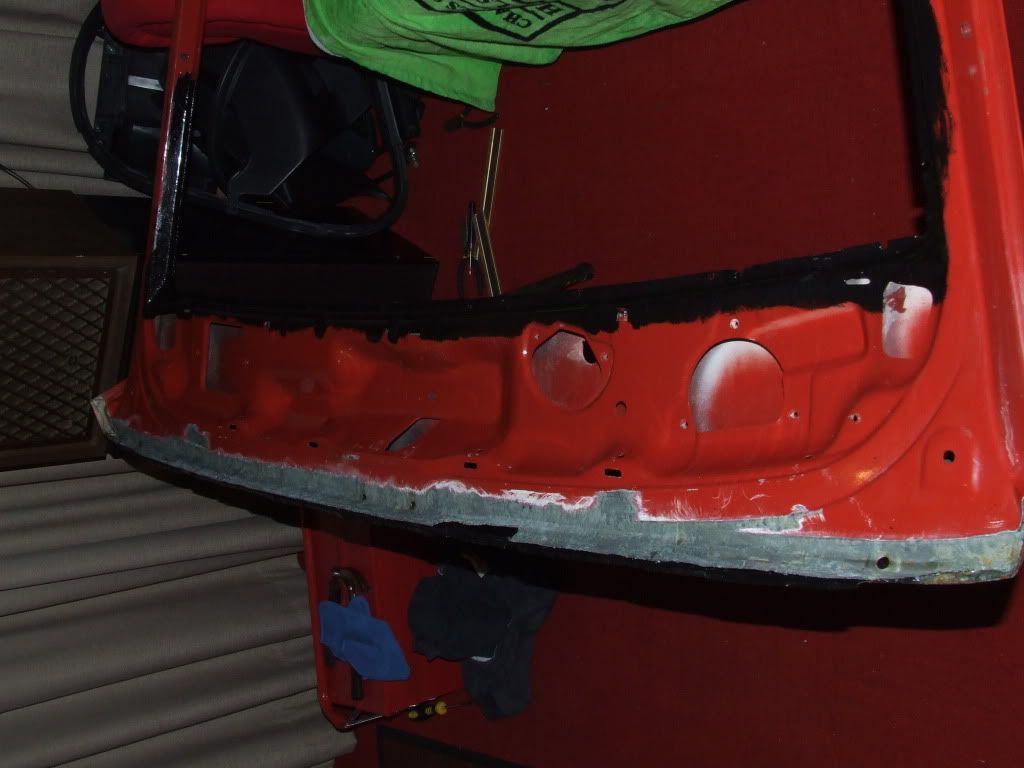
I've opened up the bottom and quatre up the left and right side seams to get at the rust and coat it. I'll just hammer then closed and then POR Patch the seams totally shut. I used small flat head screw driver. I still have a little bit of seam opening to do tomorrow.
I have also POR Patched all those holes I made when removing the below tail-light trim piece support and I'll be finished on the body moulding holes very soon.
Update December 20-22nd:
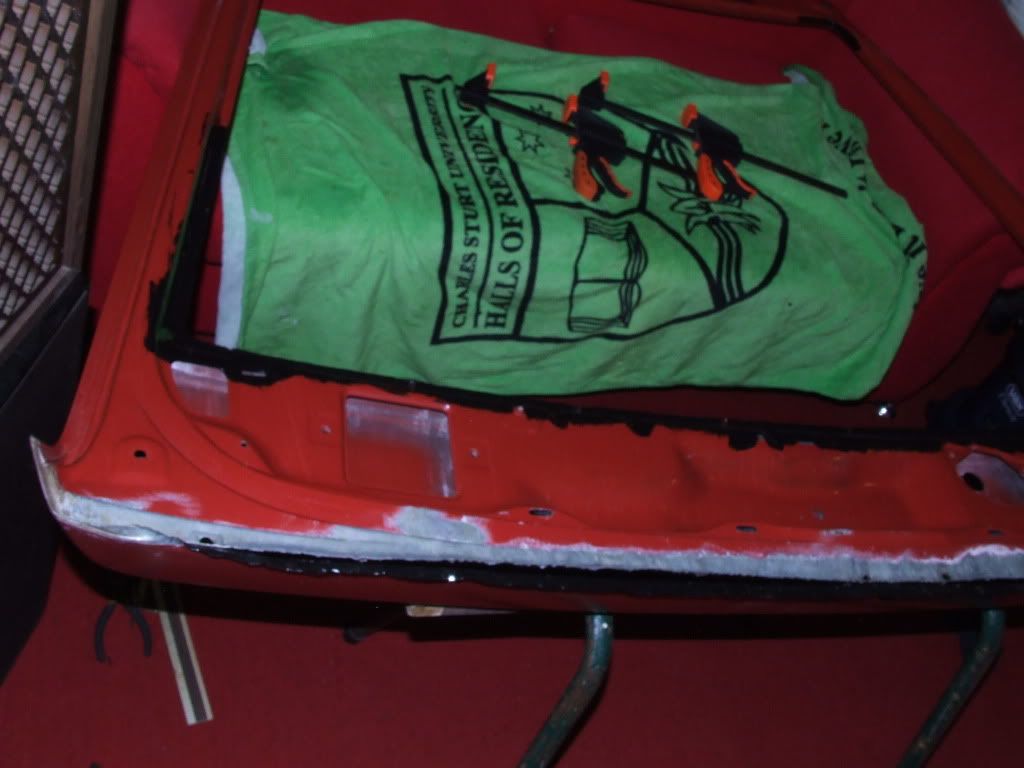
Let me put this bluntly I seriously doubt any of our cars have'nt got a smigen of rust under the folded metal or behind.
I folded back the edge far enough so I could wire wheel inside the actual edge. Think of it like when you cut a sandwich in half. The half line is the edge and I need to bend it back and splay it out so its flat and be able to wire wheel it. To say this is tricky to do on peppered metal is an understatement.
Ok this is what I found when I peeled back the metal and I had to peel back both sides in order to wire wheel and make sure I got all the rust surface which was left and right of the lock area. Remember people inside there they never sprayed red paint its only thin primer so no wonder this happend.
If you look in this pic above if you look on the left you'll see the rust stops when it gets close to the hatch bottom corner presuming that it has those drainage holes there. Another bad design flaw then water collects below the hatch subframe interior lock area and just collects and collects untill it evaporates.
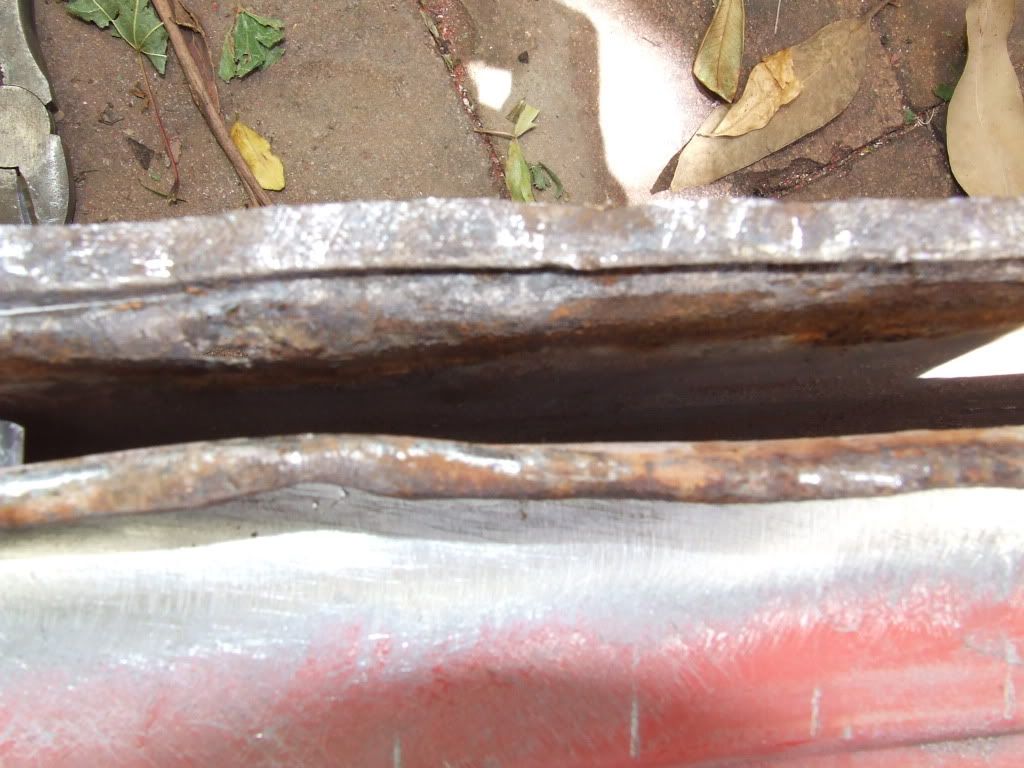

Hatch exterior edge wire wheeled u see why I had to get in that edge. I still had to do more on the other side and down the slit on both sides (I took this pic yesterday and I have cleaned up the area down the slit more today.
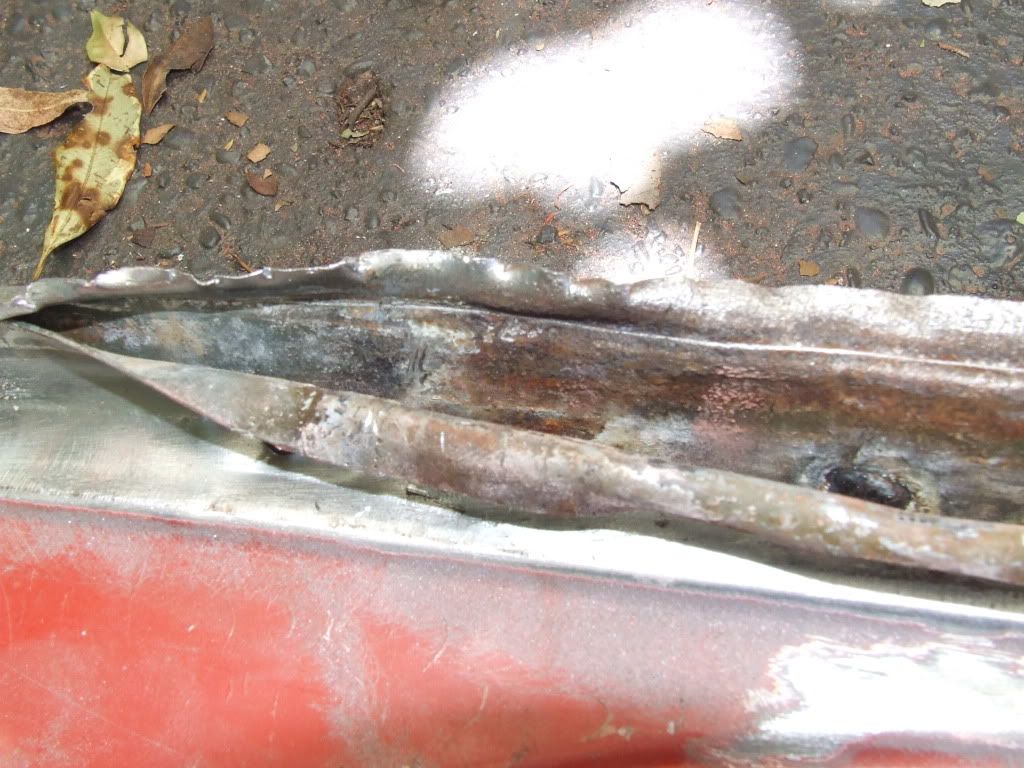
Ok update to the bottom hatch glass tray holder. All the bottom spot welds were rusted so I drilled them out today so I could seperate the metal and get in there for the wire wheel. I will be wire wheeling it tomorrow and the next day. Its tough drilling out a corner weld but it can be done. Weardly it was spot welded in the corner on the bottom left side and not on the bottom right.
Also it looks like because of finances I won't be painting the whole car untill sometime in May 2011. I will be painting the hatch in Jan because well its the only part of the car which needs to be totally completed. So I will get my Two tone car finally even with bits of primer and POR-15 still showing on the main body. Least the thing won't leak or rust after this for a while. I've been talking about it so long heh heh.
Hi,
People I've been holding out on updates till I was sure the hatch would go together well and since Hybrid_Turbo's a panel beater I trust his assessment but I also knew I could get it done with a hellva lot of elbow grease, a chisel, a clamp, hammer, plyers, POR-15 and POR Patch.
I can tell you I've spent about a month on this hatch its so fiddly and making sure the POR-15 is painted inside in problem areas is very difficult and hard considering when your bashing a edge back into shape it chips off little bits so you need to reapply several times to get it to the right.
I also did'nt take enough pictures of my progress wire wheeling the hatch tray edges in the above pics and the inside of the hatch. But suffice it to say there was alot of rust and I had to cut out some weak cancered metal.
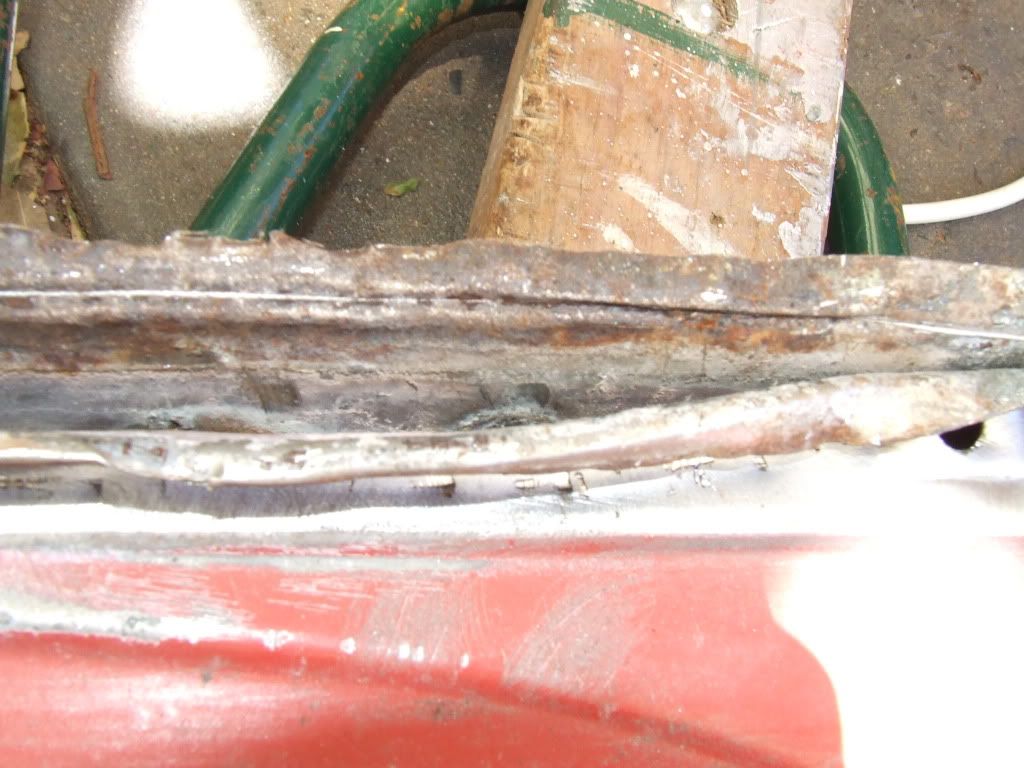
Update 22nd Dec 2010 to 17 Jan 2011:
As you can see from the picture I've used POR-15 on the hatch glass tray and the hatch outer edge and inside the frame. I made sure the metal was totally clean before putting the POR-15 on. The rust in the above pics was totally gone.
I got the hatch edge alot flatter then in these pictures with a hammer and a chisel flatting it out.
Sorry about these pics took them at night. POR-15 one side of the edge done.
Before someone cry's out that don't look the same as other hatches the dimentions of the hatch under tray have slightly changed but I've test fitted everything and it all works. From the outside and the inside once its painted it looks the same as stock.
Cleaned the the metal behind the hatch edge and treated with rust converter before POR-15
Test shaping it back into place trust me it got alot more flatter after I kept working at it. I also cleaned off the surface rust again.
I got the hatch edge all in place (Sorry did'nt take a picture when it was done) then I decided well even in stock form the folded metal poses a serious problem which is that it has condensation build on the bottom hatch edge and on the folded metal bit and it rusts slowly. So my solution is I've built a thin wall of POR Patch to cover the folded metal.
Sorry about the pics again took at night.
Por Patch ain't cosmetic stuff its really for strength and protection so even when its painted it'll look like the surface of a besa block when I put some high build primer over it.
It'll look kinda like rust bubbles under the paint (I think) but in all seriousness I'm not selling this car to anyone so who cares.
Better pic end result.

Stage I am at now is resealing the hatch glass tray bottom bit. It had alot of metal cut out of it but luckly it folded back together well and the hatch glass gasket still fits perfectly over the bottom lip even when the metal was seperated.
I weighed up if I should pot rivet or weld the bits back together but what I learnt from this hatch is that the welds themselves rusted causing more rust.
After doing alot of research into metal bonding strength I found the best solution was some kind of adhesive substance because it seals the seams and also distributes the load. So I whipped out my trusty POR Patch and its holding harder the the damn original welds I drilled out. I am going to be using a light coat of bathroom sealant on top of the POR Patch to make sure its sealed.
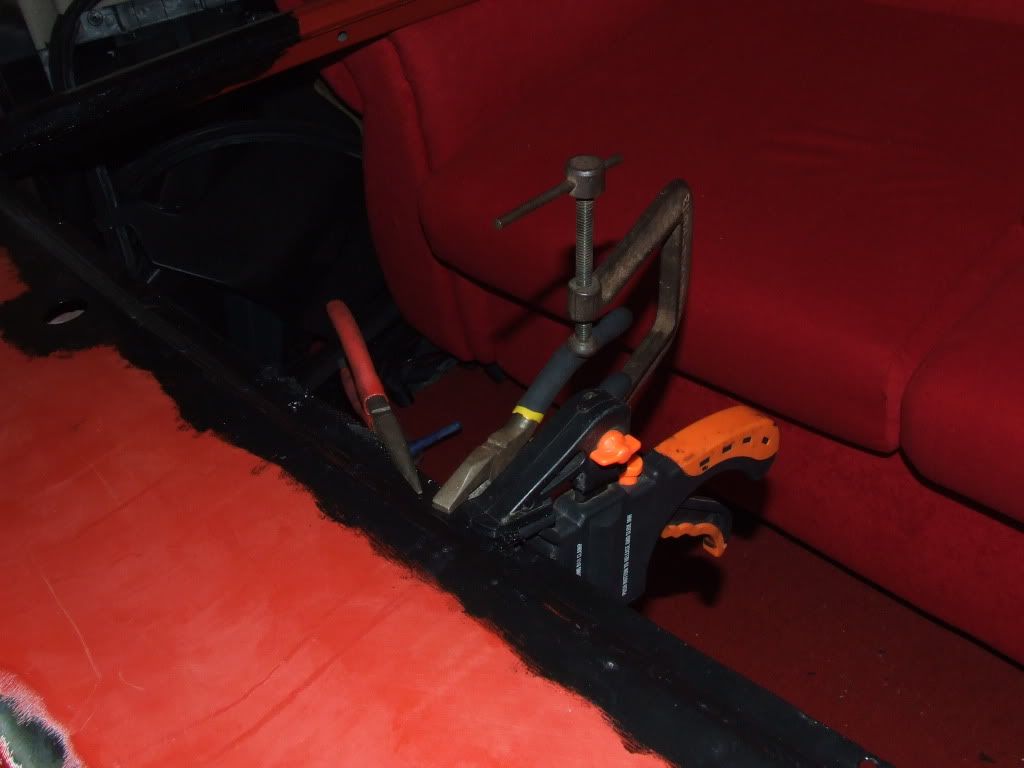
Major lol at my middle clamp. I had only really 1 clamp that orange thing on the left and the plyers on the right were rusty so they hold their gripping power really well lol rust actually helping me. The clamp holding the plyers in the middle is so stupid it won't grip anything under 1cm because the thread stops before it can tighten on itself so I had to get creative with the middle plyers.
Right now I'm slowly sealing the seam with those plyers doing a 6cm section every 7 hours. So it'll be done in a couple of days.
Ok so now I still need to spray the etch primer on the bare metal sections and paint the tie-coat high build primer on the POR-15 and etch primer areas and sand it down to a smooth finish. Then it's painting time I've booked my hatch in for Febuary 7th. Toyota Gloss Black (202).
Thanks for the praise dude.
I know these cars so well to know that my hatch was pretty good condition compared to most others out there. Most people who do these restores don't open up the seems and just do the visible rust and just delay the hatch rusting for the future.
Yea I am aware about weld through primers and yes it is the best solution when the welds are done in conjunction with the primer.
This restore has only cost me about $50 excluding the $150 I'll spend on respraying it.
Small Update 20th January:
Battery Tray rust
I ground all the rust out and I've applied the 1st of 2 coats of POR-15 (the camera makes the paint look bad but 1 more coat and it'll look clean.
POR-15ed this rust hole going to be POR Patching it soon.
Aerial hole rust removed and POR-15'ed 1st of 2 coats done.
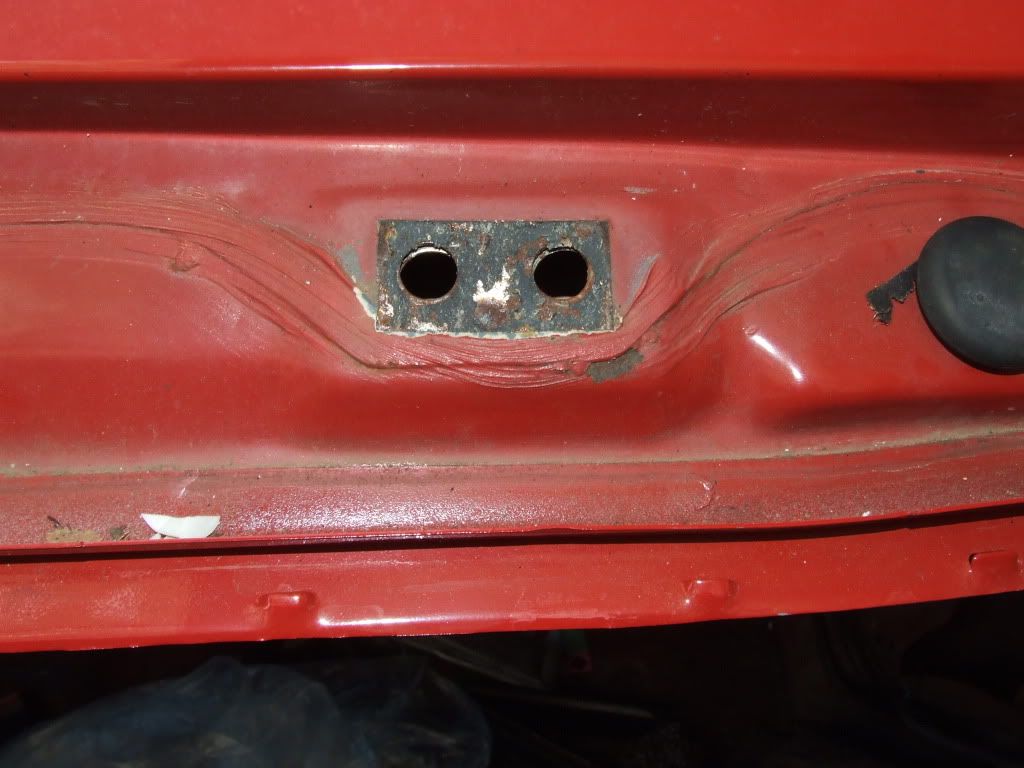
Plugged body moulding holes POR Patched with POR-15 behind.

POR Patch.You plugged the holes with what?
When are you going to start wielding up all those rusty holes?
Roscos
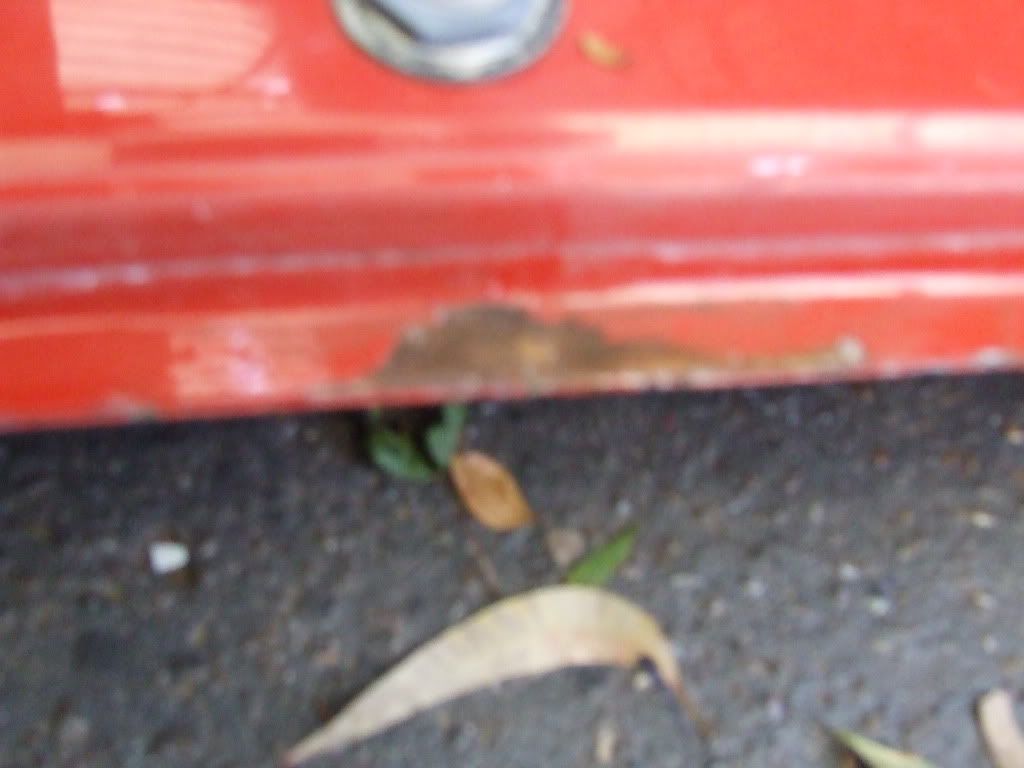
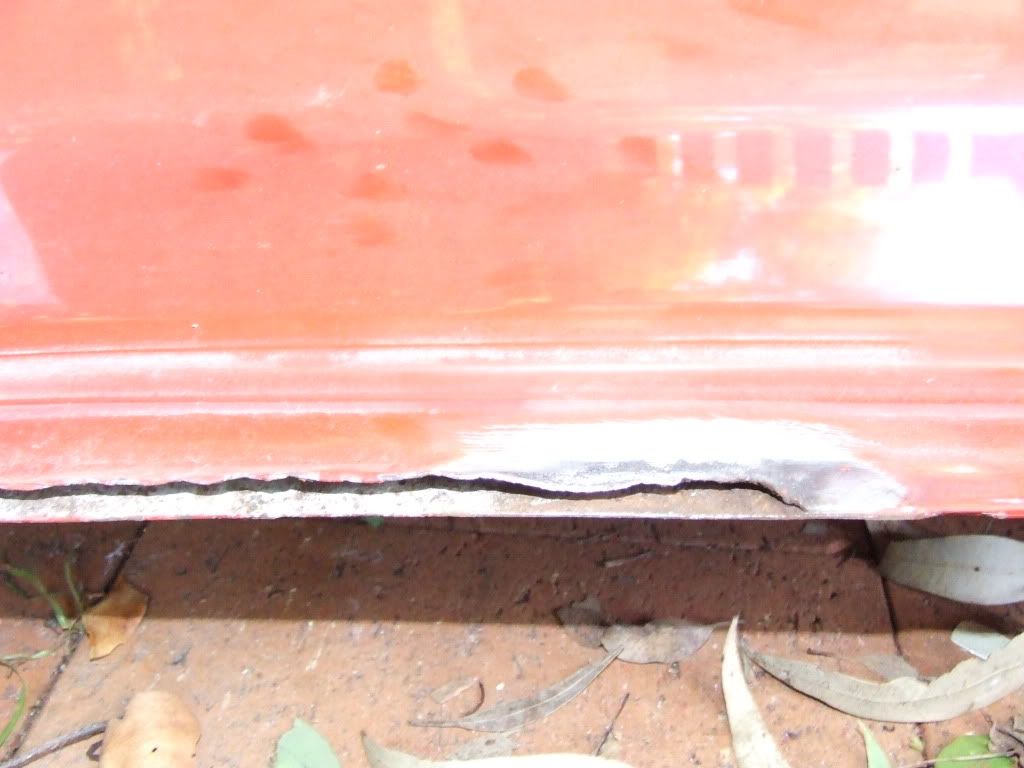
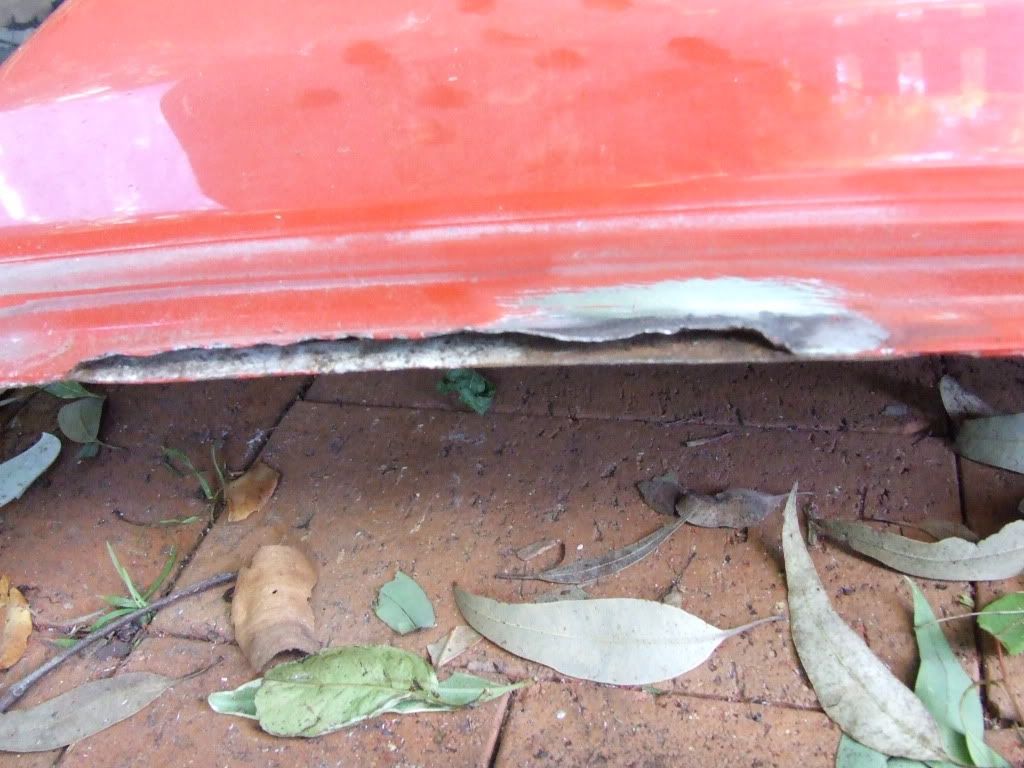
Update 26 January 2011:
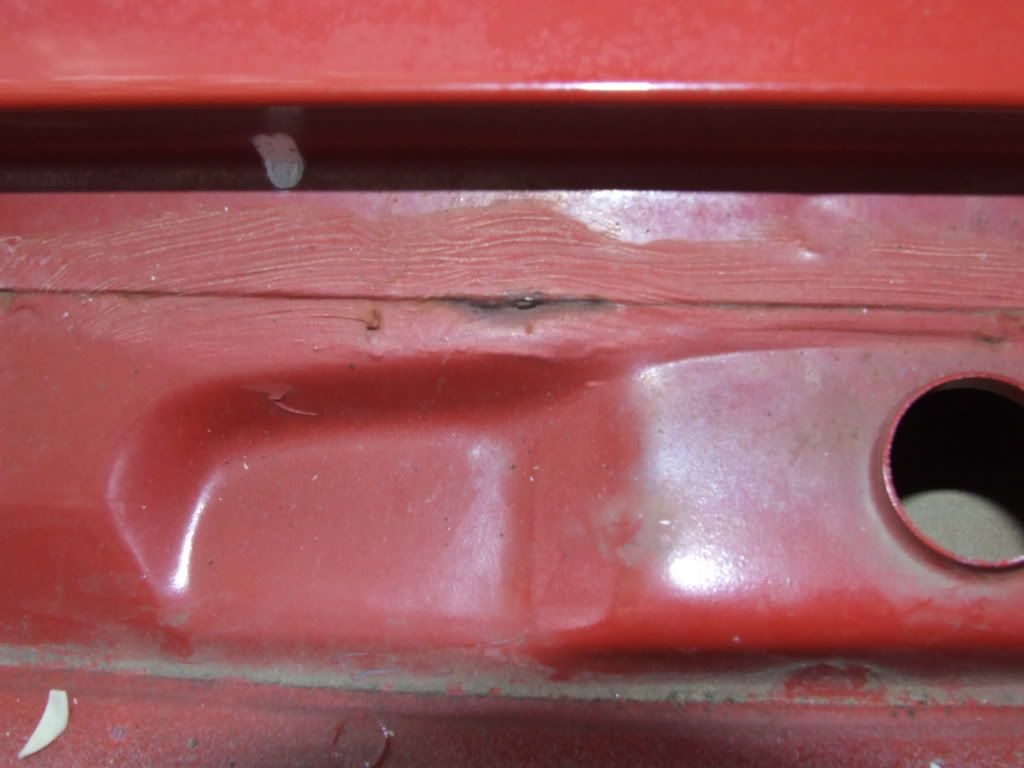
Got around to tackleing the last rear end rusty bits on the car today. There is some rust under the bonnet bolts but I'll deal with that later.
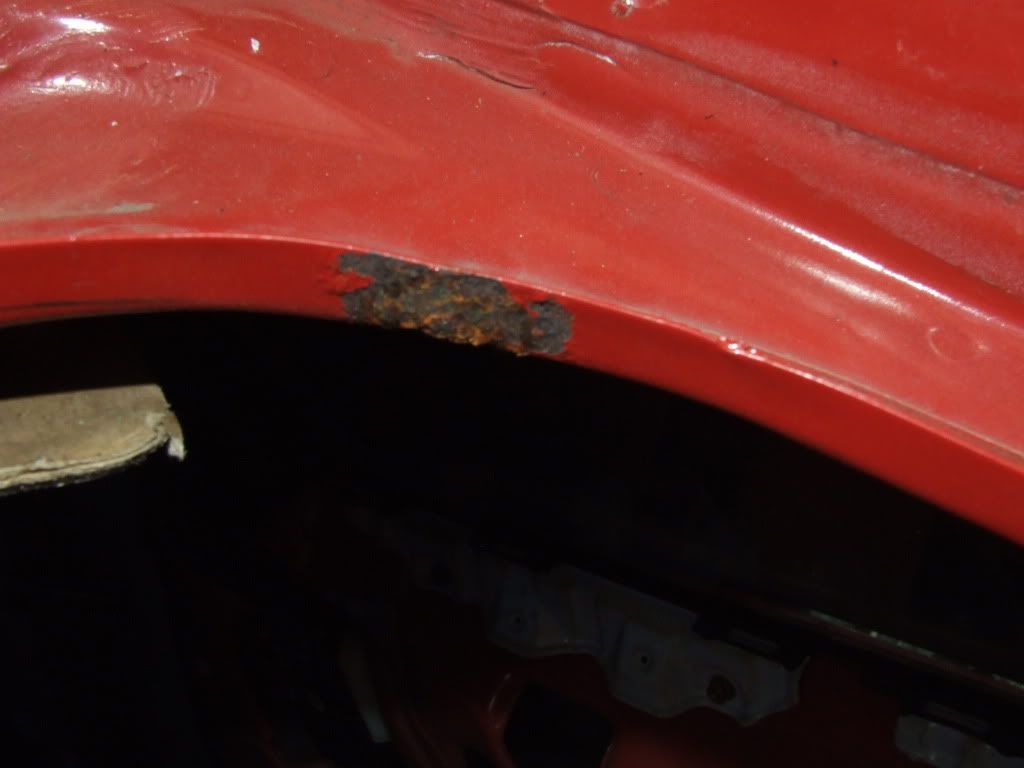
Top right hatch lip rusty bit gave me many lulz because the paint actually came off with the rubber gasket leaving bare rust.
So I ground the rust back and found a little more hidden in the seam then I treated it and POR-15'ed it with 2 coats.
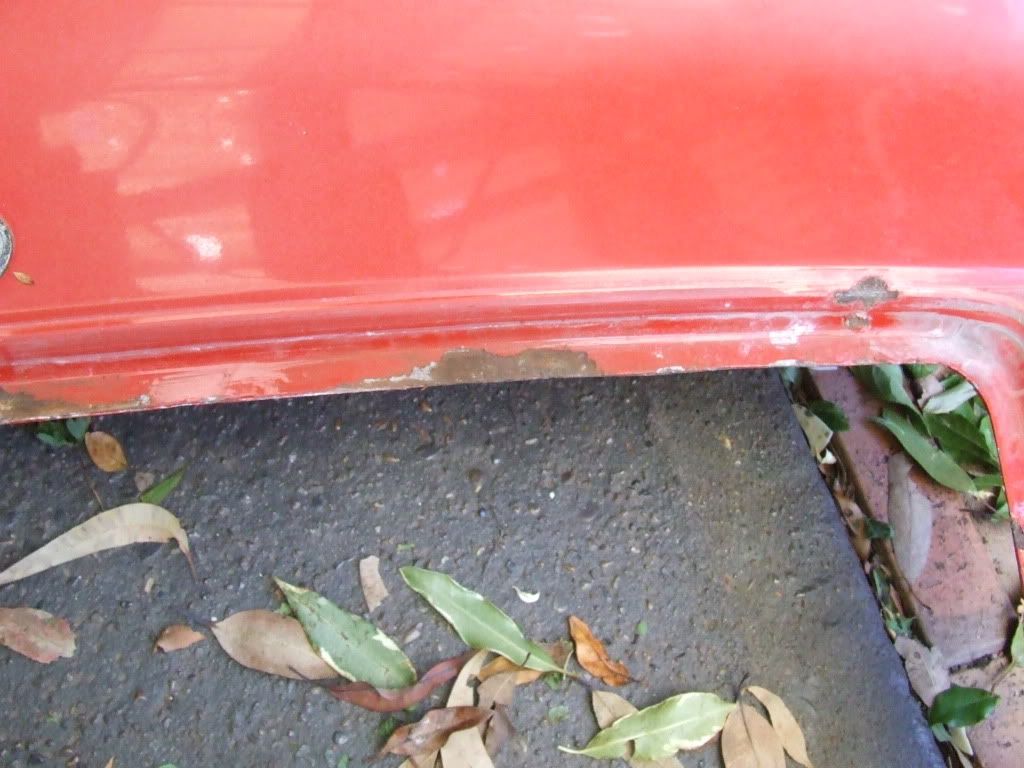
I also ground and POR-15'ed the rust which was hidden under the very back of the headliner.
I looked real close and I saw some very light surface rust on the bottom right rear valance seam so I ground it out and POR-15'ed it.
I've started applying the Tie-coat primer which is POR's high build primer which is designed to adhere to the POR-15 surface since alot of other primers flare up and don't work making a real mess. All I need to do with this now is sand it flat when its painting time and the top coats will go on no problem.
Also as mentioned in the XA6X thread I made up some tail-light gaskets here is the link to the forum post with detailed diagrams how to make your own http://www.toymods.org.au/forums/showpost.php?p=1280152&postcount=2648
Update: January 6th 2011
Well Sydney's heatwave combined with living near Penrith (the hottest place in the southern hemisphere) left me with little motivation to take photo's since I had to paint, sand and put my interior back together.
Finishing up last rust spot
Little bit of bear metal was scraped off wasn't rusted but may as well POR-15 it.\
I sealed the bottom window tray seal with bathroom sealant which worked very well.
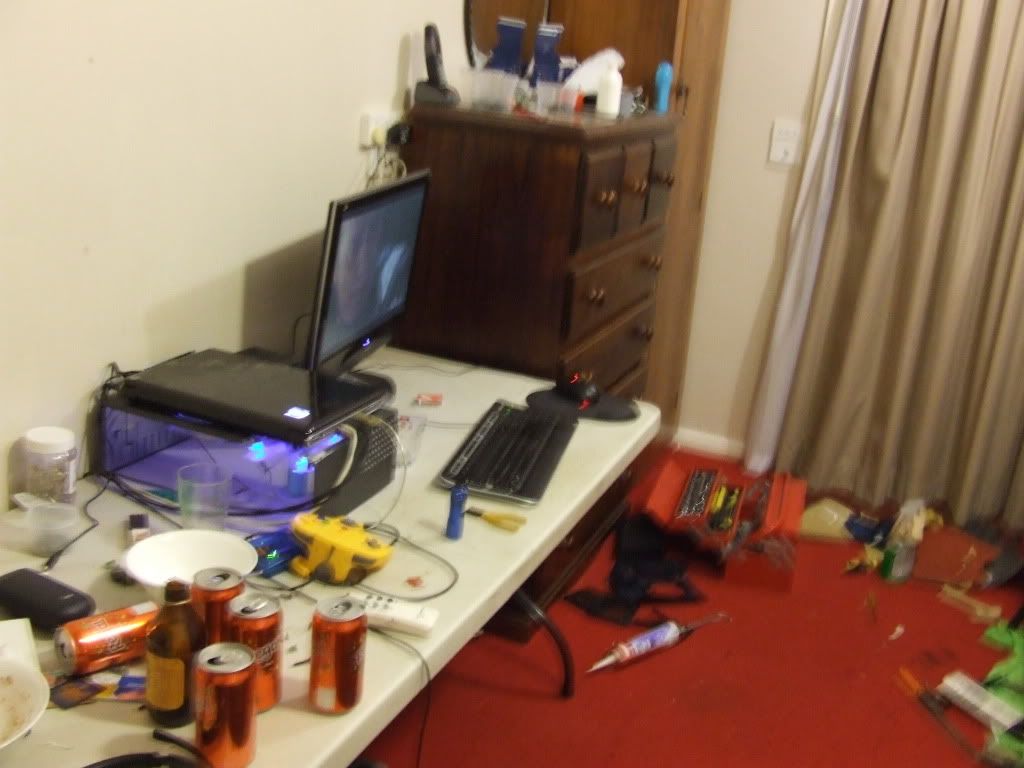
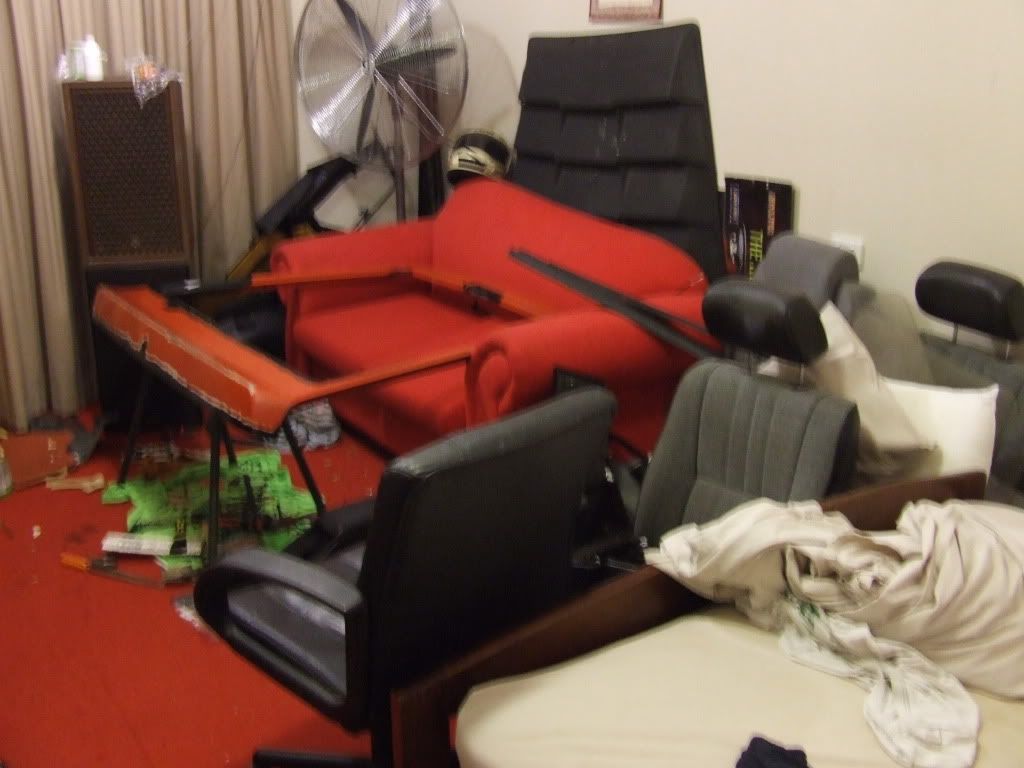
This is how my room looked at nearly its worst. I just couldn't do all this outside with the heat and not be able to work at night.
After many hours of sanding I've gotten it finger smooth and I've decided its at the stage I find acceptable to take to the painters.
Interior mostly put back together trust me after 2 months I was itching to drive a 5 speed 21R again.
It's going to the painters on the 7th of February and the hatch is only being done for now and the rest will be done in a couple of months. I'm going to get them to put another coat of high fill on it before they 2k it.
Currently the hatch is at the paint shop and is coming along very well. The rest of the car will be resprayed in about 4 months in the original red Toyota paint code.


